
Best MiniMax H3 Settings for Quality, Speed, and Audio in 2026
AI Overview
What are the best settings for MiniMax H3 video quality?
Use 1344×768 at 16:9, res_multistep, the simple scheduler, 20 denoising steps, guidance 1, video shift 12, and audio shift 3. This is the dependable open-weight quality baseline.
How many steps should I use for MiniMax H3 in ComfyUI?
Use 20 steps with res_multistep for a quality render. Use 4–8 steps only with a compatible Turbo LoRA when iteration speed matters more than maximum detail.
What resolution does MiniMax H3 output locally vs via API?
The released local weights target 768p, typically 1344×768 at 16:9. Hosted H3 can deliver higher-resolution output, including its in-context Regenerate-2K pipeline.
How do I control audio in MiniMax H3?
Name each sound, voice, or instrument and say when it happens. Keep the native 32 kHz stereo track, use audio shift 3 as the released baseline, and simplify competing cues if sync drifts.
Why MiniMax H3 Settings Are Different from Other Video Models
MiniMax H3 does not behave like a conventional diffusion model with CFG around 7.5. It is guidance-distilled, so guidance 1 is the intended value; raising it can harden edges, destabilize motion, or make the result worse. H3 also generates video and stereo audio together, with separate sigma schedules for the two streams.
Frame count follows a 17n+5 grid at 24fps. A practical five-second local clip is 124 frames, while longer targets should be rounded to a valid count rather than typed as an arbitrary number. Those three rules—guidance 1, dual video/audio shifts, and the frame grid—are the foundation for every setting below. If you need the full graph first, use the MiniMax H3 ComfyUI setup guide.
Resolution Settings — 768p, 1080p, and 2K Explained
Resolution should match the stage of work. Local open weights top out at the 768p class; 1344×768 is the standard 16:9 canvas and is close to one megapixel. A 0.5MP canvas is useful for checking composition and prompt direction. Hosted output removes the local memory burden and adds the higher-resolution regeneration path.
| Target | Typical setting | Best use | Trade-off |
|---|---|---|---|
| Local preview | About 0.5MP | Prompt and motion tests | Fastest, softer detail |
| Local quality | 1344×768 at 16:9 | Final local render | Highest released local size |
| Hosted 1080p class | Service preset | Social, ads, client review | More detail without local VRAM |
| Hosted 2K | Regenerate-2K | Commercial delivery, small text, crops | Highest cost and processing time |
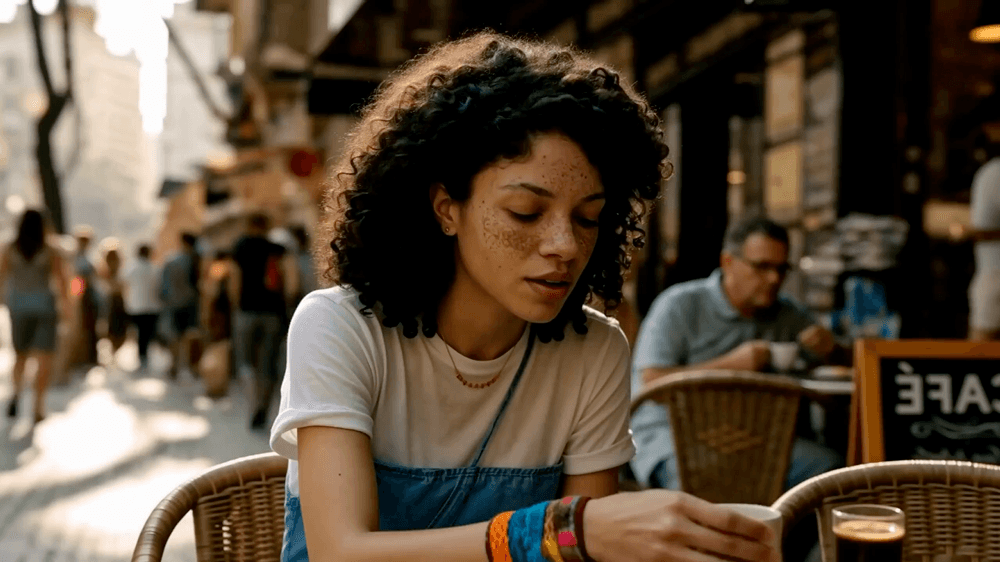
The decision is simple: iterate at 0.5MP, validate at 768p, then use hosted 2K only for the selected take. The official H3-generated clip below is a useful quality check: inspect skin texture, hands, background pedestrians, café signage, and audio continuity rather than judging a single still.
Steps, Sampler, and Scheduler — The Baseline That Works
For current ComfyUI workflows, the most useful baseline is res_multistep with the simple scheduler and 20 denoising steps. Some nodes expose this as 21 sigma points because 21 points create 20 DiT forwards. Do not accidentally set both numbers to 20 without checking what the node labels mean.
| Goal | Sampler | Scheduler | Steps | When to use it |
|---|---|---|---|---|
| Quality baseline | res_multistep |
simple |
20 | Final local render and comparisons |
| Fast iteration | Turbo-compatible path | simple |
4–8 | Prompt, motion, and framing tests |
| Legacy reproduction | Euler | Released schedule | 49–50 calls | Matching an older workflow exactly |
Turbo is not a universal “fewer steps” switch; it needs the matching adapter and graph. Start at 4 steps for layout, move to 6–8 when faces or fine motion need more stability, and compare against one 20-step baseline before final delivery. The MiniMax H3 Turbo LoRA guide shows the correct loader placement, while the LoRA training guide covers custom style adapters.
Guidance Scale, Shift, and Audio Parameters
Keep guidance at 1. H3 has guidance baked into the released weights, so high CFG values do not add prompt obedience the way they might in older image models. For the released open-weight schedule, use video shift 12 and audio shift 3 together. Some community graphs expose audio shift 4; only keep that value when reproducing that exact workflow, and return to 3 if voices, beats, or effects drift.
Audio prompts work best when they name a source and a moment: ceramic cup touches the table at 00:03, soft traffic ambience throughout, or one dry footstep on landing. Avoid requesting dialogue, music, crowd noise, weather, and multiple effects in the same five-second clip. For better sentence structure and timing language, see the MiniMax H3 prompting guide.
ComfyUI Settings Cheat Sheet
| Parameter | Quality first | Speed first |
|---|---|---|
| Megapixels | 1.0 (1344×768) | 0.5 preview |
| Steps | 20 | 4–8 with Turbo LoRA |
| Sampler | res_multistep |
Turbo-compatible sampler |
| Scheduler | simple |
simple |
| Guidance | 1 | 1 |
| Video shift | 12 | 12 |
| Audio shift | 3 | 3 |
| Frames | Valid 17n+5 count |
Shortest valid test |
| Seed | Fixed for A/B tests | Random for exploration |
Change one row at a time. Keep the seed fixed when comparing resolution, steps, or shifts; otherwise you are comparing different generations instead of settings. When you want a result without downloading checkpoints or tuning a graph, generate with Seedance using optimized presets →.
Settings for Each Mode — T2V, I2V, FLF2V, and Ref2VA
| Mode | Model path | What to lock | Setting priority |
|---|---|---|---|
| T2V | FL2VA | Prompt and seed | Composition first, then motion and sound |
| I2V | FL2VA | First image and ratio | Match the latent canvas to the input image |
| FLF2V | FL2VA | First and last frames | Match both endpoints; prompt only the journey |
| Ref2VA | Ref2VA | Reference identity and ordering | Allocate only the references the shot needs |
T2V depends entirely on prompt structure, so establish subject, action, camera, environment, and audio in that order. I2V inherits composition from the first image; changing the aspect ratio creates avoidable crops. FLF2V locks both endpoints, so reduce the prompt to motion, timing, camera path, and sound. The first-and-last-frame guide includes compatible image preparation and transition fixes.
Ref2VA supports a richer context budget—up to nine images, three videos, and three audio references in supported workflows—but “maximum” is not a target. Use one or two identity images, one motion video, and one clean audio reference when possible. Extra inputs compete for attention and make debugging harder.
Conclusion
Remember the MiniMax H3 baseline as 768p, 20 steps, res_multistep, simple, guidance 1, shifts 12/3; use 0.5MP and 4–8-step Turbo renders only for iteration, then move the chosen take to hosted 2K when final detail matters. Match FL2VA or Ref2VA to the mode, keep frame counts on the 17n+5 grid, describe audio sources with timing, and change one parameter at a time.
Ready to try it yourself?
Put the steps from this guide into practice with Seedance and turn prompts or images into polished videos in minutes.
Free credits on signup. Plans from $28/month.
Related Articles
More posts in the same locale you may want to read next.

Seedance App Preview Video Generator 2026: Create App Store and Product Launch Clips
Use Seedance to turn app screenshots, feature copy, and launch goals into App Store previews, Google Play promo videos, and product launch clips.
Read article
Gemini AI Video Prompt Examples: Copy-Ready Veo Scenes and a Better Prompt Formula
Copy Gemini AI video prompt examples for cinematic motion, product ads, dialogue, and vertical clips, then adapt them with a practical Veo prompt formula.
Read article
How to Keep Product Shape Consistent in AI Video Ads
Lock product geometry, packaging, labels, references, camera angles, and approval checks so AI video ads preserve the real SKU across every shot.
Read article