
MiniMax H3 Environment Consistency: A Practical Reference Workflow
AI Overview
What is MiniMax H3 environment consistency?
It is the ability to keep a location's layout, architecture, props, materials, lighting, and visual identity recognizable while the action or camera angle changes.
What is the best way to keep an environment consistent in MiniMax H3?
Start with a clean master environment image, give every reference one clear role, and state exactly which scene details must remain unchanged.
Should you use reference-to-video or image-to-video?
Use reference-to-video when a location must guide several shots. Use image-to-video when the uploaded image must become the exact opening composition.
Can MiniMax H3 preserve one environment across multiple shots?
It can follow strong visual anchors, but each shot still needs a continuity review for layout, props, materials, and light before you scale production.
What Environment Consistency Actually Means in MiniMax H3
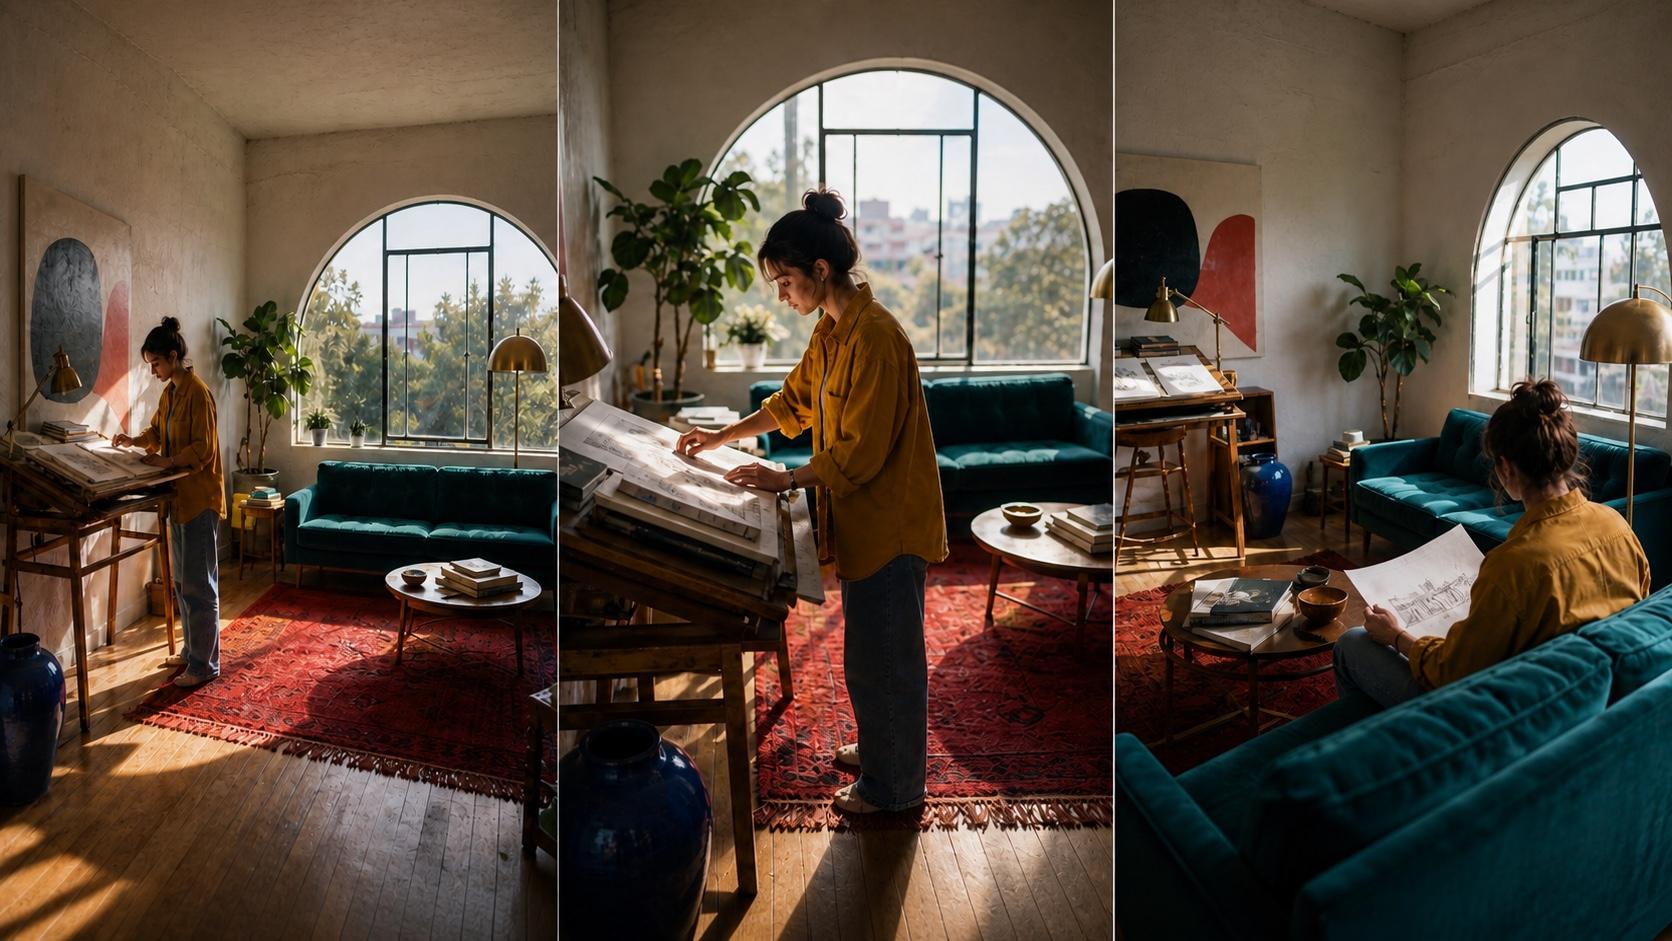
Environment consistency does not mean freezing one background. A useful result lets the camera move or reveal a doorway while the space still feels connected. The viewer should recognize the location without being told it is the same place.
An attractive frame can still fail in an edit. A relocated window, changing table, or lamp that switches sides breaks continuity even when each image looks polished. The goal is a stable world, not three unrelated frames.
Track five layers of continuity
Review spatial layout first: doors, windows, furniture, and distances between major objects. Then check recurring props, materials, light direction, weather, and reflections.
Character consistency is separate. A stable face can appear in a redesigned room, while a stable room can contain a drifting character. Give the environment and person separate reference roles.
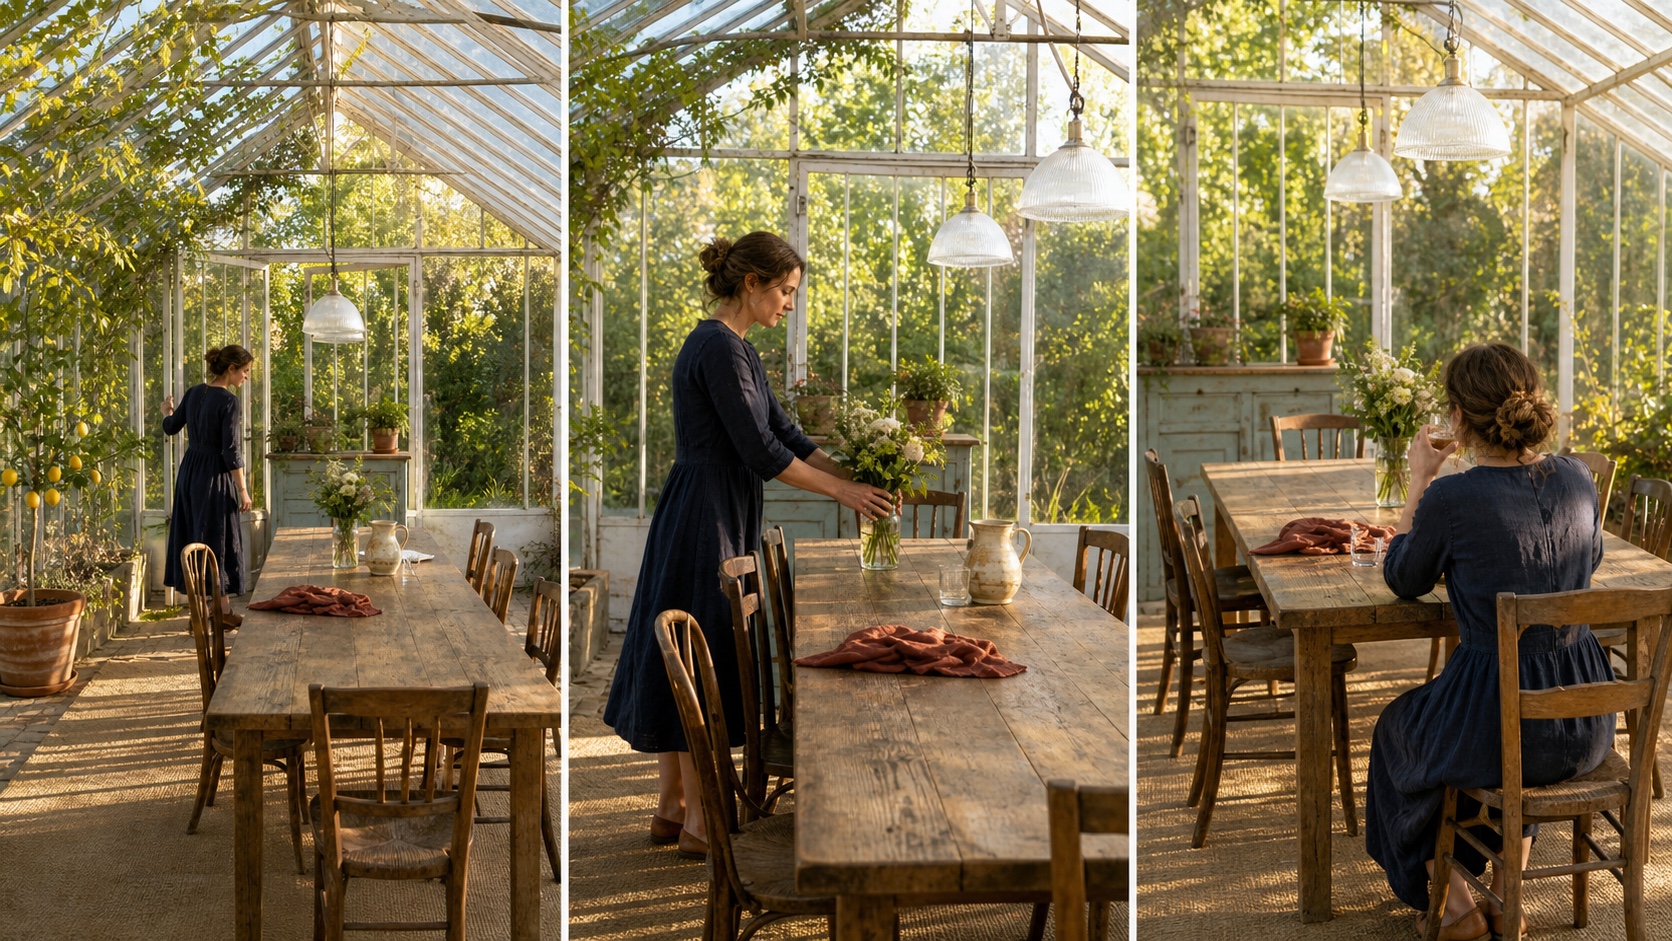
A consistent environment supports different compositions. The glasshouse frame, long table, chairs, lemon tree, blue sideboard, lamps, linen, and pitcher remain readable as the action changes.
Play the eight-second sequence to check whether the character, architecture, furniture, props, and late-afternoon light remain coherent as the framing and action change.
Build a Strong MiniMax H3 Environment Reference Pack
A reliable reference pack is small and deliberate. Conflicting furniture or lighting can introduce ambiguity, so begin with one master view and add support only for a specific blind spot.
Choose one master environment image
Use a wide frame that shows geometry, depth, the main light, and defining objects. Avoid a person blocking the set or shallow focus hiding the architecture. Build the anchor through Image to Video planning with room for later action.
Write an environment inventory: green window at left, black oven centered on the tiled wall, oak bench in front, copper pendant above, red scale left, blue bowl center. Relationships are easier to review than “keep everything consistent.”
Add supporting views only for hidden information
A second image can clarify an unseen wall, connected hallway, or hero material. It should extend the master view, with matching time, color temperature, and dressing.
Give each reference one job
Define the environment, character, and motion as separate reference roles. If an image must be the exact first frame, call it a frame anchor. This supports a clearer Reference to Video workflow.
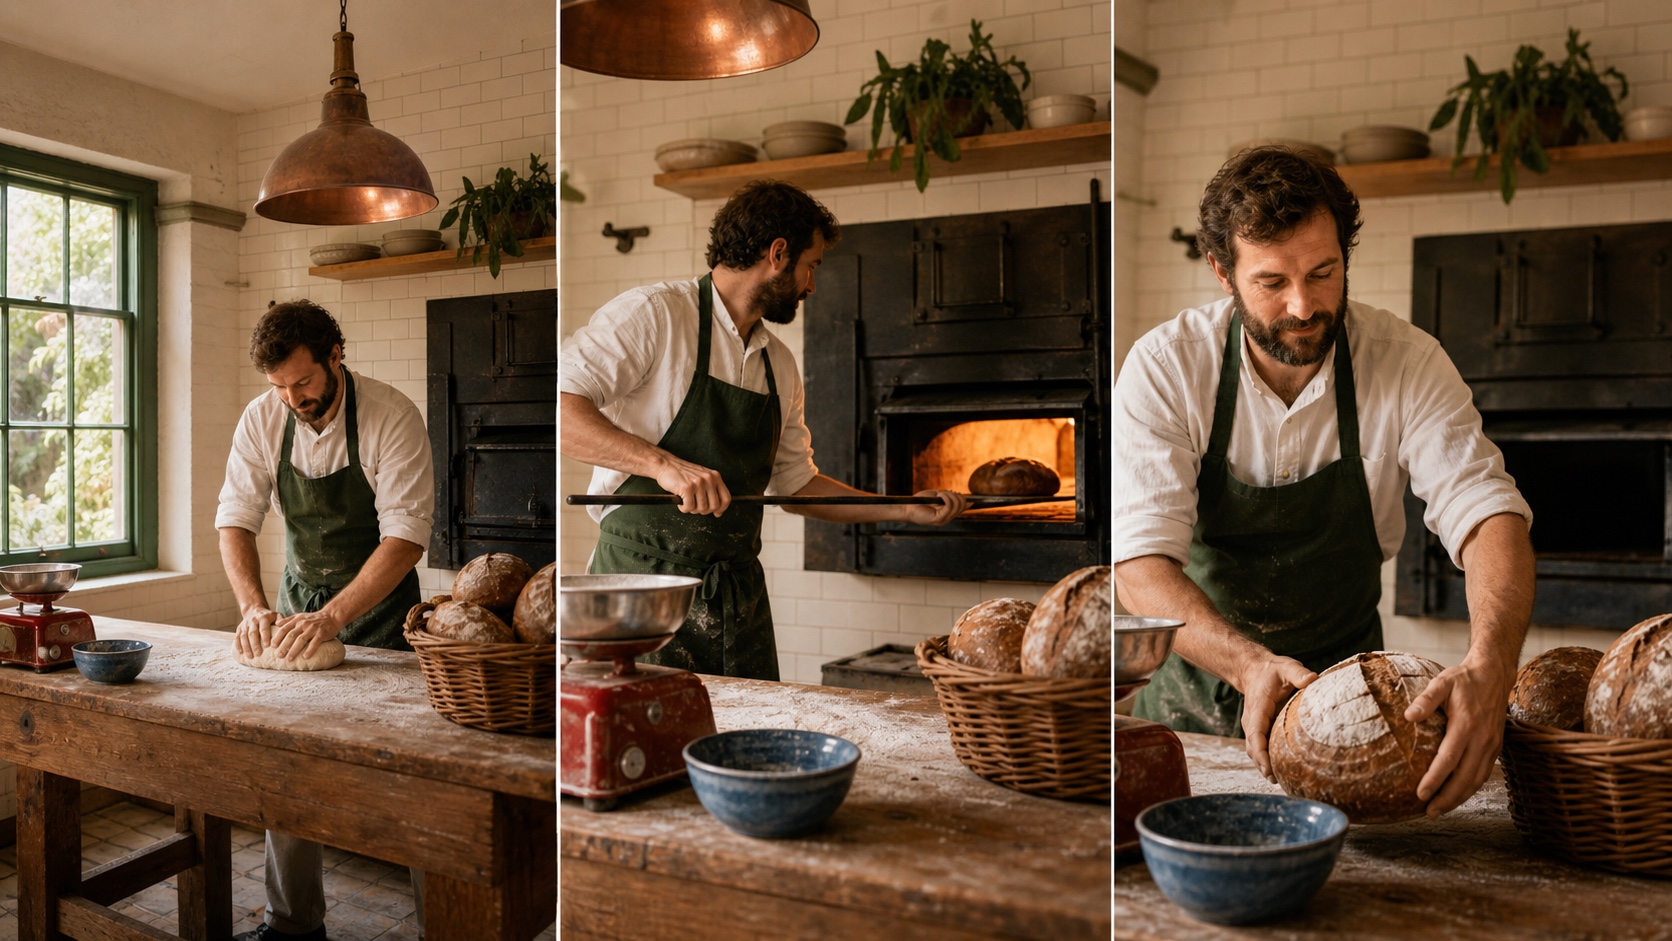
The baker changes action and framing, but the black oven, green window, copper pendant, red scale, blue bowl, baskets, and workbench continue to define one bakery.
MiniMax H3 Reference Workflow for Consistent Scenes
The practical MiniMax H3 reference video workflow starts with what must not change. Define references, state retention, then direct each shot in playback order.
Step 1: Define the environment as a reusable subject
Name the location and source image. List only critical geometry, colors, objects, materials, and light direction; do not bury anchors in mood adjectives.
Step 2: Choose reference generation or a frame anchor
Use reference generation to guide a location without copying its composition. Use a first frame, keyframe, or last frame when the shot must match an exact view. Mixing these roles causes rigidity or drift.
Step 3: Lock invariants before adding action
State preservation before action: lock the floor plan, openings, furniture, prop colors, materials, weather, and key light. Then describe actor and camera. The MiniMax H3 prompt guide covers the broader structure.
Step 4: Change one major variable per test
Generate a static wide shot, then change the action, then test a new angle. Changing cast, weather, light, lens, action, and camera together hides the cause of failure.
Step 5: Review the full clip, not the poster frame
Scrub entrances, occlusion, turns, camera passes, and the final second. Save references, prompt, settings, approved output, and failure notes for the next shot.
Copy-and-Paste MiniMax H3 Environment Prompts
These structures answer MiniMax H3 reference images and MiniMax H3 reference-to-video prompt guide searches. Replace brackets with your scene inventory.
Template 1: Consistent interior across camera angles
Use Image 1 as the environment reference for the same [room]. Preserve the floor plan, [window position], [door position], [hero furniture], [three fixed props], wall and floor materials, and [light direction] throughout. The subject [action]. Begin with a wide view, then make one slow lateral camera move to a medium angle. Reveal natural parallax without redesigning, relocating, adding, or removing fixed scene elements.
If the camera reveals an unseen wall, provide one compatible supporting view instead of asking the model to invent it.
Template 2: Consistent exterior with moving action
Use Image 1 to preserve the same [street/building/courtyard], including [façade geometry], [door and window colors], [street furniture], [tree], pavement pattern, weather, and time of day. A [subject] moves from [start] to [end] while the camera tracks at [height and speed]. Keep wet reflections, traffic direction, background scale, and practical lights continuous. Do not change the architecture or replace recurring objects.
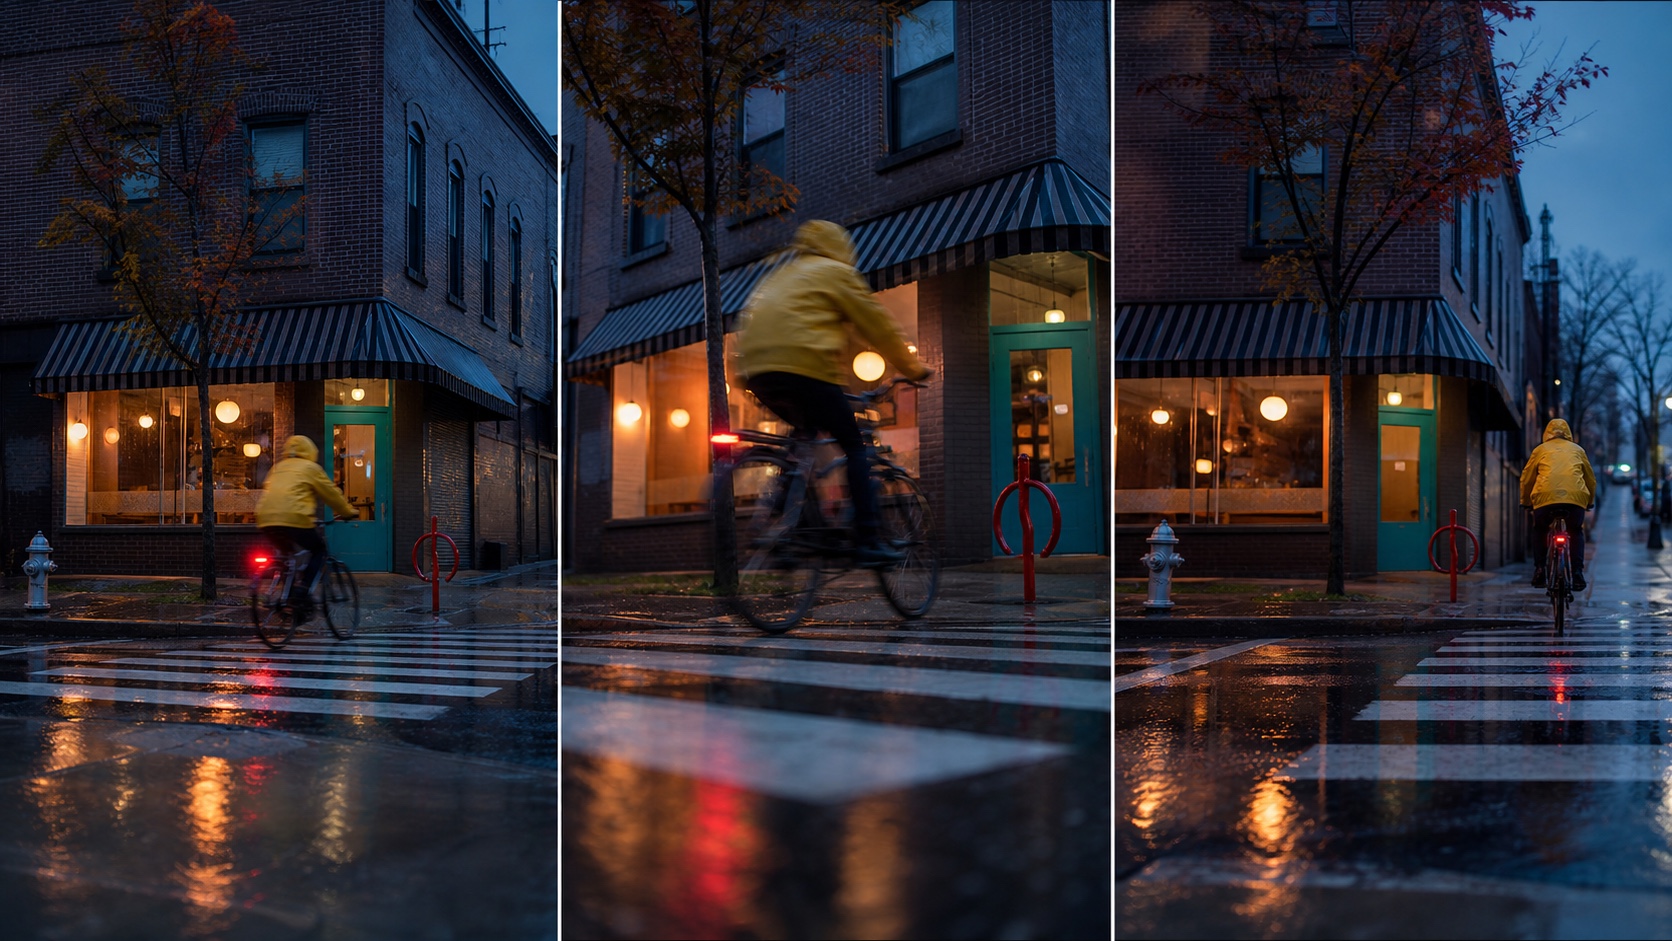
Exterior continuity depends on more than weather. Building geometry, door color, street furniture, tree placement, and reflected light must agree as the rider passes.
Template 3: Product video in one persistent set
Use Image 1 for the exact product identity and Image 2 for the environment. Preserve the product silhouette, color, controls, material finish, and scale. Preserve the counter, backsplash, window, cloth, jar, spoon, and botanical accent in their established positions. Move from a contextual wide shot to hand interaction and one macro result. Change framing and focus only; do not redesign the product or set.
For a campaign, refine only approved shots through the MiniMax H3 two-stage workflow. Refinement makes an inconsistent composition sharper, not correct.
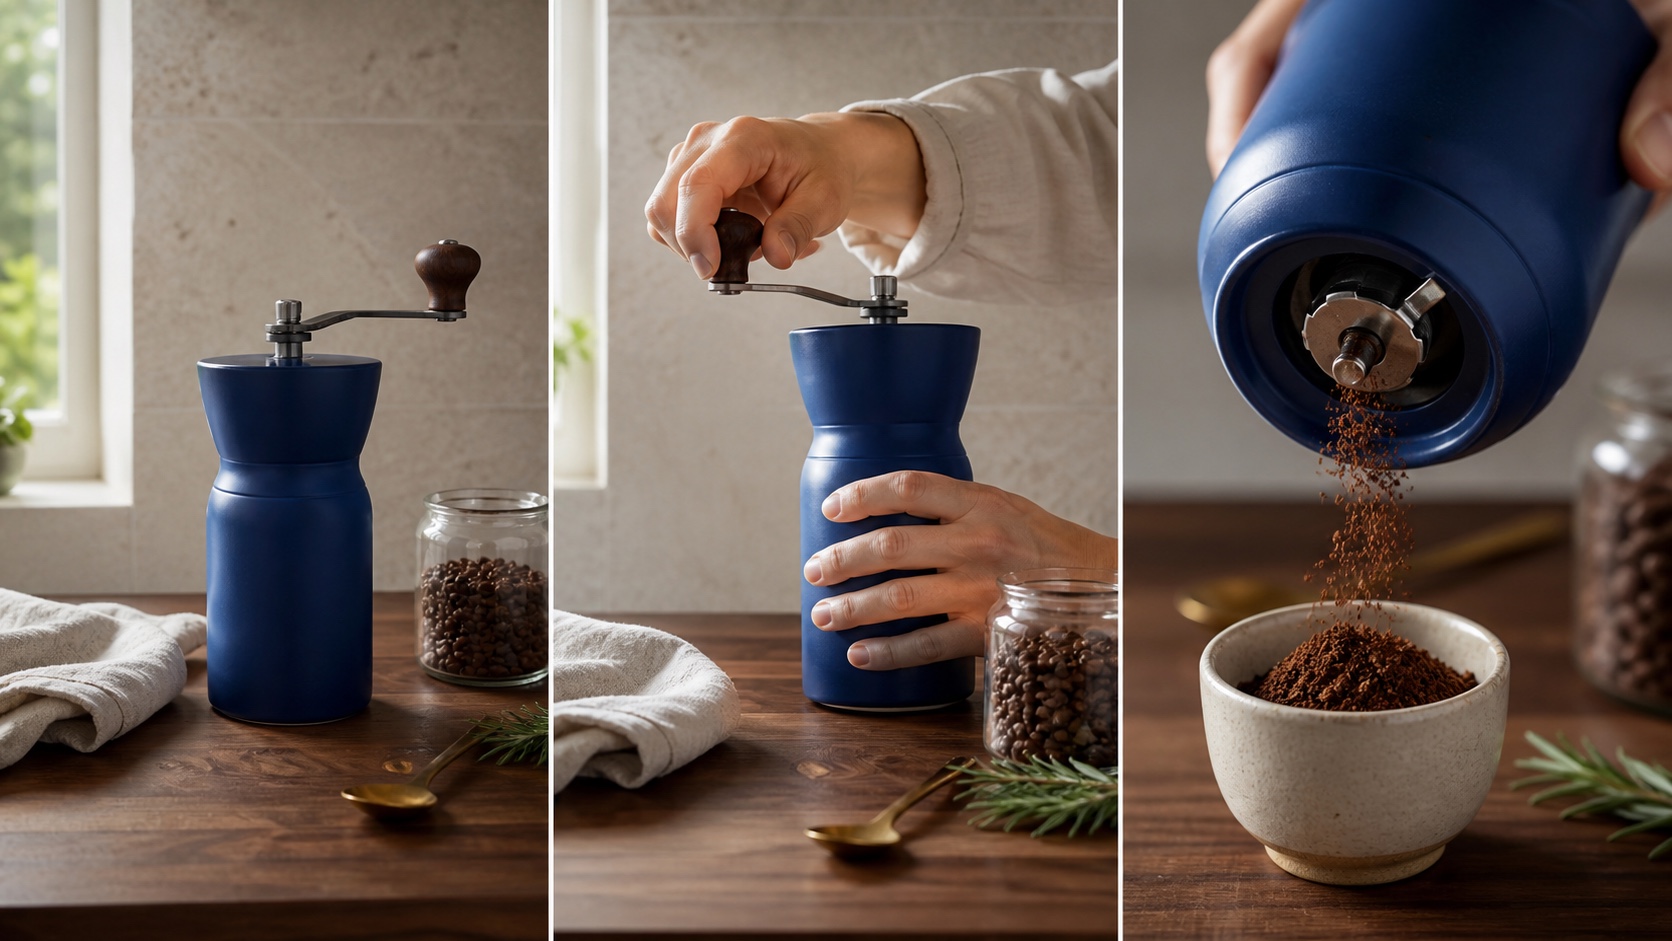
Product continuity requires both object and environment locks: the grinder, window, limestone, towel, bean jar, brass spoon, and rosemary create one repeatable set.
Fix Background Drift, Prop Changes, and Lighting Jumps
Diagnose the earliest visible change. A precise retry is more useful than repeatedly adding “ultra consistent.”
The room layout changes after a camera move
Reduce the move and describe relationships: “window left of the oven” is stronger than “window, oven.” Add a compatible reverse-angle reference when too much unseen space is revealed.
Props disappear, multiply, or change shape
Name only props that must persist, with position, color, material, and scale. Remove clutter. Give a critical product its own reference.
Lighting or weather jumps between shots
Lock time, light direction, color temperature, contrast, and practicals. “Cinematic lighting” describes taste, not continuity. Outdoors, preserve weather and reflection intensity.
The reference blocks natural movement
The environment may be over-constrained as an exact frame. Preserve defining features while allowing perspective to shift; do not demand unchanged pixels during a large camera move.
Test Environment Consistency Before Scaling Production
A five-shot test uses one environment pack for a static wide, medium action, side move, contextual close-up, and return to the original wide. The return tests whether the model can recover the established world.
Score a continuity checklist
| Dimension | Pass condition | Retry signal |
|---|---|---|
| Layout | Doors, windows, walls, and furniture keep logical relationships | Architecture moves or the room changes size |
| Props | Hero objects retain count, position, color, and material | Objects vanish, duplicate, or transform |
| Lighting | Source direction, time, practical lights, and shadows agree | Unmotivated day/night or side-to-side jump |
| Surfaces | Floors, walls, glass, metal, and textiles remain identifiable | Texture or material changes between angles |
| Motion | Parallax and occlusion reveal a connected space | Background slides like a flat plate |
Decide whether to keep, edit, or regenerate
Edit slight exposure or edge issues. Regenerate relocated doors, changing products, impossible reflections, or redesigned rooms. Track cost per accepted clip, not per attempt.
Turn successful tests into a reusable scene kit
Keep the master view, supporting angle, inventory, roles, prompt, notes, and final clips together. This reusable scene kit also supports a multi-model AI video workflow.
Conclusion
MiniMax H3 environment consistency improves when the location is treated as a production asset instead of a decorative sentence: build one clear reference pack, separate environment, character, frame, and motion roles, lock only the features that define the world, and test controlled changes before generating a full sequence. Review geometry, props, materials, lighting, and motion across the entire clip, then refine only the shots that already preserve the scene. Create your next consistent AI video with Seedance →
Ready to try it yourself?
Put the steps from this guide into practice with Seedance and turn prompts or images into polished videos in minutes.
Free credits on signup. Plans from $28/month.
Related Articles
More posts in the same locale you may want to read next.

Seedance App Preview Video Generator 2026: Create App Store and Product Launch Clips
Use Seedance to turn app screenshots, feature copy, and launch goals into App Store previews, Google Play promo videos, and product launch clips.
Read article
Best AI Video-to-Video Models in 2026
The best AI video-to-video models in 2026 for editing footage you already shot: Higgsfield Genjutsu, Seedance 2.x, Runway Aleph, Luma Modify and Kling Omni compared.
Read article
Kling 4.0 vs Seedance 2.5: Full Comparison
Kling 4.0 vs Seedance 2.5 compared by spec: 30-second clips, keyframes vs 50 references, audio, 4K and 10-bit color, editing, and which model fits which job.
Read article