You've probably hit the same point others encounter with AI video. The first clip looks good, the second is close enough, and by the third your character's face has shifted, the background feels like a different set, and the “story” has turned into a string of unrelated moments.
That's usually not a model problem. It's a planning problem.
A Seedance 2.0 storyboard works best when you treat it like pre-production, not like an extra prompt field. Used well, it gives you control over shot order, continuity, and pacing. Used badly, it just adds friction. The skill isn't just learning how to storyboard. It's knowing when the extra control is worth the time and when a simpler single-shot prompt will get the job done faster.
Ready to create your own AI video?
Free credits on signup. Plans from $20/month.
The Foundation Planning Your Narrative Before Prompting
If your clip needs continuity, a storyboard isn't optional. If it's one punchy social visual with no recurring character, no spatial continuity, and no edit-driven reveal, storyboarding may be overkill.
That trade-off matters. Workflow overhead matters for agencies, educators, and smaller teams, especially in a market where the UK's creative industries contributed £124.6 billion in gross value added in 2022 and employed 2.4 million people, as noted in this UK creative-sector discussion. If you're producing quickly and on a tight budget, extra planning has to earn its place.

Decide if the storyboard is doing real work
Use a storyboard when the output depends on sequence. That includes narrative ads, explainers with recurring visuals, character-led shorts, product reveals across multiple scenes, or any edit where one shot needs to feel like the natural continuation of the last.
Skip the full storyboard when the clip is simple.
| Project type | Storyboard value | Better approach |
|---|---|---|
| Single hero product shot | Low | One tightly written prompt |
| Character introduction with multiple angles | High | Scene-by-scene storyboard |
| Fast social loop with abstract motion | Low to medium | One shot, then iterate style |
| Short branded story with beginning, middle, end | High | Multi-shot plan first |
| Educational explainer with recurring setting | High | Locked scenes and references |
A lot of beginners storyboard everything. That slows them down. Others do the opposite and try to force a mini-film out of one broad prompt. That's how continuity falls apart.
Practical rule: If scene order matters to the viewer, scene order must exist before generation.
Build the story as a chain of decisions
Before writing prompts, write the narrative in plain language. Keep it boring. If you can't explain the sequence without cinematic language, it's still too vague.
Use this simple chain:
- Beginning. What visual establishes the subject, place, or problem?
- Middle. What changes, moves, or develops?
- End. What image resolves the idea?
Here's a rough example for a short ad:
- Opening shot: commuter sees chaotic desk setup.
- Middle shot: tool appears, workspace becomes organised.
- Closing shot: calm close-up, branded result, satisfied expression.
That structure gives the model a logic to follow. Without it, you get attractive fragments.
Lock the character and setting before motion
Most weak storyboard outputs start with motion too early. People ask for camera moves, emotional tone, dramatic transitions, and action beats before they've decided what the subject looks like.
Start with two documents, even if they're just notes in one page:
- Character definition: stable appearance, clothing, age impression, posture, key props.
- Setting definition: environment, colour palette, lighting feel, key objects, spatial cues.
Keep the character description tight and repeatable. A useful version usually focuses on a handful of strong visual anchors, not a novel-length biography. If the person in shot one wears a charcoal trench coat, short copper hair, and round glasses, don't replace those anchors later with “smartly dressed creative professional”. That's how drift begins.
For settings, think in things the camera can see. “Warm, modern office” is weak. “Small modern office, pale oak desk, matte black lamp, soft window light, off-white walls, green plant in rear corner” is usable.
Sequence shots before you write them
A storyboard isn't just a list. It's an order.
For each shot, decide:
- Shot type: wide, medium, close-up, over-shoulder
- Subject: who or what must be visible
- Action: one clear beat
- Environment: where the beat happens
- Transition logic: why this shot follows the previous one
That last point is the one often overlooked. A sequence feels coherent when the next shot answers a visual question from the last one. If a hand reaches for a notebook in shot one, shot two might show the notebook opening. If a person turns to a doorway, shot two might cut to what they see.
For a more detailed breakdown of that planning discipline, this Seedance storyboard workflow guide is useful as a practical reference.
The storyboard should explain the edit before the model generates the footage.
Keep the first pass smaller than you want
Beginners often plan too many beats. The result is a bloated sequence where no shot gets enough attention. A lean storyboard almost always works better.
A practical starting point:
- One establishing shot
- One action shot
- One payoff shot
If those three work, expand. If they don't, adding six more shots won't save the sequence.
Crafting Your Multi-Shot Prompt Structure for Continuity
Once the narrative is fixed, the prompt writing becomes much easier. You're no longer asking the model to invent a story and render it at the same time. You're translating a storyboard into controlled instructions.
The highest-control workflow is to define the clip as a scene-by-scene sequence with explicit shot type, camera movement, characters, action, environment, lighting, and mood, then lock the storyboard before adding motion. Practitioner guidance describes that as separating visual design from motion generation, which improves consistency and reduces redraws in practice, as detailed in this workflow breakdown.

Use one repeatable prompt skeleton
Don't improvise every shot from scratch. Build one structure and reuse it.
A reliable prompt skeleton looks like this:
Shot [number]
Shot type and framing:
Camera movement:
Subject:
Action:
Environment:
Lighting:
Style:
Mood:
Continuity note:
That structure forces clarity. It also exposes weak spots quickly. If you can't fill in “continuity note”, the shot probably doesn't connect properly.
Here's a practical example for a short branded desk-setup sequence:
Shot 1
Shot type and framing: wide shot, slight high angle
Camera movement: slow push in
Subject: young professional with short copper hair, round glasses, charcoal knit jumper
Action: sits at a cluttered desk, pauses, looks frustrated
Environment: small modern home office, pale oak desk, laptop, scattered notebooks, off-white walls, green plant in rear corner
Lighting: soft morning window light
Style: clean cinematic realism, natural colour, shallow depth of field
Mood: tense but controlled
Continuity note: establishes character, outfit, desk layout, and room palette
Shot 2
Shot type and framing: medium shot from desk side
Camera movement: follow the hand movement slightly as notebook is moved aside
Subject: same character, same outfit, same glasses
Action: clears space on desk and places tablet at centre
Environment: same office and desk layout
Lighting: same morning window light
Style: clean cinematic realism, natural colour, shallow depth of field
Mood: focused, purposeful
Continuity note: continues same action and preserves object placement from shot 1
Shot 3
Shot type and framing: close-up on face and hands
Camera movement: gentle static hold
Subject: same character
Action: smiles slightly while working in organised space
Environment: same desk, background softly blurred
Lighting: same morning window light
Style: clean cinematic realism, natural colour, shallow depth of field
Mood: calm, resolved
Continuity note: payoff shot using same visual anchors from prior shots
Write anchor shots first
Not every shot has equal importance. Some shots define the whole sequence. Those are your anchor shots.
Make the anchor shots the ones that establish:
- the character's most recognisable look
- the primary environment
- the core colour and lighting treatment
- the product or object that must remain consistent
Generate those first. Then let later shots inherit from them.
This is one of the better habits to borrow from broader evolving AI design prompt trends. Strong prompt systems increasingly rely on reusable reference logic rather than one-off clever wording. That mindset fits storyboard work perfectly.
Repeat what should stay stable
A common mistake is trying not to “repeat yourself”. In multi-shot prompting, repetition is useful.
Keep these elements nearly identical across connected shots:
- character anchors
- wardrobe
- environment cues
- style language
- lighting language
Only change:
- framing
- action
- camera behaviour
- immediate focal detail
If you rewrite everything every time, the model treats every shot like a new brief. That's how you get a different face, different room proportions, or a shifted art direction.
Workflow note: Continuity usually breaks because the prompt changed too much, not because it changed too little.
Avoid vague motion language
“Dynamic cinematic movement” sounds impressive and often produces muddy output. So does “camera pans dramatically” with no scene-based reason.
Better motion prompts are tied to action:
- camera follows the subject as she reaches for the door
- slow push in while the character notices the screen
- slight pull back as the product is revealed on the desk
Action-driven movement is easier for the model to interpret than abstract cinematography language.
For a stronger multi-scene workflow pattern, this multi-shot guide is worth keeping nearby while you build prompts.
Use a continuity checklist before generating
Before you hit generate, read each shot down the page and check:
- Identity lock. Is the character described the same way every time?
- Spatial logic. Do objects stay where they should?
- Visual logic. Does the lighting match the time and tone?
- Edit logic. Does each shot naturally follow the previous one?
That review catches more problems than another round of clever prompting.
Mastering Visual Control with Camera and Style Directives
At this stage, most creators either gain real control or lose it. Camera and style directives can sharpen a sequence beautifully, but they can also overpower the narrative if you stack too many of them.
The best results come from layering them lightly. Start with the shot's job, then add camera behaviour, then add style. Don't reverse that order.
Use the shot type to control attention
Shot type is the fastest way to tell the model what matters.
A practical breakdown looks like this:
| Shot type | Best use | Common mistake |
|---|---|---|
| Wide shot | establish place and staging | asking for too much facial detail |
| Medium shot | show character plus action | crowding the frame with props |
| Close-up | emotion, product detail, reaction | changing too many background cues |
| Over-shoulder | reveal screens, objects, another subject | forgetting the spatial relationship |
| Low angle | emphasis, power, scale | using it when the scene doesn't justify it |
When a sequence feels messy, the issue often isn't “bad prompting”. It's the wrong shot type for the beat. If the viewer needs to understand location, don't open with a close-up. If the key moment is a facial reaction, don't bury it in a wide frame.
Direct the camera with cause, not decoration
Camera movement should be motivated by what's happening on screen.
Good examples:
- slow dolly in as the subject reads the message
- locked medium shot while the speaker explains the concept
- follow move as the cyclist crosses frame
- gentle tilt down from skyline to storefront
Weak examples:
- epic cinematic pan
- stylish camera motion
- dramatic movement throughout
The second group sounds creative but gives the model very little to work with. The first group links motion to action and makes the scene easier to stage.
For a deeper library of phrasing patterns, this set of camera movement prompts is genuinely useful.
Don't ask the camera to perform. Ask it to observe the important thing.
Treat references like a system
Seedance 2.0 works best when the storyboard functions as a reference system, not a loose sketch. Practical guidance recommends explicitly mapping references as Image 1, Image 2, Image N, so the model can pull subject features from the right assets. It also recommends a stable 5 to 7 attribute character description plus last-frame carryover between clips for stronger identity retention, as outlined in this reference workflow guide.
That changes how you should organise your assets.
If you're using references, don't dump them in randomly. Label them mentally and in the prompt:
- Image 1: front character reference
- Image 2: side profile or secondary angle
- Image 3: wardrobe reference
- Image 4: environment reference
Then write the prompt so the model knows what each asset is for.
Example:
Use Image 1 for facial structure and hair, Image 2 for side profile and glasses shape, Image 3 for wardrobe details, Image 4 for office environment and colour palette.
Medium shot of the same character typing at the pale oak desk, soft morning light from the left, clean cinematic realism, calm focused mood.
That's far better than “use references for consistency”.
Build a stable style stack
A style stack is your repeatable set of visual descriptors. Keep it narrow. If you keep changing the style language, the sequence will wobble.
A good style stack usually contains:
- rendering intent: cinematic realism, graphic illustration, anime-inspired, documentary feel
- light treatment: soft window light, hard noon sun, moody tungsten interior
- lens feel: shallow depth of field, crisp deep focus, handheld naturalism
- finish: muted palette, rich contrast, clean modern colour, grainy texture
Here's a stable stack:
- cinematic realism
- natural colour
- soft window light
- shallow depth of field
- restrained contrast
Here's an unstable stack:
- hyperreal, dreamy, gritty, glossy, vintage, futuristic, soft haze, neon noir, editorial luxury
That second one isn't a style. It's a conflict.
Keep style secondary to continuity
A lot of people reach for style keywords to fix continuity problems. That rarely works. Style can unify the look, but it can't rescue a sequence with broken character anchors or weak shot progression.
If continuity is slipping:
- reduce competing style terms
- carry over the strongest previous frame
- keep the same environment descriptors
- simplify movement before adding more flair
That's usually enough to stabilise a sequence without draining the life out of it.
Actionable Seedance Storyboard Examples in Practice
Examples make the workflow click much faster than theory. The most useful way to study a Seedance 2.0 storyboard is to look at complete mini-sequences and ask one question: why did this need a storyboard at all?
The answer should always be visible in the edit.

Example one short product ad
A simple product ad often needs only three shots. That makes it ideal for learning.
Creative brief
Promote a minimalist insulated water bottle as part of a calm morning routine. Tone should feel premium, clean, and useful rather than flashy.
Storyboard
- Wide kitchen counter shot. Bottle sits near sunlight and breakfast items.
- Medium shot. Hand lifts bottle while subject leaves for the day.
- Close-up. Bottle placed on office desk beside laptop, subtle condensation visible.
Prompt sequence
Shot 1
Wide shot of a tidy modern kitchen counter, matte insulated water bottle placed beside a ceramic cup and sliced lemon, early morning sunlight across the surface, clean premium realism, still and calm mood.
Shot 2
Medium shot, same matte insulated water bottle now lifted by a person wearing a beige coat, camera follows the upward motion slightly, same clean premium realism, morning light, purposeful routine mood.
Shot 3
Close-up of the same matte insulated water bottle placed on a neat office desk beside a silver laptop and notebook, soft daylight, subtle condensation on the bottle, clean premium realism, calm productive mood.
Why this works
The storyboard matters because the bottle has to feel like the same object across a mini journey. Without shot planning, the ad turns into disconnected lifestyle imagery. With the storyboard, each shot advances the same idea.
Example two character introduction
Storyboarding becomes considerably more valuable. Character-led sequences fail quickly without continuity.
Creative brief
Introduce a science-fiction courier in a rainy night district. The viewer should understand the character, setting, and attitude in three shots.
Storyboard
- Establishing street shot
- Medium walking shot
- Close-up reaction shot
Prompt sequence
Shot 1
Wide establishing shot of a futuristic courier standing alone in a rain-soaked alley, long dark coat with reflective trim, compact shoulder bag, short silver hair, neon signage reflected in wet pavement, moody sci-fi realism, blue-magenta night palette.
Shot 2
Medium tracking shot of the same futuristic courier walking through the alley, same long dark coat with reflective trim, same shoulder bag, same short silver hair, camera follows from front-left as rain falls around the subject, moody sci-fi realism, blue-magenta night palette.
Shot 3
Close-up on the same courier pausing and looking to the right, rain on coat collar, neon reflections across face, controlled serious expression, moody sci-fi realism, blue-magenta night palette.
Why this works
The character description stays anchored to a small set of visual markers: coat, bag, hair, palette, environment. The camera changes. The identity doesn't.
A character intro should reveal one person from three distances, not invent three different people.
This kind of sequence is also a good place to study timing and cut rhythm in motion. The clip below shows the kind of visual pacing that helps storyboard-led generations feel intentional rather than stitched together.
<iframe width="100%" style="aspect-ratio: 16 / 9;" src="https://www.youtube.com/embed/Is4wgEpPMJQ" frameborder="0" allow="autoplay; encrypted-media" allowfullscreen></iframe>
Example three service brand sequence
A service business often needs a storyboard not for cinematic flair, but for clarity. You're showing transformation or process.
Creative brief
Show a design consultancy moving from messy client input to polished delivery.
Storyboard
- Desk full of sketches and comments
- Team review moment
- Final polished presentation on screen
Prompt sequence
Shot 1
Overhead shot of a design studio desk covered with printed drafts, sticky notes, marked-up layouts, pens, and open notebooks, neutral modern office lighting, documentary-style realism, active working mood.
Shot 2
Medium shot of two designers reviewing the same marked-up layouts pinned on a wall, one pointing at a key section, modern studio environment, documentary-style realism, focused collaborative mood.
Shot 3
Clean close-up of a polished brand presentation displayed on a large monitor in the same studio, desk now organised, controlled modern lighting, documentary-style realism, resolved professional mood.
Why this works
This sequence doesn't depend on one hero character. It depends on visual progression from chaos to clarity. That's exactly the sort of project where a storyboard is helpful even if the character continuity demands are low.
When these examples wouldn't need a storyboard
Not every version of these ideas needs multi-shot planning.
A bottle ad could be one elegant hero shot. A sci-fi courier intro could be one atmospheric standing portrait. A consultancy promo could be one screen-record-inspired service visual. The storyboard earns its keep only when the sequence itself adds meaning.
If the second and third shots don't deepen the first, cut them.
From Generation to Final Cut Troubleshooting Common Issues
The generation isn't the finish line. It's the rough cut.
Seedance 2.0's storyboard workflow is built around a multi-shot narrative planner that can break one prompt into a sequence of connected camera shots, and its reference system can take up to 12 input assets in one generation, including 9 images, 3 videos, and 3 audio clips, which gives you substantial control over character, motion, and rhythm references, according to this Seedance 2.0 overview. That control helps, but it also means weak inputs create very specific problems.

Fix character drift first
If the person changes between shots, stop adjusting colour grade or transitions. Fix identity first.
Use this order:
- return to the strongest clean frame from the previous usable clip
- reduce the character description to the most stable visual anchors
- restore the exact wardrobe wording
- remove extra style terms that may be competing with identity
If the last frame of shot one is solid, use it to support shot two. Visual inheritance is usually stronger than text alone.
Clean up weak transitions
Bad transitions usually come from one of three issues:
- the next shot starts from a different spatial logic
- the action doesn't continue naturally
- the camera language shifts too sharply
A quick way to diagnose it is to mute the clip and watch only for direction. If a subject exits frame left and appears next shot with no spatial cue, the cut will feel wrong even if both shots look good on their own.
Try these fixes:
- rewrite the second shot to continue the action already underway
- match the lighting and camera energy more closely
- trim the outgoing or incoming frames in your editor so the movement lands cleanly
Deal with style wobble
Style drift often appears after several revisions because people keep adding extra descriptors instead of removing conflicting ones.
Use a simple check table:
| Problem | Likely cause | Fix |
|---|---|---|
| Lighting shifts between cuts | changing mood or time-of-day language | lock one lighting phrase across sequence |
| Background design mutates | environment description too broad | repeat the same key spatial anchors |
| Image becomes over-stylised | stacked style keywords | cut style terms to a tight core |
| Motion looks unnatural | vague or conflicting movement instruction | tie camera motion to visible action |
Edit discipline: If a shot is eighty per cent right, repair the prompt surgically. Don't rewrite the whole brief.
Handle timing in the final edit
Even strong generations often run a beat too long. AI clips tend to linger slightly before or after the useful action. Trim aggressively.
For short-form delivery:
- cut dead air at the start
- cut the tail once the action resolves
- use sound design or music to hide small visual imperfections
- favour hard cuts over fussy transitions unless the motion naturally supports a dissolve
For platform exports, match the frame and aspect ratio to the destination before you build the final edit. Don't finish a polished horizontal sequence and then force a vertical crop as an afterthought. That's where composition falls apart.
Know when to regenerate and when to edit around it
Some issues are generation problems. Some are editing problems.
Regenerate when:
- the character identity is wrong
- the object design changed
- the camera angle misses the point of the shot
- the environment no longer matches the sequence
Edit around it when:
- the timing is slightly loose
- the end frame is awkward
- a motion beat is usable but short
- the transition only needs cleaner in and out points
That judgement gets faster with practice. The key is not treating every flaw like a prompting failure.
If you want to turn storyboard planning into finished AI video faster, try Seedance. It's built for multi-shot generation, reference-driven control, and cinematic output, which makes it a strong fit for creators who need more than isolated clips.
Ready to create your own AI video?
Turn ideas, text prompts, and images into polished videos with Seedance. If this article helped, the fastest next step is to try the product.
Free credits on signup. Plans from $20/month.
Related Articles
More posts in the same locale you may want to read next.
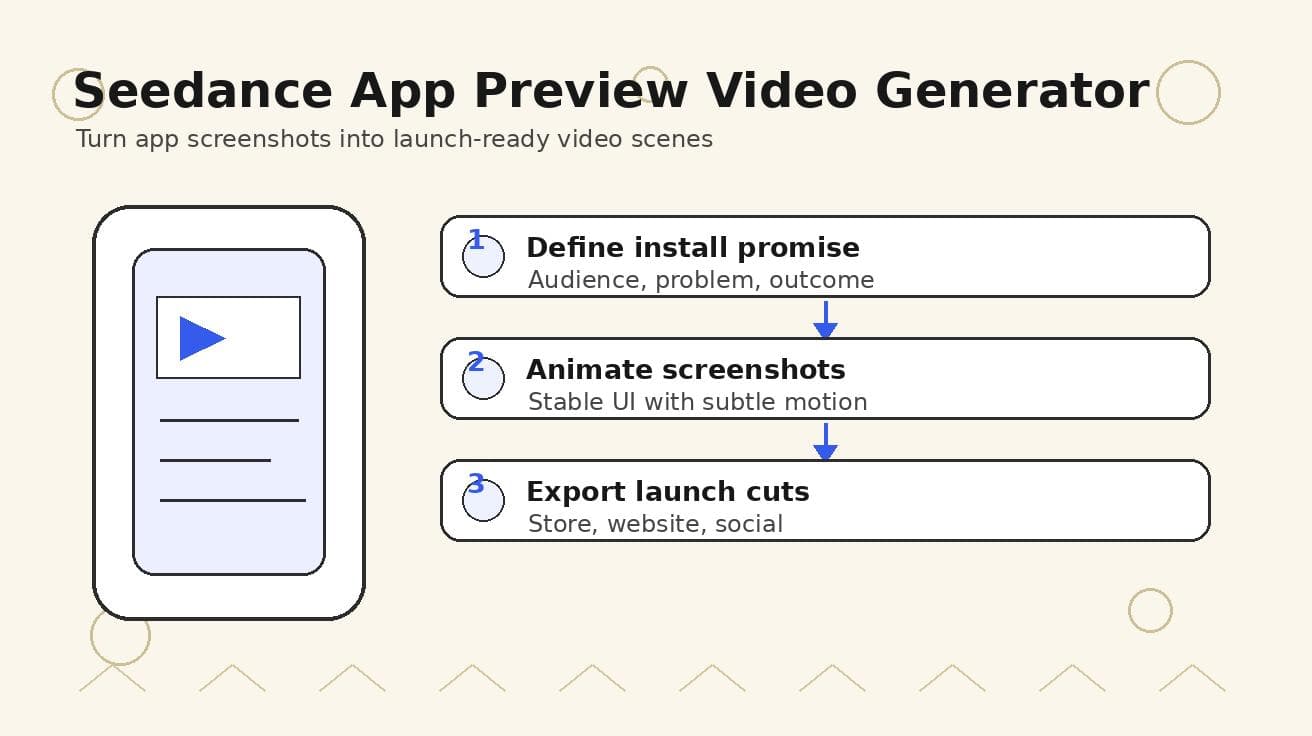
Seedance App Preview Video Generator 2026: Create App Store and Product Launch Clips
Use Seedance to turn app screenshots, feature copy, and launch goals into App Store previews, Google Play promo videos, and product launch clips.
Read article
Seedance 2.0 Multi-Shot: A Creator's How-To Guide 2026
Master Seedance 2.0 multi-shot video creation. This practical guide covers prompting, character consistency, transitions, and troubleshooting for creators.
Read article
Seedance 2.0 Character Consistency: Pro Video Guide
Master Seedance 2.0 character consistency. Our guide covers prompt engineering, asset prep, and multi-character workflows to create professional videos.
Read article