You've probably hit the same familiar wall with AI video. The first shot looks right. The second is close enough. By the fourth, your lead character has a different jawline, the jacket has changed, and the supporting character has somehow inherited the wrong glasses.
That's the problem with Seedance 2.0 character consistency. It isn't getting one nice frame. It's keeping the same person recognisable across a sequence, and keeping multiple people separate when they share the same story.
The fix usually isn't “write a better prompt” in the vague sense. It's production discipline. Reference prep, prompt structure, tag hygiene, and shot planning do far more heavy lifting than most tutorials admit. The creators who get reliable output treat AI video less like a slot machine and more like a storyboarded shoot.
Ready to create your own AI video?
Free credits on signup. Plans from $20/month.
The Foundation of Consistency Reference Image Mastery
Most consistency failures start before generation. They start with a weak reference.
A low-resolution selfie with uneven lighting and half the face hidden by hair might still look fine to a human. For a model trying to preserve identity across multiple shots, it's an unstable brief. If the source image is ambiguous, the output will be ambiguous too.
Public guidance around Seedance workflows keeps pointing back to the same issue: reference quality, lighting, and source-image design heavily affect consistency, and a master character sheet or multi-angle package is the most reliable approach. That matters even more for UK creators working from existing photos, event stills, or mobile-shot assets rather than purpose-made concept art. Some workflows also benefit from slightly stylised references because they can reduce identity confusion compared with highly realistic but messy inputs, as noted in this Seedance 2 guide.

What a usable reference actually looks like
The best reference image does three jobs at once. It shows the face clearly, it preserves proportions, and it removes visual noise that can distract the model.
Use this checklist before you upload anything:
- Clear face visibility: Both eyes should be readable. Avoid heavy occlusion from hands, fringe, hats pulled too low, or dramatic profile angles if that's your only source.
- Stable lighting: Flat, even light is better than moody contrast. If one side of the face disappears into shadow, the model has to invent structure later.
- Neutral expression: A strong grin or exaggerated emotion can work for a specific scene, but it's a poor master reference. Start with an expression the model can reinterpret without warping identity.
- Consistent styling cues: Hair parting, key accessory, and silhouette should be obvious. If the character always has a nose ring, a red scarf, or square frames, make sure that cue is visible.
- Minimal filters: Beauty filters, aggressive sharpening, and social app processing often remove the little irregularities that make a face hold together across shots.
Build a simple character sheet, even if you have bad assets
You don't need a studio photo session. You do need a cleaner package than “one random portrait”.
A practical setup is a three-image sheet:
- Front view
- Three-quarter view
- Profile or near-profile
If you only have existing photos, make them work harder. Pick images with similar hair, similar age presentation, and similar lighting temperature. Don't combine one polished headshot, one festival photo, and one dim restaurant selfie unless you want the model to average them into a stranger.
Practical rule: Fix source inconsistency before you try to fix output inconsistency.
Minor edits help. Crop to a consistent frame. Lift dark shadows slightly. Remove heavy colour casts. Don't retouch the face into perfection. The goal is clarity, not glamour.
A lot of teams skip this because it feels slow. It isn't. It's pre-production. If you want a good process for assembling and testing inputs, this reference image workflow for Seedance projects is a useful companion read.
What works with imperfect real-world material
In practice, many projects don't start with ideal source art. They start with a founder's LinkedIn photo, a lecturer headshot, or a still from old campaign footage.
When that happens, choose the least problematic image, not the prettiest one.
A filtered portrait often fails because it smooths away bone structure and skin detail. A candid frame from a phone can perform better if the face is fully visible and the lighting is cleaner. Costume-heavy images can also backfire when clothing dominates the frame. The model may cling to the outfit and stay vague on the face.
Here's a practical triage method:
| Asset type | Usually works when | Usually fails when |
|---|---|---|
| Corporate headshot | Face is unobstructed and lighting is even | Skin is over-retouched |
| Social portrait | Expression is mild and filters are light | Heavy beauty filters or strong colour grading |
| Event still | Subject is isolated and sharp | Mixed lighting and busy background |
| Costume image | Accessory is essential to identity | Wardrobe overwhelms facial detail |
The mistake people repeat
They keep changing references mid-project.
If shot three drifts, they upload a new image for shot four. That often makes the problem worse because the model now has two competing definitions of the same person. Better results usually come from strengthening the original character package, then re-running with a more disciplined prompt structure.
The reference isn't just inspiration. It's the identity contract for the whole sequence.
The Core Workflow The Anchor and Tag Method
Once the asset package is solid, the next layer is operational. This layer yields most repeatable results.
The core method is Anchor & Tag. In plain terms, you upload a strong reference, assign it a persistent tag, and call that same tag in every prompt for that character. You don't improvise the identity from shot to shot. You lock it and keep reusing it.
Guidance for Seedance consistency is unusually clear on this point. The workflow depends on a high-resolution reference with the face fully visible, a persistent tag such as @Image1, and a fixed Character Block carried across prompts. The same guidance notes that a multi-angle reference increases identity retention by approximately 35% compared with a single-angle headshot, and that locking the seed after a successful identity check clip helps stabilise noise patterns. It also points out that Prompt Leakage is a common failure mode, where outfit or lighting instructions start altering identity traits. Those details are outlined in the Anchor and Tag consistency guidance.

The Character Block that holds a face together
The Character Block is the fixed identity text that appears in every shot prompt. It should be compact, specific, and boring in the best possible way. Do not write cinematic poetry within it. Its purpose is to define what may not drift.
A practical template looks like this:
@Character_Alex
female-presenting, dark brown bob haircut, pale blue coat, left nostril ring, oval face, straight brows, wry smile, keep facial structure and accessories unchanged
That block should stay fixed through the whole sequence unless you deliberately change the character design.
What belongs in the block:
- Physical anchors: hair colour, hairstyle, face shape, brows, skin tone, build
- Distinctive accessories: glasses, earrings, ring placement, scarf, hat
- One personality cue: wry smile, stern expression, calm gaze
- Immutable continuity details: handedness, signature accessory, recurring wardrobe element if relevant
What doesn't belong there:
- Camera moves
- Background detail
- Lighting mood
- Temporary actions
- Scene-specific emotions unless they define the character generally
Why prompt leakage ruins otherwise good shots
Prompt leakage happens when your scene description starts rewriting the character.
You ask for “warm sunset light, wind-blown hair, red reflections, stylish editorial mood”, and suddenly the jacket changes, the hair length shifts, and the face becomes more generic. The model is not being difficult. You've given it too many mutable cues around the identity core.
Keep your prompt in layers:
- Character Block
- Shot action
- Camera framing
- Environment
- Lighting
- Style
That order matters. If identity comes first, the model has a stronger anchor before it processes the decorative material.
A practical prompt structure
Here's a cleaner multi-part prompt for a single shot:
- Character anchor:
@Character_Alex, female-presenting, dark brown bob haircut, pale blue coat, left nostril ring, oval face, straight brows, wry smile, keep facial structure and accessories unchanged - Action:
walking into a small bookshop and reaching for a notebook - Camera:
medium shot, eye-level camera - Environment:
independent bookshop interior, wooden shelves, soft window light - Style:
naturalistic motion, restrained realism
That gives the model room to stage the scene without renegotiating who Alex is.
Tag discipline matters more in multi-character work
Persistent tags become essential once you have two or more people in the scene. If you're using separate references, assign separate tags and mention them explicitly every time. Don't assume the model will remember which face belongs to which role after a few cuts.
A reliable setup might look like this:
| Character | Tag | Immutable cue |
|---|---|---|
| Alex | @Character_Alex |
left nostril ring, pale blue coat |
| Ben | @Character_Ben |
shaved head, amber glasses |
| Sana | @Character_Sana |
silver hoop earrings, green cardigan |
Keep the tag names human-readable. When projects get longer, confusing labels create their own production errors.
When to lock the seed
Don't lock the seed on the very first attempt. Generate a short identity test clip first. If the face, accessory placement, and silhouette hold up, then lock the seed for the surrounding shots in that sequence.
That gives you a stable base identity while still letting you change framing and action. If the test clip is wrong, locking the seed only preserves the wrong version more faithfully.
A simple workflow many creators miss:
- Generate a short identity check clip
- Approve or reject based on face, accessories, and handedness
- Lock the seed only after approval
- Reuse the exact Character Block and tag wording in later shots
That level of repetition feels mechanical. That's why it works.
Crafting Multi-Shot Stories and Storyboards
Single-shot consistency is useful. Story consistency is where the work starts to feel professional.
That's especially important in a market where video already dominates attention. Ofcom reported in 2024 that UK adults spent an average of 4 hours 20 minutes per day on television and video content, and YouTube reached 89% of online adults aged 16+ in the UK, according to this UK video consumption summary. In practical terms, audiences are used to continuous video language. They notice continuity errors fast, even in short branded clips and explainers.
A workable storyboard for AI video is less about artistic perfection and more about continuity control. If you plan the sequence properly, each generation has a narrower job. That gives you better odds of preserving the same character across cuts.

A simple example with a marketing video
Take a short promo for a language tutor.
You want four shots:
- Tutor at desk, opening laptop
- Close-up explaining a grammar point
- Student joining on screen
- Tutor smiling and pointing to a worksheet
The amateur way is to write four creative prompts from scratch. That usually produces four cousins.
The stronger way is to define one tutor identity and carry it unchanged through every prompt. The action, framing, and environment can shift. The identity text does not.
A storyboard note sheet for that sequence might look like this:
| Shot | What changes | What stays fixed |
|---|---|---|
| 1 | Wide framing, desk setup | Character Block, tag, wardrobe anchor |
| 2 | Close-up, hand gesture | Character Block, tag, face details |
| 3 | Screen interaction, seated pose | Character Block, tag, accessories |
| 4 | Medium shot, upbeat expression | Character Block, tag, hairstyle and clothing anchor |
Context Control stops prompt sprawl
Long prompts often fail because everything is thrown into one paragraph. The model then has to guess which details matter most.
A better habit is Context Control. Split your prompt mentally, or in your notes, into distinct slots. One group covers the face and identity. Another covers costume. Another covers lighting. Another covers action. The point is separation. If you bundle identity and environment into one cluttered blob, the model can start trading one off against the other.
A clean planning structure looks like this:
- Identity slot: face shape, hair, brows, accessories, expression baseline
- Costume slot: jacket, shirt, scarf, glasses
- Lighting slot: daylight, overcast, practical interior light
- Action slot: sitting, turning, pointing, walking
- Camera slot: close-up, medium, over-shoulder, wide
A proper planning document offers greater assistance than another prompt rewrite. If you want a model for laying out sequences before generation, this storyboard workflow for Seedance projects is a solid reference.
A narrative rhythm that keeps consistency intact
One pattern that works well is to move from easiest to hardest shots.
Start with:
- medium shot
- controlled pose
- simple lighting
Then move to:
- close-ups
- interaction shots
- movement-heavy cuts
Why? Because your early successful shots establish the most stable version of the character. Those become your visual benchmark when later shots start to drift.
The best storyboard for AI video is the one that reduces ambiguity before you generate anything.
What to change between shots, and what not to touch
Useful changes between shots:
- Action: standing, sitting, turning, gesturing
- Framing: wide to close
- Setting: desk, corridor, shop, classroom
- Mood: calm, focused, warm, energetic
Dangerous changes between shots:
- Rewriting the character description
- Swapping references
- Changing wardrobe anchors without a narrative reason
- Adding too many aesthetic adjectives late in the sequence
If shot two introduces “cinematic glamour lighting, editorial styling, dramatic angle, glossy skin, highly stylised realism”, don't be surprised when shot three no longer resembles shot one.
Good multi-shot output comes from directing with constraints. You aren't limiting creativity. You're protecting continuity so the creative choices read as one story instead of four unrelated generations.
Advanced Techniques for Multi-Character Scenes
Most tutorials generally dodge the hardest problem. Keeping one face stable is manageable. Keeping two or three people distinct across cuts is where workflows break.
The failure pattern is familiar. Character A starts borrowing Character B's glasses. Character B picks up Character A's hair shape. In group scenes, accessories migrate, wardrobe cues blur, and the cast begins to look like variations of the same template.
That's why multi-character work needs stricter discipline than single-subject clips.

Guidance around Seedance's ensemble use cases keeps returning to the same procedural fix: make each character visually distinct, repeat full Character Blocks in every prompt, and test each character individually before full production. That under-documented issue is outlined in this explainer on character consistency across scenes.
Similar-looking characters are a design problem first
If two characters are both “young man, brown hair, dark jacket”, the model isn't being unreasonable when it blends them. You've designed an identity collision.
The fix starts in character design:
- Separate silhouette: one slim long coat, one boxy bomber jacket
- Separate hair logic: one shaved head, one curly fringe
- Separate accessories: one amber glasses, one silver hoop
- Separate palette: don't dress everyone in muted navy and charcoal unless the project absolutely requires it
That doesn't mean making cartoon opposites. It means giving the model enough contrast to keep identities compartmentalised.
A two-person dialogue prompt that usually behaves better
For two-character scenes, repeat both Character Blocks fully. Don't shorten the second one because “the model already knows”.
A stable structure looks like this:
@Character_Alex, dark brown bob haircut, pale blue coat, left nostril ring, oval face, straight brows, wry smile, preserve identity
@Character_Ben, shaved head, amber glasses, charcoal jumper, square jaw, calm expression, preserve identity
Alex speaks across a café table while Ben listens, medium two-shot, natural window light, keep identities separate, no swapped accessories
That final instruction matters. Explicitly telling the model to keep identities separate can reduce confusion in scenes where people are close together.
A stronger library of prompt patterns helps here. If you're building dialogue scenes, interviews, or ensemble shorts, these Seedance 2.0 prompt ideas are worth adapting into your own templates.
Test in isolation before combining the cast
Don't introduce everyone at once.
First generate:
- Alex alone in a neutral scene
- Ben alone in a neutral scene
- Sana alone in a neutral scene
Then generate:
- Alex and Ben together
- Ben and Sana together
Only after those hold up should you move into the full scene.
This sounds slow, but it saves time because you catch overlap issues early. If Ben's glasses keep leaking into Alex's close-ups, you want to discover that in a test shot, not after rendering a whole campaign sequence.
Here's a useful visual example before moving into more complex staging:
<iframe width="100%" style="aspect-ratio: 16 / 9;" src="https://www.youtube.com/embed/R5pB2DXLlmc" frameborder="0" allow="autoplay; encrypted-media" allowfullscreen></iframe>
Group scenes need role separation too
When you move beyond two people, don't rely only on looks. Assign functional roles in the prompt.
Instead of:
- three colleagues standing in an office
Try:
@Character_Alex presenting at whiteboard@Character_Ben seated with tablet@Character_Sana leaning against desk taking notes
Role separation gives the model another way to keep identities organised. Position, action, and object relationship all reinforce who is who.
In multi-character scenes, visual distinction and prompt distinction need to work together. One without the other usually isn't enough.
Troubleshooting Common Consistency Failures
Even with a good setup, some shots will still break. The trick is diagnosing the failure quickly instead of regenerating blindly.
When I review a sequence, I look for three categories first: face drift, attribute leakage, and memory loss across longer runs. If you can identify which one happened, the fix is usually obvious.
A broader set of strategies for consistent AI characters is useful when you want to compare your own workflow against general best practice, especially if you're still refining your pre-production habits.
Seedance 2.0 Consistency Troubleshooting Guide
| Symptom | Likely Cause | Actionable Solution |
|---|---|---|
| Face slowly changes across shots | Reference is weak or Character Block keeps changing | Return to one master reference package. Reuse the exact same identity wording in every shot. |
| Character keeps changing outfit details | Prompt leakage from style or environment text | Move wardrobe anchors into the Character Block and simplify scene styling language. |
| One accessory disappears | The accessory isn't prominent enough in the source image or prompt | Choose a clearer reference where the item is visible, then repeat it explicitly in the Character Block. |
| Two characters start to resemble each other | Their designs are too similar or tags aren't used consistently | Increase visual contrast between characters and reference each tag explicitly in every shared shot. |
| Character looks right in shot one, wrong in shot four | You changed references or loosened identity language between prompts | Freeze the reference package. Compare prompts side by side and remove accidental identity edits. |
| Long sequence degrades over time | Attention fatigue in extended multi-shot work | Re-anchor with the original reference at a new scene break and use a fresh identity check before continuing. |
| Hands, jewellery side, or facial asymmetry flips | The model is improvising mirrored features | Add handedness or side-specific accessory placement to the Character Block and reject weak identity check clips early. |
| Group scene becomes visually muddled | Too many moving variables in one prompt | Reduce simultaneous changes. Keep camera, action, and lighting simpler until identities hold. |
Fast fixes that save a bad render
Some problems need regeneration. Others need restraint.
Try these first:
- Freeze the identity text: If you've been tweaking adjectives shot by shot, stop. Copy the best-performing Character Block and reuse it exactly.
- Cut prompt clutter: Remove decorative style cues that don't serve the shot. The model often behaves better when fewer things compete for attention.
- Re-run the identity check: Before rendering the next scene, generate a short clip using the original anchor setup.
- Split the problem: If a scene combines difficult motion, dramatic lighting, and two characters, simplify one variable at a time.
When to abandon a shot
If a prompt only works when it's overloaded with corrective language, the setup is probably wrong upstream.
A better reference package or cleaner character design often solves what brute-force prompting can't. At that point, don't keep patching the same weak shot. Reset the inputs and rebuild from the strongest known-good version of the character.
Conclusion From Creator to Director
The jump from casual prompting to reliable AI video work comes down to control. Not creative control in the abstract sense. Production control.
For Seedance 2.0 character consistency, that means three habits. Build a proper reference package. Use Anchor & Tag with a fixed Character Block. Plan sequences so identity stays fixed while action, framing, and setting change around it. Multi-character work adds another layer, but the principle stays the same. Make each person distinct and keep the prompt structure disciplined.
That matters in a UK creative economy of real scale. The government's 2023 Creative Industries Sector Vision said the sector contributes around £124 billion in gross value added and employs about 2.4 million people nationwide. In an industry that large, small workflow gains matter because continuity errors create rework in advertising, film, television, and digital media, where consistency is part of professional baseline expectations, as noted in the UK-focused summary above.
The useful mindset shift is this. You're no longer asking the model to “make a character”. You're directing identity across a sequence. Once you treat references, tags, and storyboards as part of one system, the output gets more stable and the editing process gets much less painful.
Start with one character and three shots. Then try two characters in a controlled dialogue scene. When those hold, scale up. That's how you stop chasing lucky generations and start building repeatable ones.
If you want to put these workflows into practice, try generating a short test sequence in Seedance with one locked character, one fixed Character Block, and a simple three-shot storyboard. It's the fastest way to turn theory into a repeatable production method.
Ready to create your own AI video?
Turn ideas, text prompts, and images into polished videos with Seedance. If this article helped, the fastest next step is to try the product.
Free credits on signup. Plans from $20/month.
Related Articles
More posts in the same locale you may want to read next.
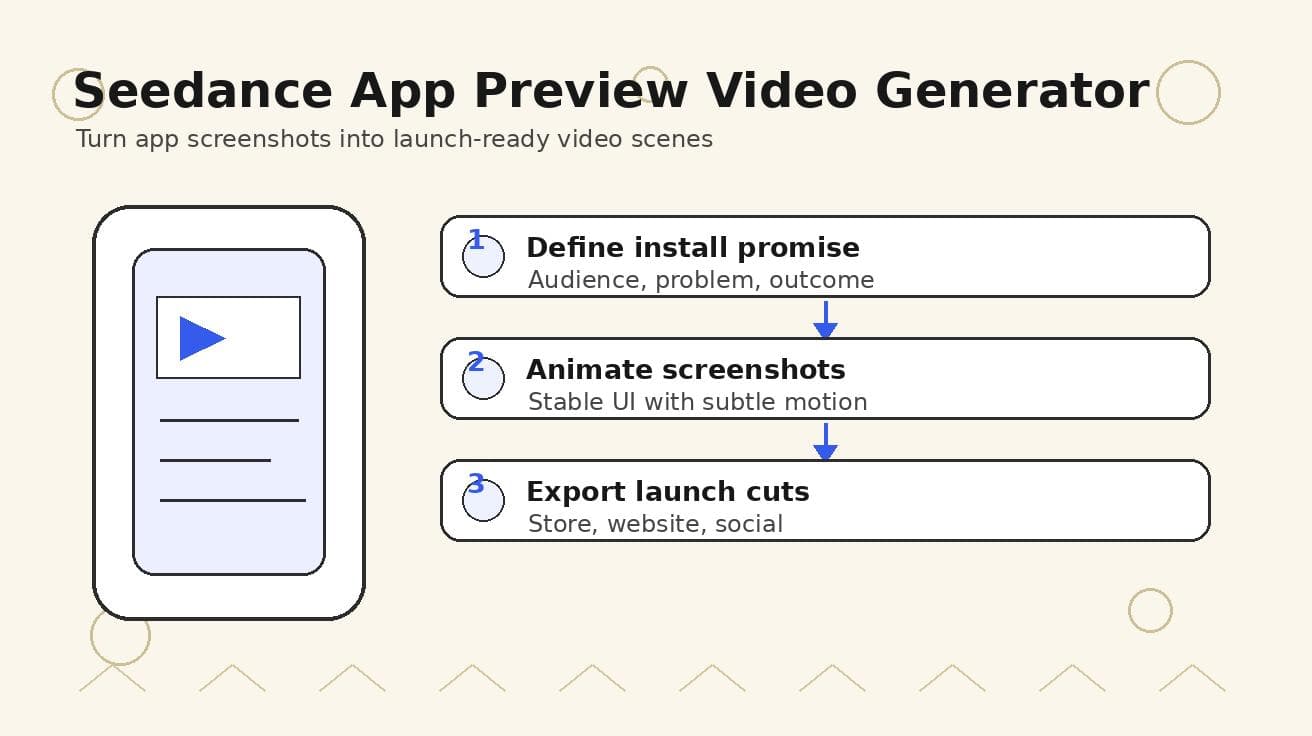
Seedance App Preview Video Generator 2026: Create App Store and Product Launch Clips
Use Seedance to turn app screenshots, feature copy, and launch goals into App Store previews, Google Play promo videos, and product launch clips.
Read article
Seedance 2.0 2K: A Guide to Cinematic AI Video
Unlock the power of Seedance 2.0 2K. Our guide explains its cinematic features, 2K video workflow, prompt recipes, and real-world uses for UK creators.
Read article
Seedance 2.0 1080p: A Creator's Guide to Cinematic AI Video
Master Seedance 2.0 1080p video creation. This step-by-step guide offers actionable workflows, prompt tips, and export settings for UK creators and marketers.
Read article