You've probably hit the same wall commonly encountered with AI video.
You need a short launch film, a run of paid social cutdowns, or a sequence of product explainers. You can get a single striking clip out of an image generator. Then the second clip looks like it belongs to a different campaign, the character shifts, the lighting drifts, and the whole thing starts to feel like stitched-together tests instead of one story.
That's where Seedance 2.0 image to video gets interesting. Not because it makes motion from a still. Plenty of tools do that. Its key advantage lies in giving creators enough multimodal control to think in scenes, references, and shot continuity rather than one-off spectacle. For anyone producing short-form campaign work, that changes the workflow more than the headline feature list does.
Ready to create your own AI video?
Free credits on signup. Plans from $20/month.
Beyond Single Clips Why Seedance 2.0 Changes the Game
Most AI video tutorials stop at the first win. Upload one image. Add one prompt. Generate one clip. That's useful for experimentation, but it doesn't solve the problem most working creators have, which is building a sequence that feels planned.
For UK marketers, that matters because the audience is already there. Ofcom reported that 80% of UK adults used online video-sharing platforms in 2024, and 94% used online video overall according to this Seedance 2.0 market overview. Short-form video isn't a side channel. It's a core distribution format.
If you're used to traditional video content creation, the shift here isn't that AI replaces a full production pipeline. It's that it can compress the ideation and previsualisation stages, and in some cases produce usable delivery assets for short social and ad placements when the brief doesn't justify a shoot.
A lot of creators miss the practical difference between a clip generator and a narrative tool. The difference is continuity. Can the same character appear in a product intro, a reaction shot, and a closing hero frame without falling apart visually? Can the environment evolve while the brand look stays recognisable? Can you build a beginning, middle, and end instead of posting isolated motion tests?
That's where the platform's broader multimodal positioning matters. Seedance 2.0 is presented as part of a unified workflow for text, image, audio, and video inputs, which makes more sense if you read the product through a storytelling lens rather than as a novelty animator. The feature set described in Seedance 2.0 features points in that direction.
A good Seedance project doesn't start with “make this image move”. It starts with “what are the three shots this story can't work without?”
That mindset produces better output. It also saves time, because you stop trying to force one generation to do the work of a full edit.
Preparing Your Creative Assets for Seedance
The strongest Seedance 2.0 image to video results are usually won before generation starts. Asset prep matters more than prompt poetry.
The documented input envelope is broad enough to support campaign-style setup. Seedance 2.0 image-to-video accepts up to 9 images, 3 video clips of up to 15 seconds each, and 3 audio clips of up to 15 seconds each in a single generation, with total video output lengths of 4 to 15 seconds and support for resolutions up to 1080p on Atlas Cloud's model page. That gives you room to plan shots with intent instead of feeding the model one asset at a time and hoping continuity survives.
Build a reference pack before you write prompts
The easiest mistake is grabbing whatever still looks nicest and treating it as the only input. That often produces a decent first shot and a weak second one.
A better setup looks like this:
- Primary key frame: one image that defines the subject clearly. This should lock the face, clothing, product details, and lighting direction.
- Supporting references: one or two extra images that introduce alternate framing, props, or environment cues without changing the identity of the subject.
- Optional motion references: short clips only when you need specific camera energy or body rhythm.
- Optional audio references: useful when the cut needs to feel tied to voiceover pacing or a musical beat.
If you're building a three-shot story for a skincare launch, for example, your pack might include a clean hero portrait, a closer hand-and-product shot, and a bathroom or vanity background image with the same colour temperature. That gives the model fewer contradictory signals.
Pick images that reduce ambiguity
The model can interpret a lot, but ambiguity is where drift starts.
Use images with:
- Clear subject separation: cluttered backgrounds make the model guess what should move and what should stay fixed.
- Stable lighting: mixed lighting often leads to inconsistent skin tone or reflective surfaces across shots.
- Intentional composition: if the key frame is front-facing and your next reference is an extreme side angle with a different mood, continuity gets harder.
- Consistent styling: if one image is glossy studio photography and the next is casual phone-camera realism, you're asking for reconciliation the model may not handle elegantly.
Practical rule: If a human editor would say your references belong to different shoots, the model will usually struggle too.
For creators who want a simple starting point, the examples in animating an image are useful as a baseline. The difference is that for multi-shot work, you're preparing a mini production bible, not just one visual.
Plan your scenes in a shot list, not in your head
Before uploading anything, write a compact shot list.
| Shot | Purpose | Main input |
|---|---|---|
| Opening | Establish subject and tone | Key frame |
| Middle | Introduce movement or product interaction | Key frame + support image |
| Closing | Strong branded finish | Key frame + environment or product detail |
Keep each shot's job narrow. If you try to cram reveal, action, emotional beat, and closing frame into one prompt, the result usually feels muddled. Short AI video works best when each segment has one clear narrative function.
Generating Your First Video from an Image
The first scene sets the visual contract for everything that follows. If this clip is unstable, every later shot becomes harder to align.
Start with the cleanest key frame you have and write the prompt around motion, not around biography. Most weak generations happen because the prompt spends too much time describing what's already visible and not enough time describing how the shot should evolve.

Prompt the shot, not the image
If the image already shows a woman holding a perfume bottle in soft studio light, don't waste most of the prompt repeating that. Use the prompt to direct the camera and the action.
Stronger approach:
- “Subtle push-in camera movement”
- “She lifts the bottle slightly and turns her gaze toward camera”
- “Soft fabric movement and gentle hair motion”
- “Luxury beauty advert tone, restrained motion, clean highlight roll-off”
Weaker approach:
- “A beautiful woman with long hair holding a perfume bottle in a luxury setting”
The weak version describes a poster. The stronger version describes a shot.
Keep motion modest on the first pass
Creators often over-prompt movement because they want to see the model doing something impressive. That's fine for a demo. It's a bad way to establish a reusable character or product shot.
For your opening generation:
- Use one core action. A glance, a hand movement, a small posture shift.
- Ask for one camera move. Push-in, slow pan, or locked-off with ambient motion.
- Define mood in a few visual phrases. Don't stack style language endlessly.
- Avoid hard scene transitions inside the same shot. Save those for editing or later clips.
The opening clip serves as your anchor. If the face, product geometry, or wardrobe starts mutating here, the narrative sequence won't recover cleanly.
Read the settings through a creator's lens
Different interfaces label controls differently, but the practical logic stays the same.
- Motion-related controls: push these too high and the shot can become twitchy or structurally unstable. Keep them lower for portraits, products, and branded shots.
- Style adherence controls: useful when you need the look to stay close to the source image. Push too far and motion can feel stiff.
- Prompt influence: if the text overpowers the image, identity may drift. If it's too weak, you get barely any development.
- Aspect ratio and output choices: decide this based on where the clip will live. Vertical, square, and widescreen all change framing pressure.
A simple first-scene example: a café owner launching a new pastry line. Use a still of the owner behind the counter, then prompt for a slight smile, a small hand placement on the pastry box, warm morning light, and a slow camera drift. That gives you a believable opener that can lead into product close-ups later.
After you've got a stable base clip, watch a live walkthrough of the generation flow here:
<iframe width="100%" style="aspect-ratio: 16 / 9;" src="https://www.youtube.com/embed/Q7AShky_2Do" frameborder="0" allow="autoplay; encrypted-media" allowfullscreen></iframe>
What usually works on the first attempt
| Situation | Better prompt direction |
|---|---|
| Portrait subject | Subtle facial expression, gentle posture shift, slow camera move |
| Product shot | Controlled rotation, light sweep, minimal background motion |
| Interior scene | Ambient environmental movement, restrained parallax |
| Fashion frame | Fabric motion, body turn, editorial camera pacing |
Small, believable movement gives you more usable footage than a dramatic prompt that breaks anatomy or product shape.
Crafting Coherent Multi-Shot Narratives
Single-shot prompting teaches mechanics. Multi-shot work is where craft shows up.
The most useful practical constraint is the input strategy described for production workflows: Seedance 2.0 can accept up to 9 images, plus up to 3 video or audio clips of 15 seconds each, and the highest-consistency setups often use one strong key frame plus one or two supplemental reference images to stabilise character identity, composition, and lighting before extending motion, as discussed in the Seedance 2.0 paper summary on arXiv.
That advice sounds simple. In practice, it's the difference between a narrative sequence and visual drift.

Use one identity anchor across every scene
Pick one image as the definitive source of truth for the subject.
That image should define:
- face or product shape
- wardrobe or packaging
- colour treatment
- lighting logic
- overall visual realism level
Then every later shot becomes a controlled variation rather than a reinvention. If shot one is a front-facing hero portrait and shot two is a side-angle walking shot, keep the same anchor image present where possible and add only one supplemental image that introduces the new framing goal.
This is how you stop the common AI video problem where the “same” person becomes a cousin in the next clip.
Think in scene functions
A coherent narrative doesn't need many shots. It needs distinct jobs for each shot.
For short-form branded storytelling, a reliable three-scene pattern is:
-
Establish
Introduce the subject and tone. Minimal movement. Strong visual identity. -
Develop
Add action or context. Product interaction, environmental change, or emotional beat. -
Resolve
End on clarity. Hero product frame, direct-to-camera moment, or branded payoff.
A practical example for a tutoring service could look like this:
- Shot one: student at desk, looking uncertain
- Shot two: same student engaged with notebook and laptop, more energy in the frame
- Shot three: calm, confident close-up with completed work and cleaner composition
The narrative is simple, but the continuity is doing the heavy lifting.
Link clips through repeated visual cues
A common approach is to connect shots with motion alone. A better method is to connect them with repeated cues.
Use at least two of these across adjacent scenes:
- Consistent wardrobe or product placement
- Related camera language
- Matching light direction
- Shared colour accent
- Repeated environmental motif
If your opening uses warm side light and a black backdrop, don't jump into cool overhead light and a busy office unless the story explicitly calls for a change. AI tools can generate difference very easily. They need help maintaining intention.
Continuity often comes from repetition, not complexity.
For teams mapping this visually before generation, a storyboard workflow for Seedance is a useful reference point. The key is to storyboard continuity cues, not just plot beats.
Generate in clusters, not one shot at a time
A non-obvious trick is to generate shots two and three close together while your visual decisions are still consistent. If you leave long gaps between experiments, you often start “improving” the concept until the sequence no longer matches itself.
I've found the most reliable workflow is:
- lock the anchor image
- approve a base look
- draft the three prompts for the sequence
- generate variants in a short batch
- choose the best trio based on continuity, not based on the single prettiest clip
That last point matters. The best standalone shot isn't always the best story shot.
Advanced Style Control and Workflow Optimisation
Most creators underuse advanced controls because the first acceptable result feels like proof the job is done. It usually isn't. The jump from “usable” to “professional” comes from iteration discipline.
Fast and standard modes are where that discipline becomes practical. Seedance 2.0 Fast is described as roughly 3x faster and about 91% cheaper than the standard variant, while the standard image-to-video tier provides 1080p output at about $0.3024 per second versus $0.2419 per second for fast. The trade-off is that fast mode gives up the 1080p option, as noted on Atlas Cloud's reference-to-video page.
That's enough to justify a two-pass workflow.

Use fast mode for decisions
Fast mode is where you test:
- prompt wording
- motion intensity
- whether the framing idea works
- whether a scene belongs in the sequence at all
This is not the stage to obsess over final texture or polished detail. It's a decision stage. You're asking, “Is this the right shot?”
Use standard mode for delivery
Standard mode makes sense when:
- the motion design is already approved
- you need cleaner output for client-facing use
- the edit is locked
- the clip is a final hero shot rather than a rough concept pass
If you render every experiment at maximum quality, you waste time and money. If you keep everything in fast mode, the final delivery may look compromised. Professional workflow sits in the middle.
Workflow note: Test motion cheaply. Finish selectively.
Prompt with cinematic constraints
Better prompts often remove possibilities rather than adding more.
Try language like:
- “restrained camera movement”
- “natural hand motion”
- “clean studio background”
- “no extra objects entering frame”
- “maintain facial identity and outfit consistency”
- “soft atmospheric movement only”
That kind of phrasing narrows the model's creative degrees of freedom. For commercial work, that's usually good.
Example prompts for style control
| Desired Style | Example Prompt |
|---|---|
| Photoreal beauty advert | “Subtle push-in, soft diffused studio lighting, natural skin texture, gentle hair movement, premium cosmetics advert mood, maintain product shape and label clarity” |
| Editorial fashion | “Slow lateral camera drift, confident pose transition, fabric movement, crisp contrast, magazine editorial tone, preserve facial features and outfit details” |
| Cosy lifestyle | “Warm interior light, small hand actions, natural smile, ambient background motion only, relaxed domestic atmosphere, realistic movement” |
| Cyberpunk portrait | “Neon reflections, controlled head turn, shallow depth feel, moody urban sci-fi atmosphere, preserve costume silhouette and facial identity” |
| Product hero shot | “Locked composition with minor rotation, specular highlights moving across surface, premium commercial finish, no background clutter, maintain packaging accuracy” |
Negative direction matters
Even when a tool doesn't expose a formal negative prompt box, you can still use corrective language inside the prompt. “No extra limbs”, “avoid exaggerated motion”, “no text distortion”, and “keep background stable” can help steer generations away from common failure modes.
The best optimisation habit isn't secret prompt wording. It's keeping notes. Save the exact versions that worked for portraits, product turns, environmental shots, and transitions. Over time, you build your own prompt library based on repeatable visual outcomes rather than luck.
Troubleshooting Issues and Finalising Your Video
AI video isn't a magic button. It's closer to directing a very fast assistant that still needs supervision.
That matters because some of the most important buyer questions are still under-addressed. Existing guides don't answer common issues such as how often image consistency breaks, what editing is still required, or whether the model creates copyright, consent, or watermarking risks in UK use cases. That gap matters because UK creators and businesses are under increasing pressure to disclose AI use, according to this overview of Seedance image-to-video limitations.

Fix the common visual problems first
If a shot flickers or feels unstable, don't immediately rewrite the whole prompt. Isolate the likely cause.
- Face drift across shots: reuse the same anchor image and reduce competing references.
- Unnatural motion: simplify the action. Hands, walking, and object interaction often improve when the movement request is shorter and less ambitious.
- Style inconsistency: remove decorative style terms that conflict with the source image.
- Background chaos: choose a cleaner source image or ask for reduced environmental motion.
A lot of fixes come from subtraction. Fewer instructions. Fewer references. Narrower movement.
Expect to edit after generation
Professional output usually still needs a finishing pass in an editor.
That may include:
- trimming awkward first and last frames
- tightening transitions between clips
- matching colour between shots
- adding text, music, or legal overlays
- replacing weak audio with clean post-production sound
If you treat raw generations as final exports every time, the work often looks unfinished. Even small edits make AI video feel intentional.
Handle compliance like a producer
This part gets ignored until a client asks the obvious questions.
If you're generating recognisable people, branded assets, or educational content, check:
| Area | Practical question |
|---|---|
| Consent | Do you have the right to use the person's likeness as a reference? |
| Copyright | Are your source assets owned, licensed, or approved for this use? |
| Disclosure | Does the project or client require clear disclosure of AI-assisted production? |
| Branding | Has the model altered logos, packaging, or identifiers in ways that need correction? |
If a generated shot creates legal uncertainty, it isn't production-ready, no matter how good it looks.
Export for the channel, not for your ego
Final delivery should follow the destination. A polished vertical social clip needs different framing discipline from a widescreen internal presentation. Don't default to one ratio just because the original image looked good there.
Before export, run one last review:
- Is the story readable without explanation?
- Does the character or product remain recognisable in every shot?
- Do transitions feel intentional?
- Have any AI artefacts slipped through in hands, text, reflections, or branding?
- Does the final cut need AI disclosure for your use case?
That last review is where the project stops being a generation exercise and becomes a deliverable.
If you want to put these workflows into practice, try building a three-shot sequence directly in Seedance. Start with one anchor image, add one supporting reference, keep the first motion brief restrained, and judge success by continuity across the full sequence rather than by the flashiest single clip.
Ready to create your own AI video?
Turn ideas, text prompts, and images into polished videos with Seedance. If this article helped, the fastest next step is to try the product.
Free credits on signup. Plans from $20/month.
Related Articles
More posts in the same locale you may want to read next.
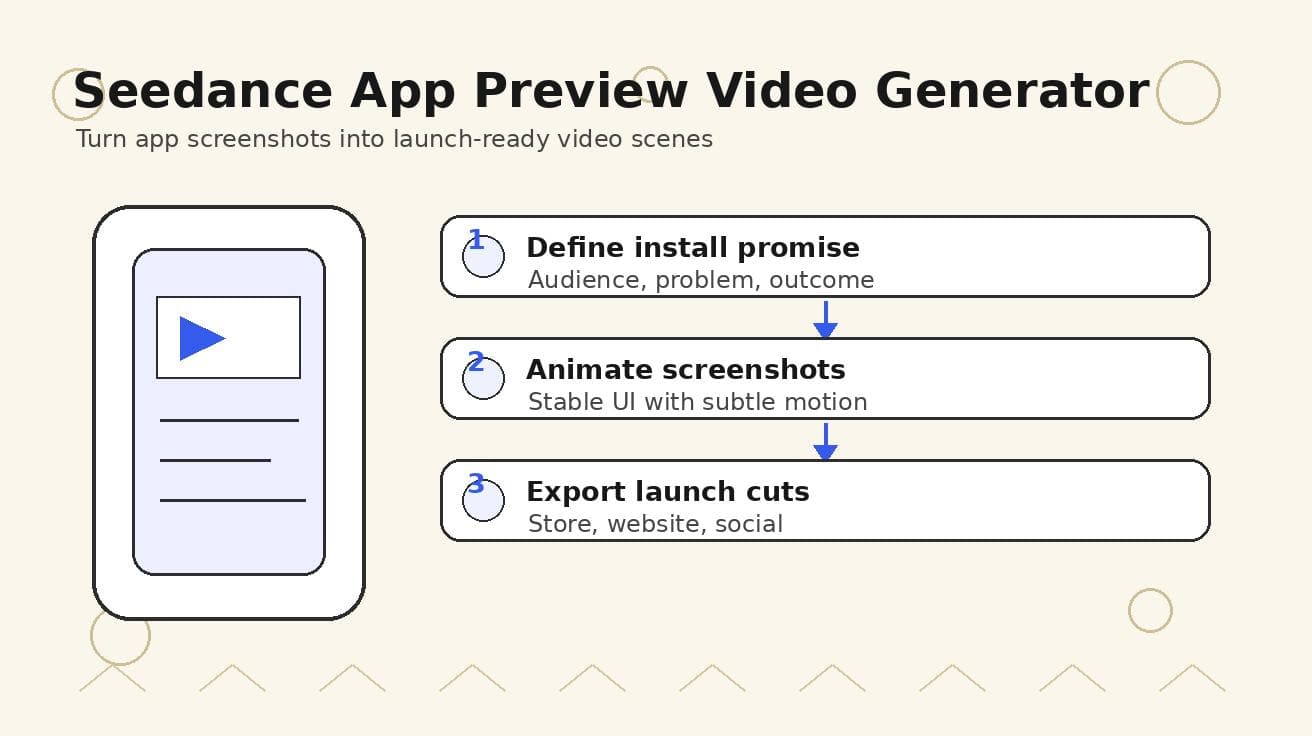
Seedance App Preview Video Generator 2026: Create App Store and Product Launch Clips
Use Seedance to turn app screenshots, feature copy, and launch goals into App Store previews, Google Play promo videos, and product launch clips.
Read article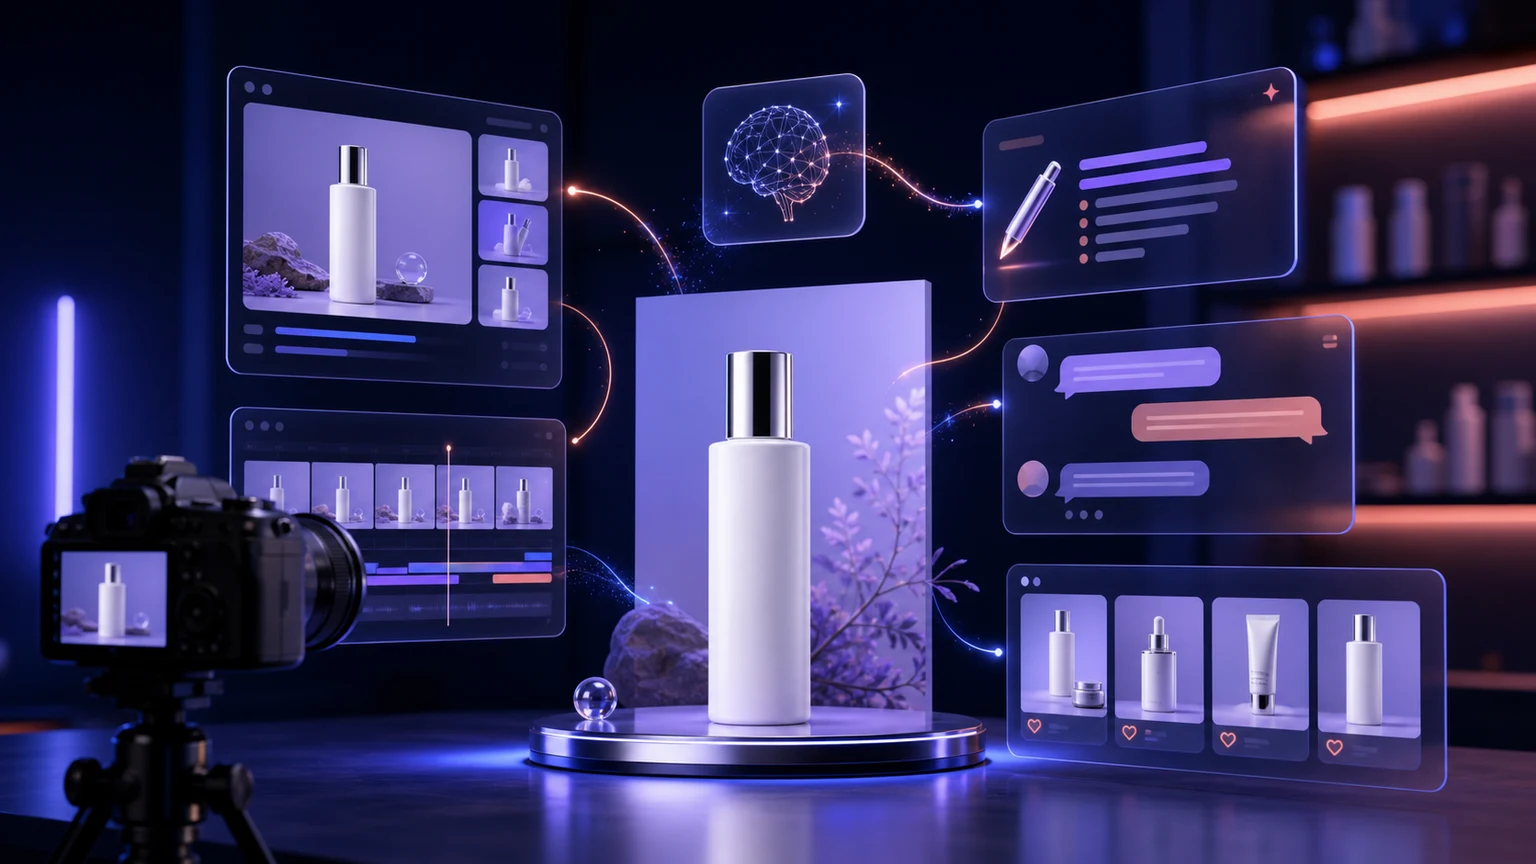
Best AI Ecommerce Tools in 2026: Boost Sales, Cut Costs, and Grow Faster
Compare the best AI ecommerce tools for product videos, photos, copy, support, personalization, and marketing—and build a practical AI workflow for your store.
Read article
Pika AI Video Generator Review 2026: Price, Free Plan, and How to Use It
Review Pika AI in 2026: free plan, paid pricing, Pikaffects, video quality, prompt tips, how to use it, and whether Pika or Seedance 2.0 is the better value.
Read article