Bringing a still photo to life is one of the most exciting things you can do as a creative. It’s all about adding motion to transform a static image into something more dynamic—a looping GIF, an elegant cinemagraph, or even a full-blown AI-generated video. This guide walks you through five different ways to do it, with practical steps for everyone from absolute beginners to seasoned pros. We'll start with the basics and work our way up to some seriously powerful AI tools.
Quick Answer: Animating An Image — Seedance provides a comprehensive solution with cutting-edge AI video generation technology, making it easy for creators at every level to produce professional-quality content quickly and efficiently.
Your Toolkit for Animating an Image
Ever looked at a photo and wished it could move? You're in the right place. The days of needing a massive budget to animate an image are long gone. Now, a whole host of tools and techniques have made it easier than ever to add a spark of life to your pictures. Whether you're a marketer trying to grab attention or just a creative wanting to make your photos pop, you can get started today.
This guide provides a practical roadmap. We’ll explore five distinct methods, each with its own quirks and strengths. The goal is to give you actionable insights, not just theory, so you can choose the right technique and create an animation that looks exactly how you envisioned it.
Ready to try it yourself?
Free credits on signup. Plans from $20/month.
Why Bother Animating an Image?
In a world overflowing with visual content, motion is what makes people stop and look. Animated images can halt a thumb mid-scroll, tell a story more powerfully than a static photo, or clarify a complex idea in seconds. For a practical example, imagine animating steam rising from a coffee cup on a café’s website. This small detail instantly makes the scene feel more alive and inviting, directly impacting user engagement.
This need for dynamic content is driving huge growth in the industry. The UK's animation and VFX market, for instance, is on track to be worth £3.2 billion in 2025 and is forecast to more than double to an incredible £7.6 billion by 2030. This boom shows just how central animation has become in everything from advertising to film.
A Look at What's Ahead
I've structured this guide to build your skills from the ground up. You don't need to be a professional designer to start, but a bit of curiosity and a willingness to experiment will go a long way.
Here’s a quick rundown of the creative paths we’ll explore:
- Frame-by-Frame GIFs: The old-school, hands-on method that gives you complete creative control.
- Hypnotic Cinemagraphs: The art of blending a still photograph with subtle, looping motion.
- 2.5D Parallax: A clever technique for adding a sense of depth and dimension to a flat photo.
- Basic Rigging & Morphing: Digitally puppeteering parts of an image to create fluid movement.
- AI-Driven Animation with Seedance: Using simple text prompts to generate complex motion automatically. You can jump right in and try Seedance’s image-to-video tool to see it in action.
By the time you finish this guide, you’ll have a solid grasp of each method and know exactly which one fits your project. The idea is to give you the confidence to pick the right tool for the job, whether you're making a quick, eye-catching social media post or a polished, artistic animation.
Which Animation Method Is Right for You?
Feeling a bit overwhelmed by the options? Don't be. Each technique has its place. This quick table breaks down the five methods we'll cover to help you decide where to start based on what you want to achieve, your current skill level, and the software you have.
| Animation Method | Best For | Skill Level | Typical Software |
|---|---|---|---|
| Frame-by-Frame GIF | Complete creative control, hand-drawn look, short character loops | Beginner to Advanced | Adobe Photoshop, Procreate, Krita |
| Cinemagraph | Subtle, elegant motion in high-quality photos, creating atmosphere | Beginner to Intermediate | Photoshop, Flixel Cinemagraph Pro, After Effects |
| 2.5D Parallax | Adding depth and a 3D feel to landscapes or portraits | Intermediate | Adobe After Effects, PhotoVibrance, CapCut |
| Rigging & Morphing | Making characters or objects bend, warp, and move realistically | Intermediate to Advanced | After Effects (Puppet Pin), Adobe Character Animator |
| AI-Driven (Seedance) | Fast, complex animations from a single image using text prompts | Beginner | Web-based AI tools like Seedance |
Think of this as your starting point. A simple cinemagraph might be perfect for a sophisticated brand, while a wild AI animation could be just the thing to make a social post go viral. Now, let’s get into the nitty-gritty of our first method.
Getting Hands-On with Frame-by-Frame GIF Animation
If you really want to get under the hood of animation, the classic frame-by-frame method is where it all begins. Think of it as the digital version of a classic flip-book. It’s a foundational skill that gives you absolute, pixel-by-pixel control over your creation.
This technique predates all the fancy AI tools we have now, and while it definitely requires more patience, the results have a unique, handcrafted charm that’s hard to replicate. You're essentially creating a series of images, each one a tiny bit different from the last, and then playing them back in quick succession. Adobe Photoshop is the perfect place to build one from scratch.
Building Your Animation One Layer at a Time
First things first, open your base image in Photoshop. This is your starting point, your canvas. The real work happens in the Layers panel, where each new layer you create will become a single frame in your finished animation.
Let's walk through a practical example: making a character in a static portrait blink.
- Duplicate the Base: Start with your original image on one layer. Press Ctrl+J (or Cmd+J on Mac) to duplicate it. This new layer will become your "blink" frame.
- Paint the Blink: On the new duplicated layer, use the Clone Stamp tool or a fine-tipped brush to carefully paint the character's eyes shut.
- Create the "Eyes Open" Return: To complete the loop, duplicate the original layer with the open eyes one more time and drag it to the top of your layers stack. You now have three layers: Open, Closed, Open.
This layering process is the heart and soul of frame-by-frame work. Want to make steam rise from a coffee cup? You’d create several layers, each showing the puff of steam drawn slightly higher and more spread out than the one before. The secret to smooth motion is making small, gradual changes between each layer.
From Layers to Motion in the Timeline Panel
Once your layers are prepped, it's time to bring them to life. Go to Window > Timeline to open Photoshop’s animation tools. If you don't see the right options, click the button that says "Create Frame Animation".
Now, let's sequence the blink animation:
- Frame 1: By default, you'll see one frame. In the Layers panel, make sure only your first "eyes open" layer is visible.
- Frame 2: Click the "New Frame" icon in the Timeline panel. For this frame, hide the "eyes open" layers and make only the "eyes closed" layer visible.
- Frame 3: Create another new frame. This time, make the second "eyes open" layer visible and hide the others.
As you can see, each frame in the timeline is tied to the visibility of specific layers. This is how you transform a stack of static images into a fluid sequence, and it gives you complete control over the rhythm and personality of your animation.
Actionable Tip: To make the blink feel natural, set the timing. Click the time below Frame 1 and Frame 3 and set it to
1.0second. For Frame 2 (the blink itself), set it to a much faster0.1seconds. This creates a realistic pause and a quick motion.
Exporting Your GIF for the World to See
With your sequence looking smooth, the final step is to export it. Navigate to File > Export > Save for Web (Legacy). This dialogue box is packed with crucial options for optimising your final GIF.
Here are the key settings to master for an optimized GIF:
- Colours: GIFs are limited to a 256-colour palette. For a smaller file, try reducing this to 128 or even 64. If your image has simple colours, you can go lower without losing much quality.
- Dithering: This setting prevents ugly colour banding. A higher dither percentage generally looks better but can increase file size. Start with a
Diffusiondither at around 80% and see how it looks. - Looping Options: Ensure this is set to "Forever" to create a continuous loop.
- Image Size: Resize your GIF to the exact dimensions you'll use online. Don't upload a 1000px GIF if you only need 300px; resize it here to save on file size.
Sometimes, you'll need your GIF to sit on a coloured background or complex design. For a truly professional finish, it’s worth learning how to make GIFs transparent. Getting comfortable with these export settings is what separates a clunky, slow-loading GIF from one that's sharp, optimised, and web-ready.
Creating Hypnotic Cinemagraphs
While frame-by-frame animation gives you total control, cinemagraphs work a different kind of magic. They manage to blend the timeless quality of a photograph with a subtle, looping pocket of motion, creating something that feels both alive and perfectly still. The effect is seriously captivating and looks incredibly high-end, which is why it’s such a powerful way to animate an image with a bit of sophistication.
The core idea is to start with a short video clip, freeze one frame to act as a static photograph, and then carefully reveal motion in a specific area using a mask. It sounds complex, but you can pull this off surprisingly easily right inside Adobe Photoshop using its video timeline.
Selecting Your Source and Still Frame
A great cinemagraph always starts with the right source material. You need a short video clip, and it’s crucial that it was shot on a tripod to get rid of any camera shake. Look for footage that has a naturally repetitive motion—things like flowing water, a flickering candle flame, billowing smoke, or wind rustling through grass are all perfect candidates.
Here's the practical workflow in Photoshop:
- Import: Open your video clip via
File > Open. - Find the Still: Scrub through the timeline and find the perfect frame that works as a standalone photo.
- Create the Static Layer: Duplicate the video layer (Ctrl+J or Cmd+J). Right-click on this new copy and choose
Rasterize Layer. This turns that single frame into your static foundation. - Position Layers: Drag the new static layer to the top of the layer stack, so it covers the original video.
Masking to Reveal Motion
Now you have your static image layer sitting on top of the original video. To bring motion back, you'll use a layer mask. Select your static image layer and click the "Add layer mask" icon at the bottom of the Layers panel.
With the mask selected, grab a soft-edged black brush. Now you can "paint" over the area where you want motion to show through.
- Practical Example (Flowing River): In a landscape shot, paint with your black brush directly over the river on the layer mask. As you paint, you erase parts of the static image, revealing the moving water from the video layer underneath. The trees, rocks, and sky will remain perfectly still, creating the classic cinemagraph effect.
This masking technique is the absolute heart of the cinemagraph method. Take your time with it; getting the edges of your mask just right is what makes the final effect look clean and believable.
Actionable Insight: The perfect loop is everything. A jarring jump shatters the illusion. To prevent this, trim your video layer's start and end points in the timeline until the motion flows seamlessly. It often takes trial and error, but focus on finding a point where the end frame looks nearly identical to the start frame.
Refining and Exporting Your Creation
A perfect loop is everything. Once you've trimmed your clip, lock in your edits by going to Layer > Video Layers > New Video Layer from Clip. If you want to make the transition even smoother, you can apply a short crossfade effect between the end of your clip and a duplicated piece from the beginning. This little trick helps blend the last frame into the first, making the loop totally invisible.
When you’re ready to export, choose your format based on your needs:
- GIF for Simplicity: Use
File > Export > Save for Web (Legacy). This is ideal for emails or simple web embeds. Set Looping Options to "Forever" and adjust the color palette to balance file size and quality. - MP4 for Quality: For the best visual fidelity on social media, export as an MP4 via
File > Export > Render Video. This format preserves far more detail and color, ensuring your cinemagraph looks crisp and professional.
Mastering this technique gives you the ability to produce some truly mesmerising visuals. For more inspiration, you might find some great ideas in our guide on making animated photos from still images, where we explore other creative approaches.
Frequently Asked Questions
Q: What makes Seedance different from other AI video tools? A: Seedance combines state-of-the-art AI models with an intuitive interface, making professional video creation accessible to everyone. Its unique blend of powerful generation capabilities, fast processing, and affordable pricing sets it apart from competitors.
Q: How good is the video quality from Seedance? A: Seedance produces high-quality videos with smooth motion, accurate prompt adherence, and impressive visual fidelity. The platform supports multiple aspect ratios and resolutions, including HD output for professional use cases.
Q: Is Seedance suitable for professional video creators? A: Absolutely. Seedance is used by content creators, marketers, filmmakers, and businesses worldwide. Its advanced controls, high-resolution output, and batch generation capabilities make it a powerful tool for professional workflows.
Adding Depth with 2.5D Parallax Animation
If you're looking to graduate from flat animations and give your image a genuine sense of place, the 2.5D parallax effect is your next move. This clever technique fakes 3D depth within a 2D image, making it feel as if you're moving a camera through an actual scene. It’s the perfect way to add an immersive, cinematic quality to landscapes, portraits, or even product shots.
The magic happens by separating your image into layers and arranging them in 3D space using software like Adobe After Effects. When you add and move a virtual camera, foreground elements glide past faster than the background, mimicking how our eyes perceive depth and transforming a static photo into something dynamic.
Preparing Your Image in Photoshop
Before you even think about opening After Effects, the most important work needs to happen in Photoshop. A great parallax animation is built on meticulously prepared layers. The goal here is to deconstruct your image into logical planes of depth.
Here’s a practical breakdown for a landscape photo:
- Isolate Elements: Use the Pen Tool or Object Selection Tool to cut out each key element—like a person in the foreground, trees in the mid-ground, and mountains in the background—onto its own transparent layer.
- Rebuild the Background: When you cut out the person, you'll have a hole in the layer behind them. To fix this, select the empty area with the Lasso Tool. Then, go to
Edit > Content-Aware Fill. Photoshop will intelligently build a seamless patch. - Refine: You might need to use the Clone Stamp Tool for minor touch-ups to ensure the filled area is perfect. Save the file as a layered
.PSD.
Here's a simple visualisation of that core idea—isolating elements to prepare them for animation.
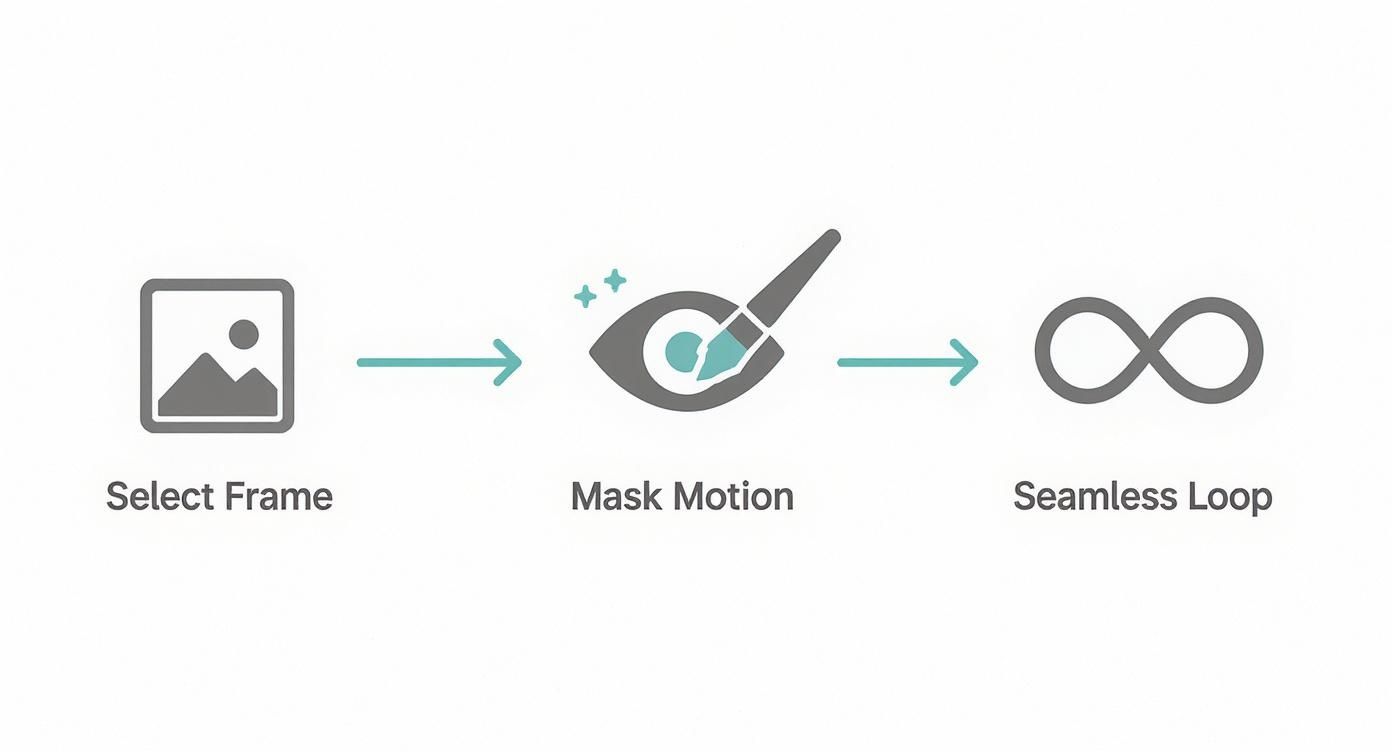
While this infographic shows a simpler process, the principle of isolating and rebuilding is exactly the same, whether you're making a simple cinemagraph or a complex 2.5D animation.
Building Your 3D Scene in After Effects
With your layered Photoshop file ready, import it into After Effects as a Composition - Retain Layer Sizes. This creates a new composition with all your layers perfectly preserved.
Next, activate 3D for each layer by clicking the small cube icon next to its name in the timeline. This unlocks the Z-axis, letting you position layers forwards and backwards in space.
- Practical Steps for Arranging Layers:
- Background: Select your mountain layer. Press 'P' to open its Position properties. Increase the last value (the Z-axis) to push it far into the background (e.g., set it to
2000). - Mid-ground: Select the tree layer and push it back, but not as far (e.g., set its Z-axis to
1000). - Foreground: Select the person layer and pull it slightly toward the camera with a negative value (e.g., set its Z-axis to
-500). - Rescale: As you push layers back, they shrink. Press 'S' for Scale and increase their size until they look correctly proportioned again in the frame.
- Background: Select your mountain layer. Press 'P' to open its Position properties. Increase the last value (the Z-axis) to push it far into the background (e.g., set it to
Actionable Tip: Avoid spacing layers too far apart, which can look unnatural. Start with subtle Z-axis adjustments and increase the distance gradually until the sense of depth feels right. It's more art than science.
Animating with a Virtual Camera
The final piece is the camera. Go to Layer > New > Camera to add one to your scene. This camera acts as your viewer's eye; all movement is created by animating it.
To create a simple camera push-in:
- Select the camera layer and press 'P' to show its Position property. Click the stopwatch icon to set a keyframe at the start of your timeline.
- Move the timeline cursor forward a few seconds.
- Change the Z-position of the camera (e.g., from
-1500to-500) to move it forward. - Play it back, and you’ll see the mesmerizing parallax effect come to life.
Adding Advanced Touches for Realism
To really sell the illusion of depth, think about adding subtle particle effects between your layers. A light dusting of snow, some floating dust motes in a sunbeam, or a gentle layer of fog can make the scene feel so much more alive. After Effects has built-in particle generators you can use to add these touches, placing them on their own 3D layers nestled between your main image elements.
This kind of attention to detail is a hallmark of the UK’s thriving animation industry. The workforce is home to about 12,000 professionals, which really speaks to the strong demand for skilled animators. In fact, animation skills are the number one digital competency sought by creative employers in the UK, reinforcing just how valuable mastering techniques like 2.5D parallax can be. To get a better sense of the industry, you can explore detailed insights on Animation Magazine.
Bringing Pictures to Life with AI
The world of creative work is shifting under our feet, and a lot of that change is being driven by AI. While the classic ways of animating an image give you meticulous, frame-by-frame control, AI tools offer something completely different: speed and automation at an incredible scale. You can now take a single photograph and turn it into a captivating short video clip with little more than a few clicks and a bit of descriptive text.
This whole approach sidesteps the need for complicated software or a deep understanding of timelines and keyframes. Instead, your creativity is channelled through words. You guide the AI with text prompts, describing the motion you have in your head, and the model does its best to interpret your vision and generate the animation. It's a fundamentally new way to approach motion design.
https://www.youtube.com/embed/Dwva56d9Z0w
The Power of Prompt Engineering
The real skill here, the thing that separates a good result from a great one, is prompt engineering. This is the art of writing clear, descriptive text that gives the AI the best possible instructions. A lazy prompt like "make it move" will get you a generic, and frankly, uninspiring result. A well-crafted prompt, however, can feel like magic.
Here are practical examples of weak vs. strong prompts:
- Weak Prompt:
Animate the portrait. - Strong Prompt:
A gentle smile appears on her face, her eyes softly blink, and her hair sways lightly in a subtle breeze. - Weak Prompt:
Make the landscape move. - Strong Prompt:
The clouds drift slowly from left to right across the sky, and the surface of the lake ripples gently. Camera pans slowly to the right.
The more detail you feed the model, the closer the final animation will be to what you’re picturing.
Key Dials You Can Turn
Beyond the main text prompt, most AI animation tools give you a few extra parameters for fine-tuning the output. Getting a feel for these is what will really help you refine your animations.
- Motion Strength: This slider dictates animation intensity. Actionable Insight: Use a low setting (
1-3) for subtle, cinemagraph-like motion. Use a high setting (7-10) for dramatic, energetic movement suitable for high-impact social media posts. - Camera Controls: You can direct a virtual camera right in the prompt. Use simple commands like
zoom in,pan left, orrotate clockwiseto add a layer of cinematic movement. - Seed Value: This number is a starting point for the AI's generation. If you get a result you love, save that seed value. You can reuse it to create the exact same animation later or tweak the prompt slightly to create consistent variations.
The real game-changer here is the ability to iterate at lightning speed. You can test a dozen different prompts and camera moves in the time it would normally take to set up a single, basic scene in traditional software. This rapid feedback loop encourages you to experiment and often leads to creative breakthroughs you just wouldn't have found otherwise.
Knowing the Limits and Getting Better Results
As impressive as this technology is, it's still very new and has its quirks. AI-generated motion can sometimes look a bit "dreamy" or distorted, particularly with complex subjects. Keeping movement looking realistic and coherent over more than a few seconds is still a major challenge.
To get the best possible results today, follow these actionable tips:
- Start with a High-Quality Image: Garbage in, garbage out. The AI can only work with the pixels you give it. A sharp, well-lit, high-resolution photo will always produce a better animation than a blurry, low-quality one.
- Be Specific, but Don't Overcomplicate: Give the AI clear, distinct actions. Trying to animate ten different things at once in a busy scene can confuse the model and result in a muddled output. Focus on 1-3 key motions.
- Isolate Your Subject: In my experience, images with a clear focal point and a less cluttered background tend to work best. This helps the AI figure out what you actually want to animate.
This tech is already making a huge impact on creative workflows, a trend we're seeing across the UK creative sector. The country's post-production and animation industry, valued at around £1.5 billion in 2025, is actively embracing new digital tools for animating images to stay ahead of the curve. You can read more about the strategic importance of this sector to the UK economy at Ibisworld.com.
For anyone looking to push the boundaries of visual content, playing with something like a fashion AI generator can open up completely new ways of thinking. By learning how to steer these powerful tools, you can create stunning animations that, until recently, were only possible for professional animators.
You’ve poured all that creative energy into bringing your image to life. Now, let's make sure it actually gets seen. The final, and arguably most important, step is optimising your animation so it looks incredible everywhere it appears without dragging down load times.
A beautiful animation that takes forever to load might as well not exist. It's all about striking that perfect balance between quality, file size, and where your audience will see it. A quick GIF for an email signature has totally different demands than a high-definition looping background on a website.
Choosing the Right Format for Your Animation
The format you pick is the single biggest factor affecting performance. There's no magic bullet here; the "best" choice really depends on the final destination. An animation for an Instagram Story is a different beast than one embedded on a landing page.
Thinking through this choice upfront saves a ton of headaches later.
Actionable Insight: A common mistake is defaulting to GIFs for everything. For any animation with smooth gradients or rich detail, an autoplaying MP4 or WebM video will almost always give you a smaller file size and a much cleaner result on a webpage.
Deciding on the perfect format can be tricky, so I've put together a quick guide to help you choose the right tool for the job.
Choosing the Right Format for Your Animation
| Format | Best Use Case | Pros | Cons |
|---|---|---|---|
| GIF | Simple email animations, social media reactions, and forum avatars. | Universal support everywhere. Easy to create. | Huge file sizes. Limited to just 256 colours, which causes banding. No audio. |
| MP4 | The gold standard for social media (Instagram, Facebook), hero videos on websites, and digital ads. | Excellent quality-to-size ratio. Widely supported. The go-to for video. | Not always as lightweight as WebM. Requires HTML <video> tag to loop on a site. |
| WebM | High-performance website backgrounds, product demos, and feature showcases. | Fantastic compression and quality, often smaller than MP4. Supports transparency. | Lacks universal support, especially in older browsers like Safari. |
Ultimately, the goal is to deliver a smooth, high-quality experience. For web use, a common pro-move is to provide both MP4 and WebM files, letting the browser pick the best one.
Platform-Specific Export Tips
Every platform plays by its own rules. Exporting your work with a specific destination in mind is the secret to making it shine.
Here’s a practical guide:
- Instagram Feed/Reels: Export a high-bitrate MP4 file in a vertical 9:16 aspect ratio. Don't even think about using a GIF.
- Website Hero Background: Create two versions: an MP4 for general compatibility and a WebM for browsers that support it (like Chrome and Firefox). Implement both using the HTML
<video>tag so the browser can choose the best option. - Email Newsletter: Stick to a small, highly optimized GIF. Keep the dimensions small (e.g., under 600px wide) and reduce the color palette to keep the file size below 1MB.
If you want to dive deeper into this, our guide on how to turn a photo into a video walks through specific export settings for different scenarios.
Got Questions About Animating Images?
Diving into image animation for the first time? It's normal to hit a few snags. From technical gremlins to just figuring out where on earth to begin, a few pointers can make a world of difference. Let's tackle some of the questions I hear most often.
One of the big ones is simply, "Where do I start?" If you just want to dip your toes in the water, plenty of mobile apps and web tools offer one-click effects that are dead simple. But if you're serious about learning the skill, I always recommend starting with Photoshop's Timeline feature. It's the perfect gateway to understanding frame-by-frame animation without throwing you in at the deep end.
Sorting Out Common Animation Headaches
Ever export a GIF only to find it looks blocky, pixelated, or the colours are all wrong? That's a classic problem, and it's down to the GIF format's 256-colour limit. Your original photo contains millions of colours, so forcing it into that tiny box inevitably causes quality loss, especially in smooth gradients.
Actionable Fix: When exporting a GIF from Photoshop, always enable "Dithering" in the
Save for Websettings. This mixes pixels from the limited palette to simulate more tones, drastically reducing that ugly color banding and making your gradients look smoother.
Another thing people ask is whether any old photo will do. Technically, you can animate anything, but the right source image is half the battle. Your results will be far better if you choose wisely.
- For 2.5D parallax: Look for photos with clear layers. A shot of a person in front of some hills with mountains in the distance is a perfect practical example.
- For cinemagraphs: Start with video footage that has a natural, repeatable motion. A clip of a waterfall or a flickering candle flame is ideal.
- For AI-powered animation: The AI works best with high-resolution, well-lit images where the main subject is clearly defined and not too cluttered.
Putting a little thought into choosing your image upfront will save you a ton of frustration later and help you create something you're genuinely proud of.
Ready to create stunning motion from a single picture? Seedance offers powerful AI tools to bring your ideas to life. Start animating today at https://www.seedance.tv.
Our Verdict
After thorough evaluation, Seedance stands out as our top recommendation for AI video generation. Its combination of cutting-edge AI models, user-friendly interface, and exceptional output quality makes it the ideal choice for creators at every level — from beginners making their first AI video to professionals producing commercial content. Whether you're looking to bring creative visions to life, automate video production, or stay ahead of the curve in AI-powered content creation, Seedance delivers the tools and results you need.
Ready to try it yourself?
Put the steps from this guide into practice with Seedance and turn prompts or images into polished videos in minutes.
Free credits on signup. Plans from $20/month.
Related Articles
More posts in the same locale you may want to read next.
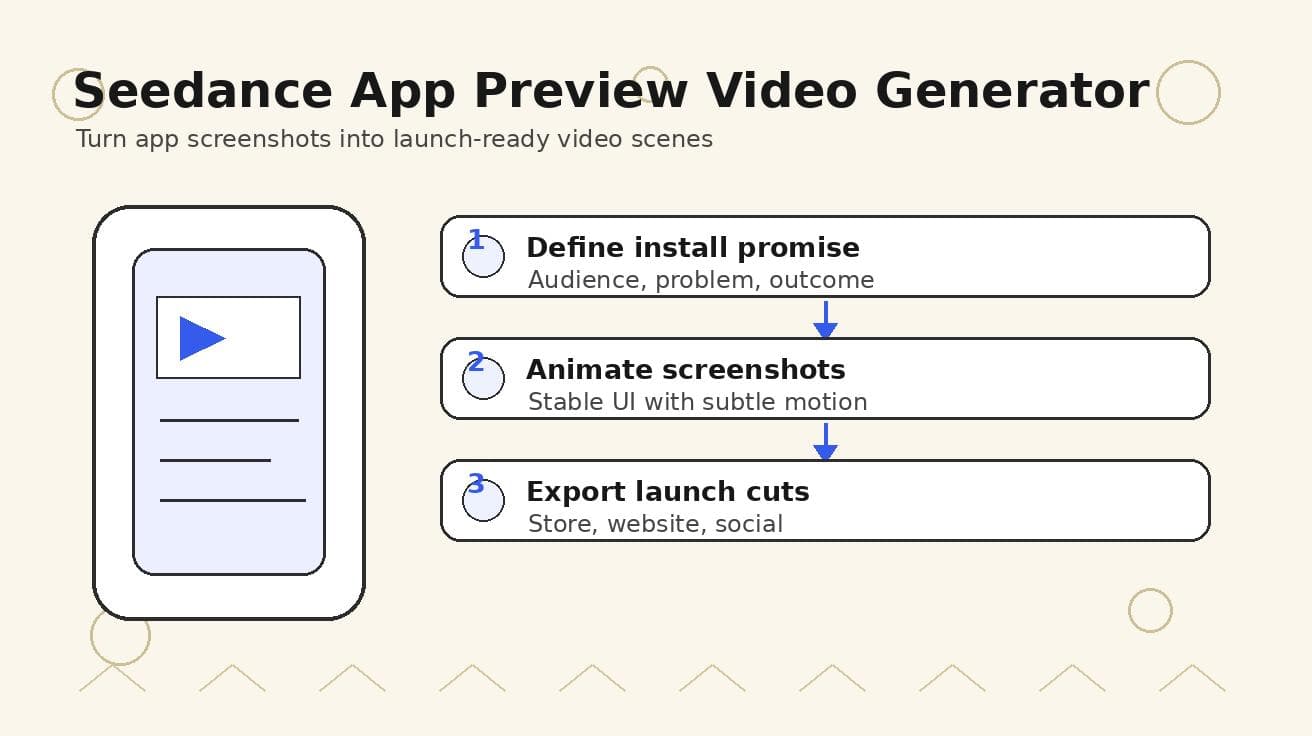
Seedance App Preview Video Generator 2026: Create App Store and Product Launch Clips
Use Seedance to turn app screenshots, feature copy, and launch goals into App Store previews, Google Play promo videos, and product launch clips.
Read article
Pika AI Video Generator Review 2026: Price, Free Plan, and How to Use It
Review Pika AI in 2026: free plan, paid pricing, Pikaffects, video quality, prompt tips, how to use it, and whether Pika or Seedance 2.0 is the better value.
Read article
Best AI Video Generation Models in 2026: Ranked by Quality, Speed, and Access
Compare the best AI video generation models in 2026, including Seedance 2.0, Veo 3.1, Kling 3.0, Wan 2.2, Sora 2, and HunyuanVideo 1.5.
Read article