A clip can have strong styling, clean lighting, and a good subject, then still fall flat the moment it starts moving. The usual problem is camera intent. The frame changes, but the shot does not feel directed.
Seedance 2.0 responds better when prompts read like shot instructions instead of visual description. Describe the camera path, the subject relationship, and the timing, and the model has something concrete to execute. Stay vague, and it tends to produce motion that feels ornamental rather than purposeful. If you want to study the model's current feature set before writing prompts, the official Seedance 2.0 video generation platform is the right reference point.
That matters because camera movement does real storytelling work. A push-in builds emphasis. An orbit adds dimensionality. A lateral pan creates depth if foreground, midground, and background are clearly separated. Each move changes what the viewer notices first, how scale is perceived, and whether the scene feels controlled, energetic, intimate, or unstable.
Ready to try it yourself?
Free credits on signup. Plans from $20/month.
The trade-off is control versus complexity.
Seedance usually performs best when one movement leads the shot and the rest of the prompt supports it. If a prompt asks for an orbit, a tilt, a rack focus, a crash zoom, and drifting handheld texture all in one pass, the model often averages those instructions into something soft and indecisive. Cleaner prompts give better motion. That is the practical rule behind every example in this playbook.
The same discipline applies if you come from live-action production. Prompting camera movement still benefits from understanding how real rigs behave, which is why this guide to filming equipment for B2B content is a useful companion. It helps frame your decisions the way an operator, DP, or editor would frame them on set.
The sections below focus on the why and the how for each move. You will see where a movement earns its place, where it tends to break down, how to phrase it for Seedance 2.0, and how to adapt it across product shots, branded content, environments, and transitions.
1. Dynamic Orbital Tracking Shot

An orbital tracking shot is one of the fastest ways to make an AI clip feel deliberately staged. The camera rotates around a subject while holding distance, which means you get shape, depth, and environmental context in a single move. For product films, that's a hero shot. For character intros, it creates instant presence.
Seedance 2.0 handles this best when the orbit is treated like one primary instruction, not a bundle of half-related motions. If you ask for orbit, tilt, push, and refocus all at once, the model often simplifies the motion or muddies the frame. That's why I usually write the orbit first, then specify only three extra controls: direction, radius, and timing.
Prompt structure that works
Use this pattern:
- Subject anchor: “camera orbits a matte black trainer shoe on pedestal”
- Direction: “clockwise orbit”
- Distance: “close orbital at 3 feet” or “orbit at 10-foot radius”
- Duration: “complete 360-degree rotation in 4 seconds”
- Frame discipline: “keep subject centred, stable scale, shallow background separation”
A practical example for e-commerce:
Practical rule: If the product has strong silhouette detail, orbit it. If the product's value is in texture or interface detail, push in instead.
Try a prompt like: “Studio product film of a stainless steel espresso machine on a dark stone counter, clockwise orbit at 4-foot radius, complete full rotation in 4 seconds, soft side light reveals metallic texture, keep machine centred in frame, cinematic commercial look.”
Where orbit earns its keep
Orbiting is excellent for:
- Product showcases: A cosmetics brand can reveal packaging shape, cap detail, and label design without cutting.
- Property marketing: A real estate creator can orbit a kitchen island or fireplace to show placement within the room.
- Character reveals: A fantasy or sci-fi intro gains scale when the background opens around the subject.
- Tech demos: Hardware like headphones, tablets, or wearables benefits from multi-angle exposure in one shot.
Seedance 2.0's motion controls become easier to manage when you think in standard camera terms rather than descriptive prose. The model is especially useful when treated like a virtual film set, and guidance around movement labels such as pan, tilt, zoom, dolly, truck, pedestal, crane, orbit, arc shot, tracking, static, push, and pull supports that approach in Vuela AI's Seedance 2 guide. If you want to test the move directly, the Seedance 2.0 video generator is the right place to run short orbit variations quickly.
The main mistake is over-rotating the idea. A smooth orbit doesn't need drama from every parameter. It needs a clear focal point and a background with something worth revealing.
2. Push-In and Reveal Camera Move
A founder steps into frame with a prototype. The opening composition establishes the room, then the camera advances until the machining marks, screen glow, or stamped logo become the story. That is what a push-in is for. It shifts the viewer from context to evidence in one move.
In Seedance 2.0, this shot works best when the reveal is planned before the prompt is written. Start by deciding what the final frame must prove. A reaction in the eyes. A product detail. A line of text on packaging. A finishing touch on a plated dish. Once that endpoint is clear, the move becomes much easier to control.
Write the destination first
Push-ins fail for a simple reason. The prompt asks for forward movement, but it never defines the landing frame.
Build the instruction around five parts:
- Opening composition: “wide studio desk shot” or “medium shot of chef at pass”
- End frame: “tight close-up on engraved bezel” or “close-up of garnish landing on plate”
- Travel amount: “from 12 feet to 3 feet” or “from medium to close-up”
- Timing: “over 4 seconds” or “slow 6-second push”
- Optical behavior: “subtle depth-of-field tightening” or “keep focus locked on subject”
A workable Seedance prompt looks like this: “Luxury watch commercial, push in from medium product setup to tight close-up of textured dial over 4 seconds, camera movement smooth and deliberate, reflections controlled, background falls softer as the watch face fills frame, premium editorial lighting.”
That structure gives the model less room to improvise. It also reads like a shot brief an editor or DP would hand off.
Where this move earns its place
Push-ins are strongest when the scene has a withheld detail. Beauty campaigns use them for cap removal, label reveals, and texture shots. Education clips use them to isolate the step that matters. Food videos use them at the exact moment the surface cracks, sauce hits, or steam rises. In interviews, a slow push can turn a neutral talking head into a statement beat if the line delivery supports it.
The trade-off is exposure. A push-in does not hide weak art direction. It amplifies it. If the destination frame lacks texture, clean edges, or a clear subject hierarchy, the shot feels smaller as it gets closer.
I usually test the end frame as a static image first. If that close-up would not hold on its own, the push-in will not save it.
Prompt tactics that improve the reveal
Two additions make a big difference in Seedance 2.0. First, specify what should become visible by the end of the move. “Reveal embossed logo,” “reveal handwritten answer,” or “reveal condensation on glass” gives the model a target. Second, control background behavior. A line like “background remains calm and uncluttered” or “foreground elements stay minimal” prevents the reveal from competing with stray detail.
Use focus notes carefully. “Subtle depth-of-field change” is usually enough. Heavy rack-focus language can pull attention away from the forward move unless focus shift is the point of the shot.
A push-in is a commitment shot. Use it when the closer frame contains the payoff, not when you just want motion for its own sake.
3. Parallax Lateral Pan with Depth Layering

A side move across a flat frame looks cheap fast. The same move across a frame with a near object, a clear subject plane, and a distant background reads as depth. That separation is the whole point of parallax in Seedance 2.0.
I use this move when the scene itself needs to carry production value. Interiors, hospitality spaces, retail displays, museum setups, interview environments, and lifestyle product shots all benefit from it. A plant crossing close to lens, a subject anchored mid-frame, and windows or architecture drifting slowly behind can make a simple prompt feel much more spatial.
The trade-off is setup discipline. Parallax is less forgiving than a standard pan because the shot only works if the layers are intentionally spaced. If everything sits on one plane, Seedance gives you lateral motion without depth payoff.
Build the shot from front to back:
- Foreground: leaves, doorway edge, hanging fabric, lamp, bottle, shelf corner
- Middle ground: presenter, chair, table, hero product, reception desk
- Background: wall texture, skyline, curtains, audience, corridor, exterior view
Prompt structure matters here. Seedance responds better when the move, direction, and layer behavior are all spelled out in one instruction. Try a format like this: “Slow lateral pan left to right across boutique hotel lounge, foreground pendant light and plant leaves passing close to camera, middle-ground seating area remains primary subject, background bar shelves and warm wall lighting drift slowly, strong parallax depth, smooth 5-second move.”
That wording gives the model a job to perform, not just a camera term to imitate.
How to adapt the move by scene type
For real estate, use parallax to preserve room scale while adding motion. Put a doorway, countertop edge, or plant in the foreground, then let the kitchen island or living area sit in the middle ground with windows behind it.
For interviews, keep the subject stable and let only the environment create the depth cue. A curtain edge or practical lamp near camera often works better than a busy foreground object that steals attention from the speaker.
For product work, use one large soft foreground shape instead of several small props. Too many passing elements can make the frame feel cluttered, especially if the product itself is compact.
Prompt tactics that improve consistency
Call out speed with restraint. “Slow lateral pan” or “controlled horizontal slide” usually holds up better than aggressive motion language. Name what should pass near camera and what should stay readable. If text, branding, or a face matters, say so directly.
Good examples:
- “Pan right with pronounced foreground parallax, subject remains clearly framed in middle ground”
- “Slow horizontal tracking across workspace, foreground tools pass softly, presenter stays stable, background shelves drift gradually”
- “Lateral pan across dining table setup, near glassware crosses frame, plated dish remains focal point, window view recedes slowly”
A common failure mode is fake parallax that feels like layers pasted on top of each other. Reduce that risk by keeping the foreground simple, the subject clear, and the background visually distinct. In practice, one strong near object usually works better than three weaker ones competing for motion.
Parallax pans are best used when the environment tells part of the story. If the space has no useful layering, choose a different move. If the space does have depth, this is one of the cleanest ways to get Seedance 2.0 to show it.
4. Whip Pan Transition with Motion Blur
A whip pan is speed used as punctuation. It isn't just fast movement. It's a controlled blur that bridges one visual idea into the next. In Seedance 2.0, that makes it useful for music videos, product montages, tutorials, sports edits, and short-form social clips where energy matters.
The shot works because the viewer reads momentum before detail. During the blur, the eye accepts the directional sweep as transition logic. Done well, it feels intentional and rhythmic. Done badly, it feels like the model lost control of the frame.
When to use it and when to stop
Whip pans are strongest between related scenes. A pan from a chef's knife landing on a board into the plated dish works. A pan from a gym trainer counting reps into a close shot of the product logo can work too. A random whip between unrelated spaces usually just looks messy.
Try prompt phrasing like:
- “whip pan right in 0.5 seconds with pronounced velocity blur”
- “fast horizontal whip pan synchronised to beat drop”
- “motion blur bridges workshop scene into finished product reveal”
For tutorial content, use whip pans to compress repetitive setup. A creator showing camera rig assembly can cut from tripod base to mounted camera to final frame test using directional whip transitions that feel continuous.
The practical trade-off
Whip pans can hide weak continuity, but they can also hide your subject. If the audience needs to read packaging text, facial expression, or an interface detail, this isn't the move for that moment. Save it for transitions and bursts of energy.
Another real consideration is prompt complexity. Existing guidance around Seedance 2.0 is mixed. Some advice says combining 2 to 3 movements is manageable and warns that beyond three the model tends to simplify. Other advice says one clear move per shot is more reliable. That uncertainty makes prompt complexity thresholds a useful working principle, especially for fast-turnaround UK social content, as discussed in the Seedance 2 camera movement guide.
Field note: If a whip pan is the transition, let it be the only move that matters in that shot.
For music videos, I'd tie it to a snare hit or bass accent. For sports edits, use it to redirect attention from one athlete or motion path to another. For explainers, keep the blur short and the destination frame simple. The goal is energy with legibility, not chaos.
5. Slow Zoom with Subject Following
A founder is walking a factory floor, still talking, still working, and the frame needs to stay with them while the background starts telling the second half of the story. That is where a slow zoom with subject following earns its place. It keeps attention locked on the person, but it also lets the environment gain narrative weight.
Used well, this move creates intimacy without flattening the scene. The subject stays dominant, yet the room, crowd, workstation, or street remains active in the shot. I use it for interviews that need more than a talking head, brand films where process matters, and documentary moments where the setting carries proof.
How to prompt it so Seedance holds the subject
Seedance 2.0 handles this move best when the instruction separates tracking behaviour from zoom behaviour. If the prompt only says “slow zoom,” the model may drift toward a generic push-in. If it only says “follow subject,” the shot can lose the gradual reframing that makes this move useful.
A reliable prompt structure looks like this:
- Subject anchor: “follow the lead chef as she moves along the prep table”
- Zoom instruction: “slow zoom in 1.2x over 5 seconds”
- Framing rule: “keep subject in the upper centre of frame”
- Background role: “allow kitchen staff and stainless workstations to remain visible”
- Shot tone: “controlled, observational, understated”
Example prompt: “Documentary-style kitchen scene, follow the lead chef as she moves along the prep table, slow zoom in 1.2x over 5 seconds, keep subject in the upper centre of frame, maintain clear view of staff movement and workspace detail, controlled observational tone.”
The trade-off is subtle but important. More zoom creates emotional pressure. More following creates continuity. Push both too far and the shot starts feeling synthetic, like the camera is correcting itself instead of observing.
Where this move earns its keep
This is a strong choice when the subject and the setting need equal billing. A teacher crossing a classroom, a designer reviewing samples in a studio, or a bartender working through service all benefit from that balance. The camera says, “stay with this person,” while the zoom says, “notice the world around them.”
It also solves a common Seedance problem. Static medium shots often feel dead after two seconds, but a bigger move can pull attention away from performance. Subject-following zoom sits in the middle. It adds motion without turning the shot into a reveal or a transition.
For adjacent framing ideas and prompt patterns, the best Seedance 2.0 prompts for scene design and camera control are worth reviewing.
One warning. Do not ask for fast subject motion, aggressive zoom, and perfect centering in the same prompt unless you are ready to lose naturalism. In practice, the cleanest results come from modest movement, clear frame priority, and a subject path the model can predict.
6. Crane-Style Vertical Ascending with Reveal

A guest steps through the venue gate. The shot starts at human height, then lifts above the entry wall and exposes the courtyard, skyline, and crowd layout in one move. That is the job of a crane-style reveal. It changes the viewer's understanding of the space, not just the framing.
Seedance 2.0 handles this move well when the prompt defines three things clearly: where the camera starts, how fast it rises, and what the reveal is supposed to expose. Leave any of those vague and the model tends to drift into a floating drone look, or it tilts upward too early and gives away the reveal before the move has earned it.
Prompting the ascent so the reveal reads cleanly
The best crane prompts are built around spatial intent, not just movement words. “Crane up” is not enough. The model needs a floor plan in sentence form.
Use a structure like this:
- Start position: “begin behind subject at entrance gate”
- Vertical move: “crane up 30 to 40 feet over 4 seconds”
- Reveal priority: “hold subject briefly, then reveal full courtyard and surrounding grounds”
- Stability control: “maintain level horizon, no drone sway, no tilt drift”
Example prompt: “Luxury property exterior at front gate, begin behind arriving guest, crane up 35 feet over 4 seconds, hold level horizon, reveal manicured drive, pool, and tree line, warm late afternoon light, composed premium real-estate tone.”
That last line matters. Tone affects how Seedance interprets motion. “Premium” and “composed” usually produce better restraint than generic cinematic language.
Where this move earns its place
Use the crane ascent when the scene has a payoff above eye level. Event films, hospitality launches, travel openers, campus tours, museum interiors, and large exterior reveals all benefit from that vertical information release. The viewer first gets orientation through the subject, then context through the environment.
It also works well as a section-ending shot. A ground-level sequence can cover texture and action, then the crane reveal widens the story and gives the cut a sense of closure.
For previsualizing that reveal before you write the prompt, the Seedance 2.0 storyboard workflow for planning camera movement is a useful reference.
Trade-offs to control
More height increases spectacle, but it also increases the chance that the shot stops feeling like a crane and starts feeling aerial. That can hurt realism in interior scenes, weddings, or branded spaces where the camera should still feel physically operated.
Shorter rises are often stronger. A 15 to 25 foot ascent with a clear reveal target usually reads better than an oversized lift with no compositional discipline.
Use it sparingly. The move has impact because it changes what the audience knows. If every sequence rises for scale, the reveal stops being a reveal and turns into a habit.
7. Handheld Steady-Cam Simulation with Subtle Drift
A founder is answering well in a workshop. The lighting is honest, the room has texture, and the performance feels natural. A locked-off frame can make that moment feel staged. Too much handheld motion makes it feel careless. The sweet spot is a steady-cam style handheld shot with slight operator drift.
Seedance 2.0 handles this move well when the prompt defines restraint. The goal is controlled human presence. The frame should breathe a little, correct itself lightly, and stay readable through dialogue. That makes this one of the most practical movement styles for interviews, documentary inserts, behind-the-scenes footage, educational content, and intimate branded scenes.
What makes it read as professional
The common failure mode is asking for “handheld” and stopping there. Seedance often responds better when the motion behavior is broken into parts: how stable the rig feels, how much drift is allowed, and what must stay protected in frame.
Use phrasing like:
- Stability style: “handheld steady-cam feel with subtle drift”
- Motion intensity: “gentle micro-adjustments”
- Operator behavior: “light breathing movement, soft balance corrections”
- Subject protection: “keep face stable during dialogue”
Prompt it like a camera note, not a vibe list. For example: “Medium close-up of founder speaking in workshop, handheld steady-cam feel with subtle drift, gentle micro-adjustments, light breathing movement, keep face stable during dialogue, natural practical lighting, intimate branded documentary tone.”
That last clause matters. If the audience is listening to someone speak, the camera cannot compete with the performance.
Where this move works best
Use it when polish would hurt credibility. Interviews gain warmth from slight motion. Classroom or product demos feel more approachable when the frame has a human operator's touch. Narrative close-ups also benefit, especially when the actor is sitting still but the scene needs a little life.
It is less effective for luxury product hero shots, architecture, or anything that depends on rigid lines. In those cases, even subtle drift can make the image feel less intentional.
Prompt strategy for scene changes
Handheld work usually falls apart at the transitions, not the center of the shot. If a clip shifts from movement into a steadier hold, define that progression clearly instead of asking Seedance for one broad “handheld” behavior across the full duration. Short beat-based prompt planning helps you control that ramp so the camera settles naturally rather than snapping into a new mode.
For more complex blocking, the Seedance 2.0 storyboard guide for planning camera movement is useful because it forces a practical question before prompting. Is the drift adding intimacy, or is it pulling attention away from the subject?
That question usually decides the shot.
8. Dolly Push with Simultaneous Zoom Counter-Motion
This is the most specialised move in the set. A dolly push combined with an inverse zoom creates the classic perspective distortion often associated with the Vertigo effect. The subject stays roughly similar in scale while the background seems to stretch or compress. It's unnerving when used well, and silly when used casually.
That's exactly why it belongs in your toolkit. Not for everyday ads, but for moments of realisation, dread, shock, altered perception, or emotional rupture. If a thriller character sees something impossible, or a music video hits a peak emotional turn, this move gives you a visual jolt with a clear point of view.
How to phrase it so Seedance understands
The model needs both motions named explicitly. If you only say “Vertigo effect”, you're depending on interpretation. Spell out the dolly direction and the zoom direction.
Use prompts like:
- Basic move: “dolly forward 15 feet while zooming back 1.5x”
- Intensity: “subtle perspective shift” or “pronounced disorienting effect”
- Timing: “execute over 2 seconds at emotional peak”
- Subject lock: “maintain subject size in frame”
A narrative example: “Psychological thriller close-up, dolly forward 15 feet while zooming back 1.5x, maintain subject size in frame, background corridor stretches unnaturally, execute over 2 seconds as character realises the door is open.”
Why restraint matters more here than anywhere else
A dolly zoom is dramatic by definition. If you use it three times in a one-minute video, you flatten its impact. Save it for the one beat where perspective itself should feel unstable.
This also connects to an unresolved but useful operational question in Seedance 2.0 prompting. Public guidance still doesn't fully settle when UK users should favour simple English camera terms, when timestamps help more, and when multi-shot prompting beats single-shot prompts for marketing or education videos. That gap is discussed in Pixo's article on Seedance 2.0 director prompts. For a complex move like this, my bias is simple: use plain English camera terms first, then add timeline structure only if the clip has a clear beat change.
Use this move in horror, psychological drama, sci-fi, or music-led storytelling. Don't use it to decorate a shot that already works. It should represent a shift in the character's experience, not just a flashy camera trick.
Seedance 2.0: 8 Camera Movement Comparison
| Technique | 🔄 Implementation Complexity | ⚡ Resource Requirements / Efficiency | ⭐ Expected Outcomes / Quality | 📊 Ideal Use Cases | 💡 Key Tips |
|---|---|---|---|---|---|
| Dynamic Orbital Tracking Shot | Medium, requires subject-locked framing and radius control | Moderate, clear subject definition and multi-shot compatibility | ⭐⭐⭐⭐, smooth 360° reveal, cinematic engagement | Product showcases, character introductions, real estate, establishing shots | Specify rotation direction, radius, and rotation duration |
| Push-In and Reveal Camera Move | Low–Medium, linear motion with DOF adjustments | Low, minimal scene setup; precise subject placement needed | ⭐⭐⭐⭐, builds tension and focus effectively | Product reveals, emotional beats, close-ups, educational detail shots | Define push distance, timing and acceleration curve; pair with audio |
| Parallax Lateral Pan with Depth Layering | High, requires careful multi-layer depth definition | Moderate–High, layered assets and coherent depth mapping | ⭐⭐⭐⭐, high perceived production value, enhanced spatial storytelling | Establishing/location shots, real estate, architecture, travel content | Clearly separate depth layers and control parallax intensity |
| Whip Pan Transition with Motion Blur | Medium, precise timing and blur parameterisation | Low, fast execution suited for quick cuts; needs audio sync | ⭐⭐⭐⭐, energetic, cinematic transitions for fast-paced content | Action sequences, music videos, tutorials, sports highlights | Specify pan duration and blur intensity; sync to beats or whooshes |
| Slow Zoom with Subject Following | Medium, combines zoom and intelligent tracking | Moderate, reliable subject detection and prompt clarity required | ⭐⭐⭐⭐, subtle emotional/contextual reveals while keeping subject framed | Interviews, narrative cinema, product storytelling, documentaries | Identify subject clearly and set zoom magnitude and timing |
| Crane-Style Vertical Ascending with Reveal | Medium–High, perspective/horizon adjustments needed | Moderate, scene must support overhead reveal and background fill | ⭐⭐⭐⭐, dramatic aerial perspective and strong location scale | Opening establishes, real estate overviews, magical reveals, finales | Specify rise height, speed and horizon control for natural perspective |
| Handheld Steady-Cam Simulation with Subtle Drift | Low–Medium, parameterise micro-movements and drift | Low, minimal assets; tune intensity for viewer comfort | ⭐⭐⭐⭐, authentic, intimate feel without shaky amateurism | Documentary interviews, intimate narrative moments, found-footage styles | Set drift intensity and pattern; use selectively to avoid distraction |
| Dolly Push with Simultaneous Zoom Counter-Motion | High, requires mathematically synchronised counter-motion | Moderate, precise framing and coordination between moves | ⭐⭐⭐⭐⭐, highly cinematic, disorienting psychological impact when done well | Thrillers, psychological moments, music videos, sci‑fi perspective shifts | Specify both dolly and zoom values, calibrate intensity, and use sparingly |
Integrating Movement into Your Creative Workflow
You open Seedance, type “cinematic camera movement,” and get a clip that moves but says nothing. The shot has energy, yet the audience still does not know where to look or why the frame changed. That usually happens when movement is treated as decoration instead of direction.
A useful workflow starts with intent. Define the job of the shot before you write the prompt. Orbit is good for dimensionality and object emphasis, push-ins tighten attention, whip pans transfer energy between beats, and handheld drift adds human presence. Each move solves a different editorial problem, so the prompt should reflect that problem clearly.
The practical question is not “Which move looks coolest?” It is “What should this moment do?”
In Seedance 2.0, that shift matters because the engine responds better when movement, subject action, and reveal point are working together. A crane rise with nothing to reveal feels empty. A dolly zoom without emotional pressure feels gimmicky. A lateral parallax move in a flat scene often reads weaker than a simple push-in. Good prompts do not stack motion for the sake of complexity. They assign one primary task to the camera, then support it with timing, framing, and scene depth.
My default build order is simple: subject, subject action, environment, camera move, timing, style. That order prevents the camera instruction from overpowering the scene. For example, “ceramic perfume bottle on black acrylic, slow rotating reflections, luxury studio set, 20 percent push-in over 4 seconds, high-contrast beauty lighting” will usually hold together better than a prompt that opens with three camera adjectives and only later mentions the product.
Testing also needs structure. Run the same movement across three scene types and compare the result. A push-in on a talking subject behaves differently from a push-in on a product shot or a doorway reveal. Orbit can sell form in a product film, but it can also weaken dramatic tension if the scene needs a fixed eyeline. Handheld drift can add intimacy in a documentary-style setup, but too much drift makes typography, UI elements, or pack shots feel careless.
Prompt libraries become useful in a professional way. Save movement templates by purpose, not just by name. I keep separate patterns for reveal shots, emphasis shots, transitions, and tension shots. That makes revisions faster because you are choosing from proven shot behaviors rather than rewriting from scratch every time.
Keep the language specific. “Clockwise orbit, medium speed, maintain subject center frame, background depth visible” gives Seedance something actionable. “Epic cinematic motion” does not. The same rule applies to transitions. If you call for a whip pan, specify the destination frame or target subject. If you ask for a reveal, name what is hidden at the start and when it should become visible.
Editing judgment still matters. Some generated clips need less motion than the first prompt suggests. If a move pulls attention away from the performance, reduce it. If the frame feels dead, add only one variable first, speed, arc, drift, or distance, then test again. Small prompt changes usually beat piling on extra descriptors.
Start with two or three movement templates that match your actual output. Product ads, explainers, mood films, and narrative scenes all reward different camera behavior. Build a short playbook around those use cases, refine the wording after each batch of renders, and you stop collecting prompt tricks. You start directing shots.
If you want to turn these camera ideas into finished clips quickly, try Seedance. It gives you the speed of AI video generation with the kind of motion control that makes prompts feel directed rather than improvised, which is exactly what you need when you're building marketing videos, educational content, product films, or cinematic short-form work.
Ready to try it yourself?
Put the steps from this guide into practice with Seedance and turn prompts or images into polished videos in minutes.
Free credits on signup. Plans from $20/month.
Related Articles
More posts in the same locale you may want to read next.

Seedance App Preview Video Generator 2026: Create App Store and Product Launch Clips
Use Seedance to turn app screenshots, feature copy, and launch goals into App Store previews, Google Play promo videos, and product launch clips.
Read article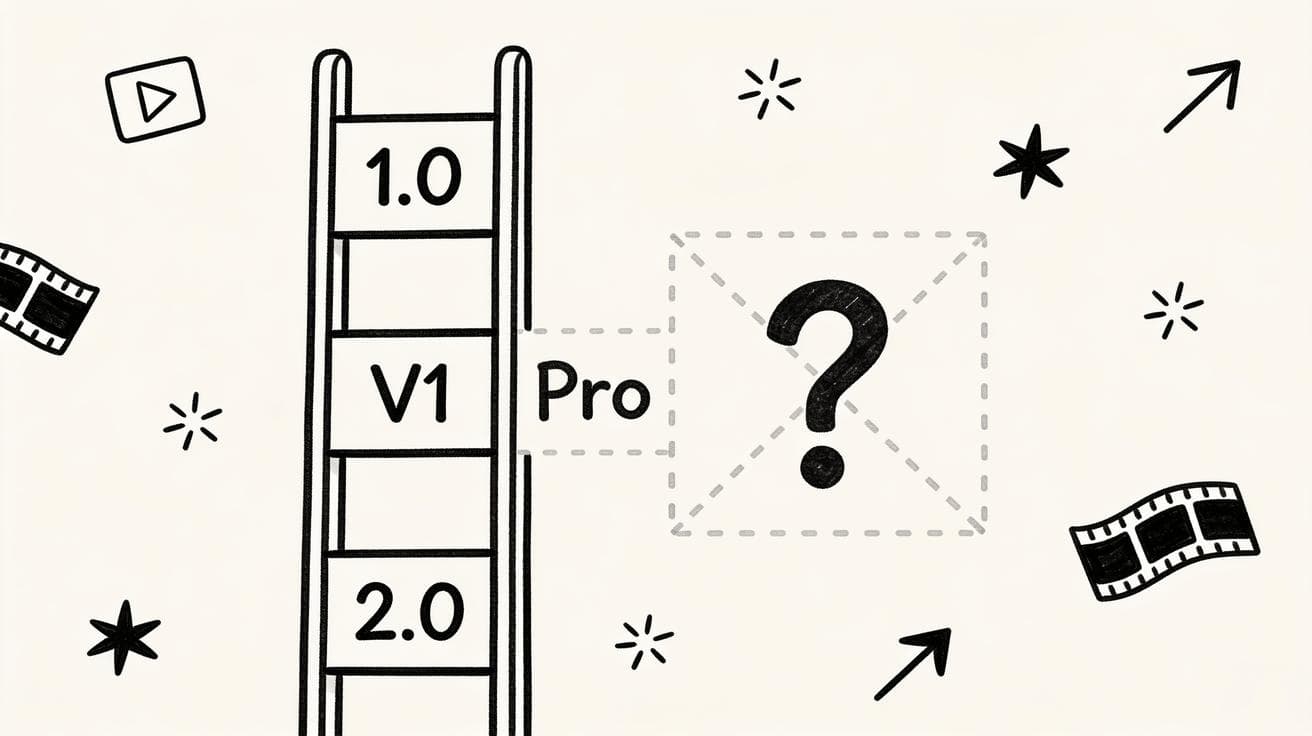
Seedance 1.5: Why It's Not Available Yet and Which Version to Use Instead
There is no official Seedance 1.5 release. Here is the real Seedance version map (1.0, V1 Pro, 2.0), why people search for 1.5, and which version to use right now.
Read article
Seedance vs Pollo AI: Which AI Video Generator Wins in 2026?
A fair, practical comparison of Seedance and Pollo AI: models, pricing, image-to-video, and when to choose Seedance.
Read article