You've probably hit the same wall most creators hit with AI video.
The concept is easy. The first draft is easy. The hard part is getting something that looks usable when it leaves the generator. Not just “interesting AI output”, but a clip you'd feel comfortable putting on a landing page, in a paid social ad, inside a lesson, or into a pitch deck without apologising for it first.
That's where Seedance 2.0 1080p becomes a practical question, not a marketing phrase. Resolution affects how sharp text edges feel, how clean product surfaces look, how believable faces appear after platform compression, and how much fixing you'll need after export. In UK workflows, that matters because high-definition delivery already sits inside a mainstream digital environment. Ofcom's Media Nations reporting says 88% of households have superfast broadband and 94% of UK adults used the internet in 2024, which makes HD AI video a realistic publishing format rather than a niche technical luxury according to the Seedance 2.0 UK overview.
Ready to create your own AI video?
Free credits on signup. Plans from $20/month.
If you're comparing tools more broadly before committing to a workflow, TimeSkip's round-up of AI picks for YouTube creators is useful for understanding where generation ends and editing still matters.
What follows is the workflow that gets cleaner results. Less prompt theatre, more production discipline. That means choosing the right shot length, controlling camera movement before style, using references sparingly, checking whether you're getting true HD output or a lower-resolution route, and treating commercial readiness as part of the creative process, not an afterthought.
For platform access and product context, the main Seedance 2.0 platform page is the obvious starting point.
From Idea to HD Reality Your Guide to Seedance 2.0
The usual starting point is a rough brief and an unrealistic deadline. A café owner needs a launch teaser by tomorrow. A solo marketer needs three social variants before lunch. A creator wants cinematic b-roll but doesn't have a camera crew, a location, or a spare week for reshoots.

AI video helps most when you stop asking it to replace an entire production and start using it to solve a specific production problem. That problem is usually speed, visual polish, or both. In practice, the difference between a disposable clip and a usable one often comes down to whether the output holds up in 1080p.
Why 1080p matters in real publishing
For UK creators, HD isn't aspirational. It's the working baseline. Viewers scroll quickly, platforms compress aggressively, and low-detail output falls apart fast when there's product texture, typography, or movement in frame. Sharpness alone won't save a weak clip, but weak resolution can ruin a strong one.
This is also why a “good prompt” isn't enough. You need a workflow that protects detail from concept through export. That includes shot design, reference control, duration, motion restraint, and a realistic expectation of what the model can produce cleanly in short form.
Practical rule: Treat 1080p as the finishing format, not the entire creative process. Build the shot for clarity first, then render for delivery.
What experienced users do differently
Beginners often over-prompt. They stack styles, moods, lens language, emotional beats, and object lists into one request. The model responds with visual confusion. Better results come from making fewer decisions per shot and locking the most important ones early.
A clean Seedance workflow usually looks like this:
- Start with one visual objective: a product reveal, an establishing shot, a classroom animation, a previs moment.
- Keep the first version short: short clips are easier to evaluate for motion, subject integrity, and composition.
- Judge output like an editor: ignore novelty and look for drift, broken hands, texture smearing, unstable backgrounds, and mismatched motion.
- Refine one variable at a time: camera, lighting, reference image, or audio direction. Not all of them at once.
The promise of this workflow
The payoff is simple. You spend less time chasing random generations and more time producing clips you can cut together. That's the difference between AI video as entertainment and AI video as part of a professional content pipeline.
Your First Project From Setup to a Single Stunning Shot
A first project should do one thing well. Don't start with a product ad, voice-led explainer, and multi-scene character sequence all at once. Start with a single shot that tests composition, motion, and surface detail.
Near the top of your session, keep the interface uncluttered and focus on the core controls.

Pick a shot that's easy to judge
The best starter scene is an environmental shot. It gives you enough detail to inspect sharpness and enough motion to catch instability, without introducing face consistency or complex hand animation.
Use a scene like this:
cinematic coastal cliff at sunrise, soft sea mist, layered rock textures, golden side light, slow forward camera drift, realistic water movement, natural colour, gentle ambient wind and distant waves
This works because each part has a job. “Coastal cliff at sunrise” sets the subject. “Layered rock textures” pushes detail. “Slow forward camera drift” limits motion chaos. “Natural colour” helps avoid oversaturated fantasy output when you're trying to assess quality.
Build the clip in a controlled way
Before generating, set a few ground rules for yourself:
- Choose one aspect ratio on purpose. If the clip is for social placements, decide whether you need vertical, square, or horizontal before you write the prompt.
- Keep motion modest. Fast movement hides problems on first glance, then creates ugly artefacts when you inspect the export.
- Avoid text in frame. Text is a poor benchmark for a first test because it can fail for reasons unrelated to the shot design.
- Stay focused on one environment. Mixed environments often cause continuity breaks inside short clips.
A simple prompt you can paste and adapt
Try this as your first serious test:
wide cinematic shot of a rugged coastline at sunrise, layered cliffs with realistic rock detail, soft sea mist drifting across the frame, calm ocean below, warm natural golden light from the right, slow controlled forward camera movement, stable horizon, realistic water shimmer, subtle wind ambience and distant waves, clean photoreal style, no extra objects, no people, no text
If the first generation looks muddy, don't immediately add more adjectives. Strip the prompt back further. Most of the time, clarity improves when the request gets narrower.
What to judge after the first render
Watch the clip once like a viewer. Then watch it again like a post-production lead.
Look for:
- Edge stability: cliffs, horizon lines, and mist boundaries shouldn't pulse or crawl.
- Motion discipline: the camera should feel intentional, not like it's floating without weight.
- Texture fidelity: surfaces should read as rock, water, and haze, not glossy AI mush.
- Lighting coherence: sunrise direction should stay consistent across the shot.
Later in the process, this walkthrough video can help you compare your setup habits against a live interface flow.
<iframe width="100%" style="aspect-ratio: 16 / 9;" src="https://www.youtube.com/embed/suIwxbO-_ZE" frameborder="0" allow="autoplay; encrypted-media" allowfullscreen></iframe>
Fixing a weak first result
If your first result misses, the usual issue isn't the model. It's that the prompt asked for too much or asked for movement without control.
Use this adjustment logic:
- If the image looks busy, remove decorative descriptors first.
- If the camera feels erratic, explicitly state “slow controlled” movement and specify one move only.
- If detail is soft, make the environment simpler and push one surface type, such as rock, fabric, glass, or wood.
- If the shot feels synthetic, replace stylised language with concrete physical cues like side light, shallow mist, wet pavement, or matte ceramic.
A strong first shot isn't the one with the most spectacle. It's the one you can reliably reproduce and improve.
That reliability matters more than a lucky generation. Once you can get one stable, attractive clip on demand, sequencing becomes much easier.
Crafting Narratives with Advanced Prompts and Sequencing
Single shots are useful. Narratives are where the tool either becomes part of your workflow or starts wasting your time. Most poor AI sequences fail for a simple reason. Each shot was generated as an isolated idea rather than as part of a controlled visual system.
The strongest Seedance work uses a repeatable prompt structure. The publicly documented guidance that matters most is this: the effective sequence is define the shot, lock camera motion, then specify audio cues, and while the model accepts up to 9 image references, 3 video clips, and 3 audio clips, results tend to hold together better with 1 to 3 highly relevant references per scene according to the Seedance technical paper on arXiv.

If you want a separate library of examples to study while building your own structure, this collection of best Seedance 2.0 prompts is useful for comparison.
Use the three-part prompt structure like a director
Prompts are frequently written as one descriptive blob. That makes revision painful because you can't see which part caused the problem. Breaking the request into three production decisions fixes that.
Part one defines the shot
This is the visual sentence. Subject, environment, framing, lighting, and style belong here.
Example:
medium shot of a woman in a dark green raincoat standing at a wet bus stop at dusk, reflective pavement, cool city lighting, photoreal cinematic style
That's enough to establish identity and environment without drifting into poetry.
Part two locks camera motion
Motion is where sequences usually collapse. If one shot glides and the next lurches, the edit feels fake even if each clip looks good alone.
Add one clear instruction:
slow dolly in, camera remains level, subject stays centred
Or:
static camera, only environmental motion in rain and passing reflections
The less ambiguity here, the cleaner your edit options become.
Part three specifies audio cues
Audio direction changes how the scene feels, even if you later replace or mix it. Use sound cues to support realism, not to compensate for weak visuals.
Example:
soft rain ambience, distant traffic, no music, subtle tyre splash in background
A before and after prompt comparison
Weak version:
cinematic woman waiting in rain at night emotional city scene dramatic camera amazing lighting realistic sound
This gives the model almost no hierarchy.
Stronger version:
medium shot of a woman in a dark green raincoat at a wet city bus stop at dusk, reflective pavement and cool sodium street lighting, slow dolly in with level camera and subject centred, soft rain ambience and distant traffic, photoreal cinematic style, no extra pedestrians near camera
The stronger version narrows the scene and protects consistency.
Sequence scenes by visual continuity, not by script order
A script may start with dialogue. Your generation workflow shouldn't. Start with the easiest shot to stabilise visually, then build outward.
A practical order for a three-shot sequence is often:
- Begin with the anchor shot: the most stable, identity-defining image of the character or location.
- Generate the reaction or detail shot next: this inherits the look from the anchor.
- Finish with the transition shot: movement between locations is harder, so leave it until your visual language is already locked.
This matters because references work best when they serve continuity rather than variety.
How to use references without wrecking coherence
More references don't automatically improve output. They often create a negotiation the model can't resolve cleanly. If you've got nine images available, that doesn't mean you should use nine.
Keep reference strategy tight:
| Reference goal | Best practice |
|---|---|
| Character identity | Use one clear portrait or one clean full-body image |
| Wardrobe continuity | Add a second image only if clothing details matter to the scene |
| Location style | Use one environmental frame with matching mood and lighting |
| Motion inspiration | Use one short clip only when camera rhythm is important |
Field note: If a shot starts looking overdesigned, cut references before you rewrite the prompt. Reference overload causes more chaos than prompt brevity.
A mini narrative example you can build
Say you're creating a short story about a baker opening a shop at dawn.
Shot one
wide exterior of a small bakery at dawn, warm interior light glowing through windows, quiet street, light morning fog, static camera, faint birds and distant city ambience
Shot two
close shot of flour-dusted hands placing fresh pastries on a wooden counter, warm window light, shallow depth feel, slow lateral camera move, subtle tray and paper sounds
Shot three
medium shot from inside bakery as front door opens and first customer enters, warm inviting light, camera gently pulls back, soft door chime and low room ambience
Notice what stays consistent. Warm dawn light. Calm camera language. A grounded sound bed. That's what makes three short clips feel like one story.
What usually fails in multi-shot work
Narrative quality drops fast when creators do any of the following:
- Change style terms every shot: one clip says photoreal, the next says dreamy analogue, the next says luxury ad aesthetic.
- Switch camera grammar constantly: static, then drone-like sweep, then handheld push for no story reason.
- Rewrite the subject too loosely: “woman”, then “young professional”, then “stylish commuter” can shift the face and wardrobe.
- Add references late with no plan: this often solves one problem while creating three new ones.
Better sequencing isn't about bigger prompts. It's about keeping key variables fixed and changing only what the story needs.
Achieving Flawless 1080p The Art of Rendering and Export
The biggest mistake people make with Seedance 2.0 1080p is assuming the words alone guarantee the output path they want. They don't. “1080p” can mean a capability, a delivery tier, a platform-specific setting, or a claim that doesn't match the exact route you're using.
That's why export discipline matters. Public-facing material around the model has created some confusion because some API documentation has listed 480p and 720p outputs only, even while broader marketing around the product talks about higher-quality output. The practical takeaway for creators is simple. Don't assume. Verify through the actual workflow you're using, as highlighted in the Seedance API documentation context.

For a broader view of how duration and resolution choices interact in planning, this video length and resolution guide is a helpful companion.
Don't trust the label alone
When a creator says “I exported in 1080p”, I usually want to know three things:
- What generation route did they use?
- What exact file did they download?
- Did they inspect the output at delivery size, not just in a preview window?
Preview panes are flattering. Final files are honest. Compression, softness, artefacts, and motion instability become much clearer once the clip leaves the generator.
A practical export checklist
Use this every time you prepare a final clip for delivery.
- Confirm the actual export setting: check the file properties after download rather than relying on memory from the generation screen.
- Review at full screen: inspect edges, skin, product surfaces, and any fine detail that could break under platform compression.
- Check motion at normal speed and half speed: normal speed shows viewer perception. Half speed reveals hidden warping and frame inconsistencies.
- Compare against your lower-resolution prototype: if the HD version doesn't add meaningful detail, the shot may need redesign rather than re-render.
- Export only approved shots at the highest needed setting: don't spend premium output capacity on shots that still have unresolved composition problems.
Clean 1080p is not just a bigger file. It's a shot that survives scrutiny when detail and movement are both under pressure.
What improves perceived HD quality
Creators often chase “more resolution” when the bigger issue is weak visual structure. A shaky camera, cluttered background, or unstable subject will still look poor in a larger frame.
Focus on the factors that make HD feel polished:
| Problem | Better approach |
|---|---|
| Busy frame with too many small objects | Reduce object count and simplify depth layers |
| Fast sweeping camera | Slow the move and define one axis of motion |
| Inconsistent lighting | State one clear light source and time of day |
| Style drift across shots | Reuse the same style language and core references |
| Surface mush | Emphasise one material type and trim unrelated descriptors |
Prototype cheap, finish carefully
In production terms, the sensible workflow is to test rapidly at lower quality and reserve final HD rendering for the shots that already work. That isn't just about saving money. It also protects decision quality. You stop confusing expensive output with good output.
If a shot still has broken anatomy, unstable geometry, or drifting identity, a 1080p export only gives you a sharper version of the problem. Fix the shot first. Then render the keeper.
What to check before a commercial handoff
Before a client sees the file, run a final pass on these points:
- Brand safety: remove stray objects, malformed products, or background details that pull focus.
- Editability: make sure the opening and closing frames are usable for cuts.
- Platform fit: confirm that your chosen aspect ratio suits the destination.
- Audio sanity: if the generated sound feels synthetic or distracting, replace it in edit rather than forcing it into final delivery.
That last point matters more than many creators admit. Native sound can be useful, but commercial work often benefits from deliberate post audio, especially when you need legal certainty, cleaner mixing, or a sharper brand tone.
Practical Seedance Workflows for Marketers Educators and Filmmakers
The commercial case for high-quality AI video in the UK is easy to understand. The IAB UK reported that digital ad spend reached £35.5 billion in 2024, and DCMS-linked reporting shows the UK's creative industries contributed £124.6 billion in GVA in 2022, both cited in the Vercel model overview for Seedance 2.0. That doesn't tell you how to work. It tells you why polished, fast-turnaround video has real value.
The better question is how different professionals should use the tool without falling into the same generic workflow. A marketer doesn't need the same clip design as an educator. A filmmaker doesn't judge success the same way as a social team.
The marketer's three-shot ad workflow
A marketer usually needs a short sequence that earns attention immediately, shows the offer clearly, and lands the brand message without visual clutter.
A reliable three-shot pattern looks like this:
First, create the hook shot. This should be visually legible in the first instant. Think steam rising from coffee, a close-up texture reveal, a dramatic lighting contrast on packaging, or a solved problem shown in one frame.
Second, make the product truth shot. The shot ensures the item, service, or result becomes unmistakable. Keep the camera calmer than the hook so the viewer can process the selling point.
Third, finish with the action shot. This might be the product in use, a branded environment, or a clean closing frame with room for edited text.
Marketers get better results when they separate novelty from persuasion. The first shot can surprise. The second and third need to explain.
The educator's explainer workflow
Educators need clarity more than spectacle. The best AI-generated learning clips don't try to fake a full documentary. They create concise visual support for one idea at a time.
A strong workflow is to break the topic into micro-scenes:
- Open with the concept frame: one simple visual metaphor or environment.
- Show the process: one motion-based visualisation that demonstrates change over time.
- End with reinforcement: a summarising scene that supports the spoken or on-screen explanation added later in editing.
For educational content, background simplicity matters. Busy frames distract from the lesson. Neutral camera moves also help because they let the viewer focus on the information rather than on style.
The filmmaker's previs workflow
Filmmakers benefit most when they use Seedance as a previsualisation partner rather than as a final replacement for every shot. It's strongest for testing mood, geography, framing rhythm, and cut logic before a physical shoot or before a larger VFX conversation.
A practical previs session often starts with:
- Establishing the space: what does the location feel like at the intended time of day?
- Blocking key moments: where does the subject enter, pause, turn, or confront?
- Testing transitions: does the cut from wide to close feel motivated?
- Finding visual language: are you building with static tension, slow pushes, or lateral movement?
This approach saves time because it reveals weak scene logic early. If the AI sequence feels confusing, the live-action sequence probably will too.
Sample Prompts and Settings by Use Case
| Use Case | Sample Prompt Snippet | Recommended Settings |
|---|---|---|
| Marketer social ad | close product hero shot on matte black surface, clean rim light, slow push in, subtle ambient sound, no background clutter | Keep clip short, use one hero object, restrained camera move, final render only after message is approved |
| Educator explainer | simplified animated cross-section of plant roots absorbing water, clear visual layers, gentle motion, clean neutral background | Prioritise legibility, avoid dense scenes, use calm motion and replace or supplement audio in edit |
| Filmmaker previs | wide night alley with neon reflections, lone subject entering from frame left, slow tracking camera, distant city hum | Lock lighting and camera grammar, use references sparingly, generate anchor shot first |
| SME service promo | bright reception area, friendly staff interaction, clean modern interior, gentle dolly movement, natural ambience | Focus on believable environment details, keep wardrobe and brand colours consistent across shots |
Commercial readiness in the UK
Regarding practical application, a lot of AI video advice gets thin. A clip can look impressive and still be awkward to use in real business contexts.
For UK creators, the practical issues are straightforward:
- Check rights before paid use: if you've used reference materials, make sure you're allowed to use them in a commercial workflow.
- Treat claims carefully: don't let generated visuals imply product features or outcomes you can't support.
- Review for disclosure needs: your edit, campaign context, or platform may require a more transparent approach to AI-generated media.
- Plan for human finishing: legal-safe output often means replacing audio, adding approved branding, and doing a final review outside the generator.
The strongest commercial workflow isn't “generate and publish”. It's “generate, inspect, edit, clear, then publish”.
Common Pitfalls and Next Steps in Your AI Video Journey
Most frustration with AI video comes from expecting one perfect generation instead of building a repeatable correction loop. The good news is that the common failures are usually manageable if you diagnose them properly.
Character drift and scene inconsistency
If the subject changes face, clothing, or age from shot to shot, the fix usually isn't a longer prompt. It's a tighter identity anchor. Keep the character description stable, reuse the same limited references, and stop changing style language between scenes.
Jerky movement and floating cameras
When motion feels weightless, creators often add even more motion instructions. That makes it worse. Pick one move, define it plainly, and let the environment carry the rest of the energy.
Strange artefacts and overdesigned frames
Artefacts often show up because the scene is carrying too many visual demands at once. Cut decorative objects, simplify lighting, and remove references that don't directly support the shot. If the image still feels synthetic, reframe the idea into a cleaner composition rather than endlessly tweaking adjectives.
The fastest path to a professional result is usually subtraction. Fewer variables. Fewer references. Fewer competing style cues.
What to develop next
If you want to improve quickly, work on three skills. Learn to write prompts that separate shot, camera, and sound. Learn to judge clips like an editor, not like a spectator. Learn to reserve final HD rendering for shots that already deserve it.
Audio is the next frontier for many creators. If you're building more complete scenes and want better control over sound design or music direction around your generated clips, this 2026 guide to AI music creation is a worthwhile companion resource.
AI video is moving quickly, but the craft principles aren't changing. Clear intent beats noisy prompts. Controlled motion beats spectacle. Good production judgment beats blind iteration. If you can do those things, Seedance 2.0 1080p stops being a buzzword and starts becoming a useful part of your workflow.
If you're ready to put these techniques into practice, try Seedance and build one controlled, commercially usable 1080p clip first. That single disciplined project will teach you more than a week of random prompting.
Ready to create your own AI video?
Turn ideas, text prompts, and images into polished videos with Seedance. If this article helped, the fastest next step is to try the product.
Free credits on signup. Plans from $20/month.
Related Articles
More posts in the same locale you may want to read next.
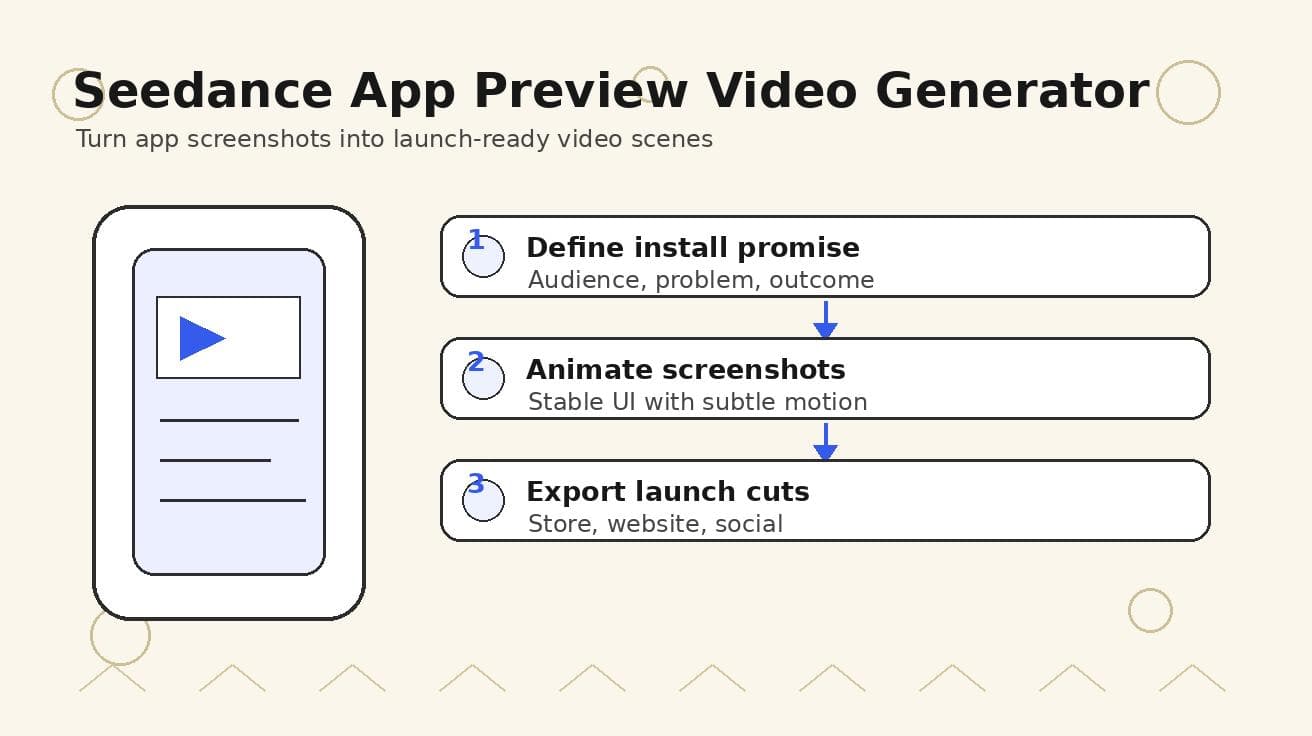
Seedance App Preview Video Generator 2026: Create App Store and Product Launch Clips
Use Seedance to turn app screenshots, feature copy, and launch goals into App Store previews, Google Play promo videos, and product launch clips.
Read article
Seedance 2.0 Generate Video with Audio: Master 1080p
Master Seedance 2.0 generate video with audio. This guide covers 1080p creation, prompting, lip-sync, multi-shot storytelling, and troubleshooting in 2026.
Read article
Seedance 2.0 Video to Video: Unlock Pro AI Results
Unlock pro results with Seedance 2.0 video to video. Get workflows, prompt engineering tips & continuity secrets for 1080p AI video.
Read article