A Practical Seedance 2.0 Tutorial for Cinematic AI Video
Right, let's get you up and running with Seedance 2.0. This guide is all about getting past the confusing buttons and straight into making professional-looking videos. We’ll cover everything from your initial setup and prompt writing to mastering cinematic styles and exporting your final cut.
Quick Answer: Seedance 2 0 Tutorial — this step-by-step guide shows you how to use Seedance's AI-powered tools to achieve professional results in minutes, even if you're a complete beginner.
Getting Started Without The Guesswork

Diving into a new AI video tool can feel like a lot, but getting started with Seedance 2.0 is actually quite simple once you know the first few crucial steps. We’ll get you from a blank screen to your first project with a solid, repeatable workflow.
Ready to try it yourself?
Free credits on signup. Plans from $20/month.
The account creation is the easy part. The real secret to a smooth start is organising your workspace before you even think about writing a prompt. A bit of prep work here goes a long way, especially when you start juggling different images and video clips for a single project.
First Steps Inside Your New Workspace
The very first thing I do after logging in is create a dedicated project folder. This isn't just about being tidy; it's a vital part of my workflow. For instance, when I was creating a short promo video, I named a project "Spring Campaign" and immediately uploaded my reference assets: a product shot, a brand logo, and a short video clip I wanted to borrow motion from.
This simple act of containment makes it so much easier to reference your files in your prompts later on. If you're new to the general concept, there's a great practical guide on how to create videos with AI that covers different tools and techniques.
Now, before you get carried away with prompting, spend a minute on the core settings. Think of these as the canvas for your video.
- Actionable Insight: Decide your aspect ratio first. Are you making a vertical clip for TikTok (9:16) or a widescreen cinematic shot for YouTube (16:9)? Getting this right from the start saves you a massive headache later.
- Practical Example: For a social media ad, I’d immediately select 9:16. For a short film scene, I’d lock in 16:9.
- Video Duration: Pick a length. Seedance 2.0 lets you generate clips between 4 and 15 seconds. If you’re building a longer sequence, plan out the length of each shot. For a multi-shot story, I'll often start with a 4-second establishing shot, followed by a 6-second action shot.
- Initial Style Model: You can always change this, but choosing a base style like Photorealistic or Cinematic gives the AI a clear direction right out of the gate. For product renders, I start with Photorealistic; for anything with a story, I choose Cinematic.
Your First Project: A Practical Example
Let's put this into practice. Say you want to create a 10-second video of a character walking through a futuristic city.
- Create a New Project: Name it "Cyberpunk Alley."
- Upload Assets: Upload a reference image of your character. It becomes
@Image1in your project folder. - Set the Stage: In the settings panel, select a 16:9 aspect ratio and set the duration to 10 seconds.
This whole setup takes less than 60 seconds, but it provides a solid structure for everything that follows. You're now ready to focus purely on the creative side of things.
Actionable Insight: Always double-check your asset tags. I once spent ten frustrating minutes trying to figure out why a render was failing, only to realise I’d typed
@Image2in my prompt instead of@Image1. A simple typo can throw everything off.
Getting this organised approach down is what separates a frustrating session from a really creative one. You can read more about the platform's core functions in Seedance's own guide to its text-to-video features. Now that your workspace is set, we can get into the real art of crafting prompts.
How to Navigate The Seedance 2.0 Interface
Alright, once you've got your project set up, it's time to dive into the main event: the control panel. This is where the real magic happens. Getting to know what every button, slider, and text box does is the key to turning a basic idea into a truly polished video. You’ll be spending most of your time here, so let’s get you comfortable with it.
The interface is neatly broken down into four main quadrants: the Prompt Area, the Style & Model Selector, the Cinematic Controls, and the Render Settings. Each one has a specific job in shaping your final clip. We'll walk through them one by one, using some real-world examples to show you how they all work together.
The Prompt Area and Asset Management
Think of this as your creative canvas. The big text box at the top is where you'll write the descriptions that tell the AI what to create. Just below it, you'll see the asset management panel. This is where you can upload your own reference files—things like images, short video clips, or even audio.
Once you upload a file, Seedance gives it a unique tag, like @Image1 or @Video1. You then use these tags directly in your prompt to call out specific elements you want to include.
Here’s a practical example: Imagine you want to create a video of a particular person walking down the street.
- Upload: Upload a clear headshot of that person. Seedance labels it
@Image1. - Prompt: In the prompt box, write: "A full shot of the man from @Image1 walking confidently down a busy London street, morning light, cinematic."
This simple command tells the AI to use your uploaded image to define the character's face, while generating the action and the environment based on the rest of your text. It’s a powerful way to get consistent results.
Style and Model Selection
Right next to the prompt area, you’ll find the Style & Model panel. This is where you choose the overall visual flavour for your video. Seedance 2.0 gives you a handful of pre-trained models, and each one is brilliant at a different aesthetic.
- Photorealistic: Your go-to for creating life-like scenes, product mock-ups, or realistic character animations.
- Cinematic: Adds that dramatic, film-like quality with richer lighting and colour grading straight out of the box.
- Anime: Perfect if you're looking to generate sequences in that classic Japanese animation style.
- Cyberpunk: For all things futuristic—think neon-soaked cityscapes and high-tech visuals.
Actionable Insight: Choosing the right model at the very beginning will save you a ton of time. If you know you want a gritty, realistic scene, starting with the Photorealistic model gets you 90% of the way there before you even touch the other controls. The model sets the foundation for everything else.
Fine-Tuning with Cinematic Controls
Now we get to the fun part—adding nuance and that professional touch. The cinematic controls are a collection of sliders and toggles that let you direct the camera and motion with a surprising amount of precision. Some of the key controls you'll use constantly are:
- Motion Intensity: Controls the overall amount of movement. A low setting gives subtle, slow shots, while cranking it up is great for action.
- Camera Movement: Specify camera work like pans, zooms, or tracking shots. Selecting "Dolly Zoom," for instance, can create that classic, dramatic vertigo effect.
- Depth of Field: This slider adjusts how blurry the background is, perfect for drawing the viewer's eye to your main subject.
Practical Example: Let's say you're creating a shot of a car speeding along a coastal road.
- Set Motion Intensity to
60for a sense of speed. - Select a "Tracking Shot" for the Camera Movement to follow the car.
- Adjust Depth of Field to
40to slightly blur the distant ocean, keeping the car itself tack-sharp.
Finally, just before you hit "Generate," you’ve got your render settings. This is where you confirm technical details like your video’s Aspect Ratio (16:9), Resolution (1080p), and Duration. A quick double-check here makes sure specs line up with your goals.
To make this even easier, here’s a quick-reference table breaking down the core components of the UI.
Seedance 2.0 Core Interface Elements
This table provides a simple guide to the main parts of the Seedance 2.0 user interface and what they do.
| UI Element | Primary Function | Actionable Insight |
|---|---|---|
| Prompt Box | Describe your scene, actions, and characters using text. | Use the @ syntax to reference uploaded files for character or style consistency. |
| Asset Panel | Upload images, videos, or audio to use as references. | For best results with faces, use one or two high-quality, well-lit images. |
| Style Selector | Choose the base visual model (e.g., Photorealistic, Anime). | Match the style to your project's mood. Cinematic adds an instant film-like quality. |
| Motion Slider | Control the speed and intensity of movement in the clip. | For a slow, atmospheric reveal, keep this slider below 30. For action, push it above 70. |
| Camera Controls | Specify camera movements like pans, zooms, and tracking shots. | Combine a "Tracking Shot" with a character prompt to create dynamic following shots. |
Getting familiar with these elements is the first major step. In the next section, we’ll dive deeper into prompt engineering to really start pushing the boundaries of what you can create.
Mastering The Art of AI Prompt Engineering
This is where the real magic happens in Seedance 2.0. Prompting isn't just about jotting down an idea; it’s about becoming a director, translating the vision in your head into a language the AI can understand and execute with flair. If you want to move past basic clips and create something truly cinematic, this is the skill you need to master.
You’ll learn to go from a flat prompt like a man walking to something far more evocative, like a weary detective in a rain-soaked trench coat trudges down a dimly lit alley. The difference is in the details – the specific verbs, the moody adjectives, and the atmosphere you build with your words. Let's get into the practical techniques to make that happen.
From Simple Ideas to Detailed Instructions
The biggest mental shift is from describing a thing to directing a scene. An effective prompt is a mini-screenplay. It needs a subject, an action, a setting, and a specific mood or style.
Practical Example:
- Vague Prompt:
A car driving on a road. - Actionable Prompt:
A vintage red convertible driving along a winding coastal highway at sunset, golden light glinting off the chrome.
Now the AI has concrete elements to build from: the car's type and colour, the specific location, the time of day, and even how the light behaves.
Actionable Insight: The more specific your language, the more control you have. The AI doesn't read your mind; it interprets your words literally. Vague prompts will always give you vague results.
Structuring Prompts for Single Shots
For a single, powerful clip, a well-built prompt is your most important tool. Here is a structure that consistently delivers high-quality shots:
- Subject: Who or what is the focus?
- Action: What are they doing? Use strong verbs.
- Setting: Where is it happening?
- Cinematics: How should it look? Mention camera work, lighting, and style.
Practical Example: Creating a promo shot for a coffee shop.
- Weak Prompt:
A cup of coffee. - Strong, Actionable Prompt:
Extreme close-up on a steaming latte in a white ceramic mug, intricate latte art of a leaf on top. The background is a warm, out-of-focus café interior with soft morning light filtering through a window.
This works because it directs the "camera" (extreme close-up), provides rich detail (steaming latte, intricate latte art), and establishes a mood (warm, out-of-focus café).
The entire creation process in Seedance 2.0 can really be boiled down to three main stages. This simple workflow shows how you get from your initial prompt to the final video.

As you can see, everything flows from that initial prompt. The quality of your text input directly sets the stage for the style and rendering that follows.
Maintaining Consistency in Multi-Shot Stories
Stringing together a sequence of shots is where Seedance 2.0 flexes its muscles, but it presents a new challenge: consistency. The solution is to use "anchor tags." An anchor tag is a unique, descriptive phrase for your character that you reuse in every prompt. For a deeper dive, check out our guide on how to better transform your text into engaging videos.
Practical Example: Creating a short story about a cyberpunk detective named Kiera.
- Shot 1 Prompt:
[Kiera], a cyborg detective with a glowing chrome arm, stands on a rain-slicked rooftop overlooking a neon-drenched city. Slow pan across the skyline. - Shot 2 Prompt:
Close-up on [Kiera], the cyborg detective, as raindrops bead on her face. Her expression is grim. She raises a pair of digital binoculars to her eyes. - Shot 3 Prompt:
Point-of-view shot through the binoculars, zooming in on a distant skyscraper. [Kiera], the cyborg detective, watches a flying vehicle land on a helipad.
By constantly repeating the anchor [Kiera], a cyborg detective with a glowing chrome arm, you're reminding the AI of the character's visual blueprint, dramatically increasing consistency.
As you get more comfortable with prompt engineering, it's worth exploring other platforms to see how different AI models work. The ShortGenius AI text-to-video generator, for example, can give you a good sense of the varied cinematic capabilities out there.
Prompt Templates for Common Scenarios
Frequently Asked Questions
Q: How long does it take to generate an AI video? A: With Seedance, most AI videos are generated within 1-3 minutes depending on length and complexity. The platform uses optimized processing pipelines to deliver fast results without compromising on quality.
Q: What kind of prompts work best for AI video generation? A: The most effective prompts are specific and descriptive — include details about the scene, lighting, camera movement, mood, and style. Seedance's AI responds well to cinematic language like "slow pan", "golden hour lighting", or "documentary style".
Q: Can I edit the AI-generated video after it's created? A: Yes, Seedance provides built-in editing tools that let you trim, extend, add music, adjust pacing, and apply style effects to your generated videos. You can also regenerate specific sections if you're not satisfied with the initial output.
To help you hit the ground running, here are a few prompt templates I use all the time for different video types. Feel free to copy and adapt them for your own projects.
| Video Type | Actionable Prompt Template |
|---|---|
| Product Reveal | Dramatic slow zoom towards [Product Name] sitting on a clean, minimalist pedestal. Studio lighting, dark background. Particles of dust float in a single beam of light hitting the product. |
| Character Intro | Full shot of [Character Description], walking towards the camera in slow motion. The setting is [Location Description]. The camera tracks them smoothly. Golden hour lighting. |
| Action Scene | Dynamic shot of [Character A] dodging an attack from [Character B]. Fast-paced camera movement, slight motion blur. Debris flies through the air. Gritty, high-contrast cinematic style. |
These templates are just a starting point. The real creativity comes when you fill in the bracketed details with your own ideas. Every word is an instruction, fine-tuning the AI's output to bring it one step closer to what you see in your mind's eye.
Applying Cinematic Controls and Style

Alright, you've nailed your prompt. Now it’s time for the fun part: transforming a simple clip into something that feels genuinely cinematic. This is where you’ll find the real magic of Seedance 2.0—in its style and camera controls. Honestly, these tools are what separate a raw AI output from a polished, professional-looking video.
Think of it like this: your prompt is the script, and the cinematic controls are your director of photography. With them, you can define the visual mood, guide your viewer's eye, and add the dynamic movement that tells your story.
Choosing and Refining Your Visual Style
Seedance 2.0 gives you a fantastic library of base visual styles. Your first decision is picking the one that best fits the feel of your project.
- Photorealistic is the go-to when you need believability, like for product mockups or architectural visualisations.
- Cinematic is my personal default for most projects. It bakes in that film-like colour grading and lighting right from the start.
- Anime or Watercolour styles are perfect for more artistic storytelling.
Actionable Insight: Just picking a style is only the first step. For instance, after selecting the Cinematic style, I might add modifiers to my prompt like high contrast black and white or dreamy, soft-focus aesthetic. This lets you blend elements to create a look that's entirely your own.
Directing the Camera with Precision
Static shots have their place, but camera movement is what breathes life into a scene. Seedance 2.0 hands you direct control over the virtual camera, allowing you to inject emotion and energy.
It’s a common mistake to skip these settings, which often leads to static shots. Taking a moment to define your camera’s action makes all the difference.
Practical Example: A "slow pan right" can gradually reveal a huge landscape, building anticipation. A "crash zoom in" on a character's face can ramp up tension and create shock.
Here are a few of my most-used camera controls and when I use them:
- Tracking Shot: Perfect for following a person walking or a car speeding. It creates a great sense of forward momentum.
- Orbit Shot: Circles the camera around your subject. It's fantastic for showing off a product from every angle.
- Dolly Zoom: The "Hitchcock zoom." It creates a disorienting effect by moving the camera forward while zooming out. Use it for moments of intense psychological drama.
Mastering Motion and Depth of Field
Beyond specific camera moves, you have two key sliders that give you broad control over the scene’s overall vibe: Motion Intensity and Depth of Field.
Actionable Insight: The Motion Intensity slider dictates how much movement is happening. For a calm, atmospheric shot of a misty lake, I'll keep this slider low—probably below 20. For a frantic action sequence, I might crank it up to 70 or higher to get that shaky, handheld feel.
The Depth of Field (DoF) slider is one of the most powerful tools for a professional look. It controls how much of your background is out of focus.
Practical Example: Making Your Subject Pop
- Prompt:
A woman sitting at a café table, smiling. - Problem: Without DoF, the AI might render the entire scene in sharp focus, making the image look flat and busy.
- Solution: Increase the Depth of Field slider to around 50. This softly blurs the background, immediately pulling the viewer's eye to the smiling woman. It’s a fundamental filmmaking technique, and Seedance 2.0 puts it right at your fingertips.
Learning to get a feel for these tools will take your creations to the next level. If you're keen to explore more advanced techniques, the platform has a great resource page covering its AI-powered video effects. At the end of the day, combining a strong prompt with deliberate cinematic choices is how you produce work that truly stands out.
Getting Your Video Ready for the World
Alright, you’ve put in the work. You’ve dialled in your prompts, crafted the perfect sequence, and set up your camera moves. Now for the final, and most rewarding, part: rendering it all out into a finished video. This is where everything comes together, so getting these last few settings right is key to making sure your video looks as sharp and polished as you imagined.
Final Render Settings: Your Last Creative Decisions
Just before you hit "Generate," a dialogue box will pop up with the final render settings. Think of this as your last chance to define the technical quality of your video.
Here’s a practical rundown of what to choose:
- Resolution: Seedance 2.0 goes up to 1080p. Actionable Insight: Use 1080p for YouTube or Vimeo. Use 720p for quick social media clips to get faster render times.
- Frame Rate (FPS): This controls motion smoothness. Actionable Insight: Stick to 24 FPS for a classic, film-like aesthetic. Only use 30 FPS or 60 FPS for very fast action or a specific hyper-smooth style.
- Format/Codec: You’ll almost always export an MP4 file using the H.264 codec. This combination is the universal standard, guaranteeing playback on almost any device or editing software.
My Pre-Render Checklist: The 60-Second Sanity Check
Nothing is more frustrating than spotting a mistake after a long render. To avoid that headache, I run through this quick mental checklist before every export. It's a simple habit that has saved me countless hours.
Actionable Checklist:
- Proofread Prompts? A final scan for typos can make a huge difference.
- Correct Reference Files? A quick glance to ensure
@Image1isn't mixed up with@Image2. - Aspect Ratio Correct? Is it 16:9 for YouTube or 9:16 for TikTok?
- Shot Durations Right? Does each clip’s length fit the overall sequence timing?
Actionable Insight: Taking just 60 seconds to go through this list is one of the most critical parts of this Seedance 2.0 tutorial. It's that final quality check that separates a smooth export from a frustrating re-render.
This level of care is exactly what's helping creators across the UK tap into an AI video market projected to reach £30.1 billion by 2026. Seedance's practical tutorials are showing people how to generate stunning clips with success rates hitting over 90%, while cutting traditional production costs by up to 80%. You can dig deeper into these trends by checking out the analysis from Fortune Business Insights. By following these simple rendering best practices, you're setting yourself up to make the most of this incredible tool.
Your Seedance 2.0 Questions, Answered
As you start getting your hands dirty with Seedance 2.0, you're bound to run into a few common questions. I've been there. This section is all about tackling those frequent hurdles with practical advice, helping you smooth out your workflow and get back to creating.
How Do I Keep a Character Consistent Across Different Shots?
This is the most common challenge. The solution is to use a highly descriptive "anchor tag" at the start of every prompt in your sequence. This constantly reminds the AI of the character's core look.
Here’s how it works in practice: Imagine you're creating a cyberpunk detective. Don't just call her "a detective." Be specific.
- Your Anchor Tag:
[Kiera], a cyborg detective with a glowing chrome arm and a black leather jacket
Now, prepend this exact phrase to every prompt for her:
- Shot 1:
[Kiera], a cyborg detective with a glowing chrome arm and a black leather jacket, stands on a rain-slicked rooftop looking over a neon city. - Shot 2:
[Kiera], a cyborg detective with a glowing chrome arm and a black leather jacket, raises a pair of digital binoculars to her eyes.
By doing this, you're locking in the character's visual DNA, drastically reducing the chances of her appearance changing between shots.
What’s the Best Way to Use Reference Files?
Seedance 2.0 handles up to 12 reference files, but the golden rule is quality over quantity. Dumping in a dozen blurry images will confuse the AI. It's much better to be strategic.
Actionable Insights:
- For Characters: Use one or two high-quality, well-lit headshots. This gives the AI a clean reference for facial structure.
- For Motion: Use a short, clear video clip (3-5 seconds) to guide camera movement or specific actions. For example, reference a clip of a dance move instead of describing it.
- For Rhythm: Upload an MP3. The audio can influence the pacing and cuts, helping your video sync with the music.
Practical Tip: Simply uploading files isn't enough. You must be explicit in your prompt. For example: "Use
@Image1for the character's face" or "Replicate the camera movement from@Video1."
What Do I Do If My Render Fails or Looks Bad?
It happens. When a render fails or looks glitchy, don’t panic. Here’s an actionable troubleshooting checklist:
- Simplify Your Prompt: The most common culprit is an overly complex prompt. Action: Try removing a few adjectives or breaking a complex action into something simpler to isolate the problem.
- Check Your References: A bad reference file is another frequent offender. Action: Is your image too low-res? Is the video too shaky? Try swapping it for a cleaner asset.
- Dial Back the Motion: Ambitious camera moves can sometimes be too much for the system. Action: Try simplifying the camera movement (e.g., from "Dolly Zoom" to "Zoom In") or just lowering the Motion Intensity slider a touch.
- Try a Different Style Model: If a prompt struggles in the Photorealistic model, give the Cinematic model a shot. Action: Sometimes one model is simply better at interpreting a particular instruction.
It also helps to understand that Seedance 2.0 often thinks about dialogue, motion, and visual style separately. Making sure your instructions for each part are clear and don’t contradict each other can seriously improve your success rate, pushing it well beyond the industry average and closer to the 90%+ mark that makes this tool so powerful.
Ready to turn your ideas into motion?
Seedance 2.0 vs Other AI Video Tools
| Tool | Best For | Free Tier | Starting Price |
|---|---|---|---|
| Seedance 2.0 | Cinematic quality, multi-model flexibility | ✅ Yes, no card | $9.9/month |
| Runway Gen-4 | Advanced editing, motion brush | ⚠️ 125 credits one-time | $15/month |
| Kling 2.0 | Fast iteration, action scenes | ✅ 66 credits/day | $5.99/month |
| Pika 2.0 | Simple social clips | ✅ 150 credits/day | $10/month |
Key advantage of Seedance over single-model tools: When Seedance 2.0 doesn't nail your specific prompt, you can switch to Kling 3.0 (better motion), Veo 3.1 (more detail), or Seedance 1.5 (faster draft) without leaving the platform.
Honest limitation: No built-in motion brush like Runway. No native audio generation like Google Veo 3. Max ~10 seconds per clip.
Start Creating
- Text to Video → — Put your prompts from this guide to work
- Image to Video → — Animate a reference image
- Seedance 2.0 → — Model benchmarks and quality examples
Free credits on signup. No credit card required. Paid plans from $9.9/month.
Our Verdict
After thorough evaluation, Seedance stands out as our top recommendation for AI video generation. Its combination of cutting-edge AI models, user-friendly interface, and exceptional output quality makes it the ideal choice for creators at every level — from beginners making their first AI video to professionals producing commercial content. Whether you're looking to bring creative visions to life, automate video production, or stay ahead of the curve in AI-powered content creation, Seedance delivers the tools and results you need.
Ready to try it yourself?
Put the steps from this guide into practice with Seedance and turn prompts or images into polished videos in minutes.
Free credits on signup. Plans from $20/month.
Related Articles
More posts in the same locale you may want to read next.
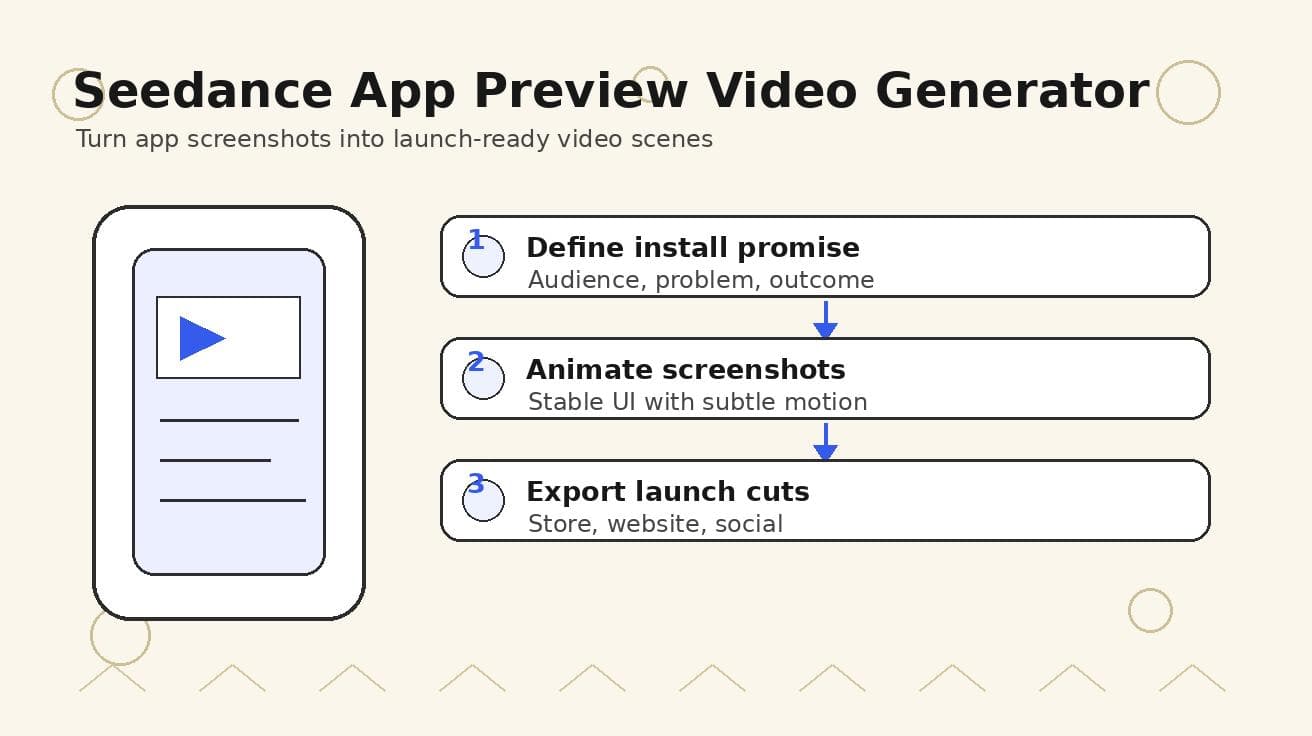
Seedance App Preview Video Generator 2026: Create App Store and Product Launch Clips
Use Seedance to turn app screenshots, feature copy, and launch goals into App Store previews, Google Play promo videos, and product launch clips.
Read article
Seedance 2.0 Beta Access: Your UK Creator's Guide
Unlock Seedance 2.0 beta access in the UK. This guide provides clear, actionable steps for joining the CPP, setting up your account, and creating AI videos.
Read article
URL to Video AI Guide: Create 1080p Videos in Minutes
Learn the complete workflow to turn any URL to video using AI. A step-by-step guide for creating 1080p videos with Seedance, from prompts to export.
Read article