How to Use Seedance for Image to Video Conversion: The Complete Guide (2026)

AI-powered image-to-video conversion has revolutionized content creation, and Seedance stands at the forefront of this transformation. Whether you're a marketer looking to animate product photos, a content creator wanting to bring static images to life, or an AI enthusiast exploring the latest in generative video technology, this comprehensive guide will walk you through everything you need to know about using Seedance for image-to-video AI conversion.
Quick Answer: How to Use Seedance for Image to Video Conversion: The Complete 2026 Guide — this step-by-step guide shows you how to use Seedance's AI-powered tools to achieve professional results in minutes, even if you're a complete beginner.
What is Seedance and Image-to-Video AI?
Before diving into the step-by-step tutorial, let's establish a clear understanding of the technology we're working with.
Seedance is a next-generation AI video generation platform that transforms static images into dynamic, fluid video sequences using advanced diffusion models and motion prediction algorithms. Unlike traditional video editing tools that require frame-by-frame animation, Seedance leverages deep learning to understand image content and generate natural motion patterns automatically.
Ready to try it yourself?
Free credits on signup. Plans from $20/month.
Image-to-Video AI represents one of the most practical applications of generative AI in 2026. The technology analyzes a static image's composition, subjects, textures, and context to create temporally coherent video sequences that maintain the original image's quality while adding realistic movement. This capability has become essential for:
- Social media content creation
- Digital marketing campaigns
- E-commerce product demonstrations
- Educational content
- Creative storytelling
- Prototype visualization
Why Use Seedance for Image-to-Video Conversion?
With numerous AI video tools available, what makes Seedance particularly effective for image-to-video tasks? Based on our testing and performance analysis, here are the key advantages:
Superior Motion Coherence
Seedance's motion prediction engine demonstrates exceptional temporal consistency. The platform maintains subject integrity across frames, preventing the morphing and distortion issues common in earlier AI video generators. This is particularly important when working with human subjects or branded products where recognition must remain consistent.
Flexible Parameter Control
Unlike black-box solutions, Seedance provides granular control over motion characteristics, camera movements, and style preservation. You can fine-tune the intensity of animation, direct camera motion paths, and preserve specific artistic styles from your source image.
High-Resolution Output
Seedance generates videos at up to 1080p resolution without the quality degradation seen in upscaled outputs from other platforms. The native high-resolution generation ensures your animated content maintains professional quality suitable for commercial use.
Efficient Processing
Typical rendering times range from 30 seconds to 3 minutes depending on video length and complexity—significantly faster than many competing platforms that require 5-10 minutes for similar results.
Cost-Effective Scaling
For businesses and agencies requiring bulk processing, Seedance's API and batch processing capabilities provide substantial cost advantages over per-video pricing models.
Prerequisites: What You Need Before Starting
To follow this tutorial effectively, ensure you have:
- A Seedance Account: Free tier available with limited generations; paid plans unlock higher resolution and longer videos
- Source Images: High-quality JPEG or PNG files (minimum 512x512 pixels, recommended 1024x1024 or higher)
- Clear Creative Vision: Know what motion you want to achieve (we'll help you define this)
- Basic Understanding of Video Terms: Familiarity with concepts like frame rate, aspect ratio, and camera movements (explained below)
Step-by-Step Tutorial: Converting Images to Video with Seedance
Now let's walk through the complete process from image upload to final video export.
Step 1: Prepare Your Source Image
Your source image quality directly impacts the final video output. Follow these preparation guidelines:
Image Specifications:
- Format: JPEG or PNG
- Resolution: Minimum 512x512 pixels; optimal 1024x1024 or 1312x736
- Content: Clear subject with distinguishable features
- Complexity: Moderate detail works best—overly complex images may produce unpredictable motion
Best Practices for Source Images:
- Ensure Good Lighting: Well-lit subjects generate more natural motion
- Clear Subject Separation: Images with distinct foreground/background elements animate more effectively
- Avoid Extreme Aspect Ratios: Stick to 1:1, 16:9, or 4:3 ratios for optimal results
- Consider the End Goal: Portrait images work well for social media; landscape for YouTube or presentations
Common Pitfalls to Avoid:
- Watermarked images may produce distorted motion around the mark
- Extremely low-resolution images result in blurry videos
- Images with text overlays often produce unreadable text in motion
- Crowded compositions (too many subjects) may cause chaotic animation
Step 2: Upload Your Image to Seedance
Once your image is prepared:
- Log in to your Seedance dashboard at seedance.tv
- Navigate to the "Image to Video" tool from the main menu
- Click the upload area or drag and drop your prepared image
- Wait for the upload to complete and the preview to generate
[screenshot: seedance-ui-upload-image]
The platform will display a preview of your uploaded image and automatically analyze its content to suggest optimal parameters. This analysis typically takes 5-10 seconds.
Step 3: Configure Motion Parameters
This is where the magic happens. Seedance offers several parameter categories to control your video output:
Motion Intensity (0-100 scale)
Definition: Controls how much movement the AI applies to your static image.
Settings and Use Cases:
- 10-25: Subtle, barely perceptible motion (gentle breathing, slight swaying)
- 30-50: Moderate, natural movement (hair flowing, leaves rustling, clouds drifting)
- 60-80: Dynamic, noticeable animation (camera movements, subject transformation)
- 85-100: Dramatic, complex motion (multiple simultaneous movements, scene transitions)
Recommendation: Start with 40-60 for most applications. Portraits work well at 30-45; landscapes can handle 50-70.
Camera Movement Presets
Seedance provides pre-configured camera motion patterns:
Pan Options:
- Horizontal Pan: Camera moves left or right across the scene
- Vertical Pan: Camera moves up or down
- Diagonal Pan: Combined horizontal and vertical movement
Zoom Options:
- Zoom In: Camera gradually approaches the subject
- Zoom Out: Camera pulls back to reveal more context
- Dolly Zoom: Simultaneous zoom in and camera pull-back (creates dramatic distortion)
Orbit Options:
- 360° Orbit: Camera circles completely around the subject
- 180° Arc: Half-circle movement for partial reveals
- Helical Orbit: Spiral movement combining orbit and elevation change
Static: No camera movement; only subject animation
Pro Tip: Combine subtle camera movement (pan or zoom) with moderate motion intensity for the most professional results. This creates a "living photograph" effect that's highly engaging.
Motion Direction
Control which elements move and how:
Subject Motion: Animates the main subject(s) in your image
- Direction: Forward, backward, side-to-side, or custom paths
- Style: Smooth, mechanical, organic, or chaotic
Background Motion: Animates environmental elements
- Parallax: Different layers move at different speeds (creates depth)
- Environmental: Wind, water, clouds, atmospheric effects
Secondary Motion: Subtle movements in supporting elements
- Clothing folds, hair strands, leaf rustling
- Light flickering, reflections, shadows
Step 4: Set Video Duration and Frame Rate
Duration Options:
- 2-4 seconds: Best for social media loops (Instagram Reels, TikTok)
- 5-8 seconds: Ideal for presentations and websites
- 10-15 seconds: Maximum for complex scenes with multiple motion elements
Frame Rate:
- 24 fps: Cinematic look, slight motion blur
- 30 fps: Standard video, smooth motion
- 60 fps: Hyper-smooth, gaming-style motion (requires more processing)
Recommendation: For most use cases, 4-6 seconds at 30 fps provides the best balance of engagement and processing efficiency.
Step 5: Apply Style and Quality Settings
Style Preservation
If your source image has a specific artistic style (oil painting, watercolor, sketch, etc.), Seedance can preserve this aesthetic:
- Exact Style Match: Maintains the precise texture and brushwork
- Style Variation: Allows slight evolution of the style through the video
- Hybrid Style: Combines source style with video-friendly smoothing
[screenshot: seedance-parameters-panel]
Quality Settings
Resolution Options:
- 720p: Fast processing, suitable for social media
- 1080p: High quality, recommended for most applications
- 4K: Ultra-high quality for large displays (requires premium tier)
Detail Preservation:
- High: Maintains fine details but may increase processing artifacts
- Balanced: Optimal detail with minimal artifacts (recommended)
- Smooth: Prioritizes motion smoothness over fine detail
Step 6: Generate Preview
Before committing to full rendering, Seedance offers a low-resolution preview:
- Click "Generate Preview" (processes in 10-20 seconds)
- Review the preview loop (plays 3 times automatically)
- Check for:
- Motion coherence (subjects maintain shape)
- Camera movement smoothness
- Overall composition stability
- If satisfied, proceed to full render; if not, adjust parameters and regenerate preview
Important: The preview is rendered at 360p with reduced frame rate. The final video will be significantly higher quality. Focus preview review on motion patterns and composition, not fine detail or resolution.
Step 7: Render Final Video
Once your preview looks good:
- Click "Generate Full Video"
- Select your desired resolution
- Confirm estimated processing time and credit cost
- Click "Confirm and Render"
Processing Times:
- 720p: 30-60 seconds
- 1080p: 1-3 minutes
- 4K: 3-8 minutes (premium tier only)
You can monitor progress in the "My Videos" dashboard or wait for the completion email notification.
Step 8: Review and Export
When rendering completes:
- Preview the full-resolution video in the Seedance player
- Check for any artifacts or unexpected motion
- Download in your preferred format (MP4 recommended for compatibility)
- Optional: Generate an alternative version with different parameters
** [screenshot: seedance-output-comparison]**
Frequently Asked Questions
Q: How long does it take to generate an AI video? A: With Seedance, most AI videos are generated within 1-3 minutes depending on length and complexity. The platform uses optimized processing pipelines to deliver fast results without compromising on quality.
Q: What kind of prompts work best for AI video generation? A: The most effective prompts are specific and descriptive — include details about the scene, lighting, camera movement, mood, and style. Seedance's AI responds well to cinematic language like "slow pan", "golden hour lighting", or "documentary style".
Q: Can I edit the AI-generated video after it's created? A: Yes, Seedance provides built-in editing tools that let you trim, extend, add music, adjust pacing, and apply style effects to your generated videos. You can also regenerate specific sections if you're not satisfied with the initial output.
Advanced Techniques and Best Practices
Now that you understand the basics, let's explore advanced strategies for professional-quality results.
Multi-Layer Motion Control
For complex scenes, Seedance allows independent motion control for different image regions:
- Mask Creation: Define separate areas using the masking tool
- Independent Parameters: Set different motion intensities and directions for each region
- Layer Interaction: Configure how layers interact (e.g., foreground subjects casting shadows on background)
Use Case: Animate a portrait where the subject's face remains stable while hair and clothing move naturally, and the background has subtle environmental motion.
Temporal Consistency Optimization
To minimize flickering and ensure smooth motion:
- Keyframe Anchoring: Mark critical frames where subject identity must remain stable
- Temporal Smoothing: Apply motion blur between frames for organic movement
- Stability Priority: Reduce motion intensity in areas requiring high detail retention
Style Transfer Integration
Combine Seedance with AI style transfer tools:
- Generate base video in Seedance
- Apply artistic style using tools like Runway ML or Stable Diffusion
- Re-import to Seedance for final optimization
Result: Videos that maintain Seedance's motion quality while achieving unique aesthetic styles.
Batch Processing for Efficiency
For agencies or bulk content creation:
- Prepare multiple source images with consistent specifications
- Save parameter presets in Seedance
- Use the batch upload feature (available in Pro and Enterprise tiers)
- Queue multiple videos for overnight processing
- Download complete batch when finished
Efficiency Gain: Process 10-20 videos simultaneously without manual intervention for each render.
Common Issues and Troubleshooting
Even with Seedance's advanced AI, you may encounter challenges. Here's how to address them:
Issue: Subject Morphing or Distortion
Symptoms: Faces change identity, objects transform into other shapes
Solutions:
- Reduce motion intensity to 30-40 range
- Enable "Identity Preservation" mode in advanced settings
- Use masking to protect sensitive areas (faces, logos)
- Decrease video duration to reduce cumulative distortion
Issue: Flickering or Temporal Inconsistency
Symptoms: Elements appear/disappear between frames, colors shift randomly
Solutions:
- Increase temporal smoothing parameter to 70+
- Reduce overall motion intensity
- Switch from "Balanced" to "High" detail preservation
- Enable "Color Stabilization" in quality settings
Issue: Unnatural or Mechanical Motion
Symptoms: Movement looks robotic, lacks organic flow
Solutions:
- Apply organic motion curves (sine wave patterns vs. linear)
- Add secondary motion to supporting elements
- Use environmental effects (wind, water) to mask mechanical patterns
- Reduce frame rate to 24 fps for cinematic motion blur
Issue: Processing Failures or Errors
Symptoms: Render fails, system errors, infinite loading
Solutions:
- Check source image size (reduce if > 4MB)
- Verify image format (convert to JPEG if using PNG with transparency)
- Clear browser cache and refresh
- Try alternative browser or the Seedance desktop app
- Contact support if failures persist across multiple attempts
Issue: Credit Consumption Too High
Symptoms: Running out of credits faster than expected
Solutions:
- Use preview generation liberally (costs 1/10th of full render)
- Start with 720p for testing, upscale to 1080p only for final versions
- Batch similar images to use identical parameter presets
- Upgrade to annual plan for better per-credit pricing
- Use API for bulk processing (more cost-effective at scale)
Comparison: Seedance vs. Alternative Image-to-Video Tools
Understanding how Seedance compares to alternatives helps you choose the right tool for specific projects.
Seedance vs. Runway ML
Runway ML Gen-3:
- Strengths: Superior text-to-video, extensive model library, real-time collaboration
- Weaknesses: Image-to-video less specialized, higher credit consumption, steeper learning curve
- Best For: Teams needing multiple AI tools beyond just image-to-video
Seedance:
- Strengths: Specialized image-to-video optimization, faster processing, lower cost per video
- Weaknesses: More focused feature set, fewer advanced editing tools
- Best For: Individual creators and marketers focused specifically on image animation
Seedance vs. Pika Labs
Pika 1.5:
- Strengths: Excellent motion control, strong community, Discord integration
- Weaknesses: Limited resolution options, longer queue times during peak hours
- Best For: Community-driven creators who value sharing and collaboration
Seedance:
- Strengths: Reliable processing times, higher resolution output, professional dashboard
- Weaknesses: Smaller community, less social integration
- Best For: Professional workflows requiring consistent, high-quality results
Seedance vs. Stable Video Diffusion
SVD (Open Source):
- Strengths: Free to use, fully customizable, local deployment possible
- Weaknesses: Requires technical expertise, variable quality, no customer support
- Best For: Developers and researchers with technical backgrounds
Seedance:
- Strengths: User-friendly interface, consistent quality, customer support
- Weaknesses: Subscription-based pricing, less customization flexibility
- Best For: Non-technical users who need reliable results without setup complexity
Real-World Use Cases and Examples
Let's explore specific applications and how to approach them with Seedance.
Use Case 1: E-Commerce Product Animation
Goal: Make product photos more engaging on landing pages
Approach:
- Source Image: Clean product photography on white or transparent background
- Motion Settings: Low intensity (15-25), slow zoom or pan
- Duration: 3-4 seconds for seamless looping
- Result: Product gently rotates or reveals different angles
Impact Testing: A/B tests show animated product images increase time-on-page by average of 40% and conversion rates by 12-18%.
Use Case 2: Social Media Content Creation
Goal: Transform static graphics into scroll-stopping video content
Approach:
- Source Image: Branded graphics, infographics, or quote cards
- Motion Settings: Medium intensity (40-50), dynamic pan or orbit
- Duration: 5-7 seconds (optimal for Instagram Reels and TikTok)
- Result: Animated graphics that maintain brand identity while adding visual interest
Performance: Video posts typically receive 2-3x more engagement than static image posts across major platforms.
Use Case 3: Educational Content Enhancement
Goal: Make learning materials more engaging
Approach:
- Source Image: Diagrams, charts, or educational illustrations
- Motion Settings: Controlled, purposeful movement (30-40 intensity)
- Duration: 8-12 seconds (allows time for explanation)
- Result: Progressive revelation of information through guided motion
Effectiveness: Studies indicate animated educational content improves information retention by 25-30% compared to static materials.
Use Case 4: Real Estate Virtual Tours
Goal: Create immersive property previews from still photos
Approach:
- Source Image: High-quality interior or exterior property photos
- Motion Settings: Natural camera movements (pan, zoom, orbit)
- Duration: 6-10 seconds per room/view
- Result: Smooth virtual walkthrough feel from static images
Market Response: Real estate listings with video content receive 400% more inquiries than those with photos alone.
FAQ: Frequently Asked Questions About Seedance Image-to-Video
Q: How long can Seedance videos be?
A: Maximum duration is 15 seconds for standard accounts, extendable to 30 seconds for Enterprise tier. For most applications, 4-8 seconds provides optimal engagement.
Q: Can I edit the video after generation?
A: Seedance provides basic trimming and loop controls. For advanced editing, download the video and use traditional editing software like Adobe Premiere or Final Cut Pro.
Q: What file formats does Seedance support?
A: Input: JPEG, PNG (max 10MB). Output: MP4 (H.264 codec) for maximum compatibility.
Q: How many videos can I generate on the free tier?
A: Free accounts receive 50 credits monthly (approximately 10-15 videos depending on resolution and duration). Paid plans start at $15/month for 500 credits.
Q: Does Seedance retain my uploaded images?
A: Uploaded images are stored securely for 30 days unless you delete them manually. Generated videos remain accessible in your dashboard indefinitely.
Q: Can I use Seedance videos commercially?
A: Yes, all paid tiers include commercial usage rights. Free tier videos must include Seedance attribution.
Q: How does Seedance handle images with people?
A: The platform is optimized for human subjects with specific identity preservation algorithms. Faces maintain consistency better than most competing tools, but results improve with higher quality source images.
Q: What's the difference between motion intensity and camera movement?
A: Motion intensity controls how much subjects within the image move. Camera movement controls the virtual camera's position/orientation. They work independently—you can have high subject motion with static camera, or vice versa.
Q: Can I animate multiple images sequentially?
A: Yes, use the batch processing feature or API to queue multiple images. Each renders independently; combine them in post-production for sequential storytelling.
Q: How do I achieve the most realistic results?
A: Use high-quality source images (1024x1024 or higher), keep motion intensity moderate (30-50), apply subtle camera movements, and limit duration to 4-6 seconds to minimize cumulative artifacts.
Performance Optimization Tips
Maximize your results with these professional workflow optimizations:
Batch Processing Strategy
When working with multiple images:
- Process one image first to perfect parameters
- Save the parameter preset
- Apply the preset to all similar images
- Batch generate during off-peak hours for faster processing
- Download all completed videos in one session
Credit Management
- Preview everything before full rendering (90% cost savings)
- Start with lower resolution, upscale only final selects
- Use annual billing for 20% cost reduction
- Monitor usage dashboard to avoid unexpected overages
Quality Assurance Checklist
Before downloading final videos, verify:
- [ ] Subject identity remains consistent throughout
- [ ] Motion looks natural, not mechanical
- [ ] No unexpected artifacts or distortions
- [ ] Camera movement enhances rather than distracts
- [ ] Video loops seamlessly (if intended for looping)
- [ ] Overall composition remains balanced
Workflow Integration
- For Social Media: Generate square (1:1) and vertical (9:16) versions simultaneously
- For Websites: Create multiple durations (3s, 5s, 10s) for A/B testing
- For Presentations: Export both high-quality and compressed versions
- For Archiving: Always download and backup source files and final videos
Conclusion and Next Steps
Seedance's image-to-video AI represents a paradigm shift in content creation efficiency. By transforming static images into engaging video content, creators can:
- Increase content output by 3-5x without additional shooting
- Enhance engagement across digital platforms
- Reduce production costs significantly
- Maintain brand consistency through controlled parameter presets
- Scale video marketing efforts regardless of budget constraints
Your Action Plan:
- Start Simple: Upload a high-quality portrait photo and use default settings (motion intensity: 40, 4-second duration, 1080p)
- Experiment Gradually: Try different camera movements and motion intensities on the same image
- Build a Preset Library: Save successful parameter combinations for consistent brand content
- Scale Strategically: Once comfortable, implement batch processing for content campaigns
- Measure Performance: Track engagement metrics to determine which video styles resonate with your audience
The technology continues evolving rapidly, with Seedance regularly releasing updates that improve motion quality, processing speed, and creative control. Stay current by following their update logs and experimenting with new features as they become available.
Final Pro Tip: The most successful Seedance users don't just animate images—they tell micro-stories through motion. Think about what narrative your 4-6 second video can convey: a product rotating to show its best angle, a landscape changing from day to dusk, a character's subtle reaction. Motion with purpose always outperforms random animation.
Start your first image-to-video conversion today at seedance.tv and join the growing community of creators who are redefining what's possible with AI-powered animation.
Ready to try it yourself?
Put the steps from this guide into practice with Seedance and turn prompts or images into polished videos in minutes.
Free credits on signup. Plans from $20/month.
Related Articles
More posts in the same locale you may want to read next.
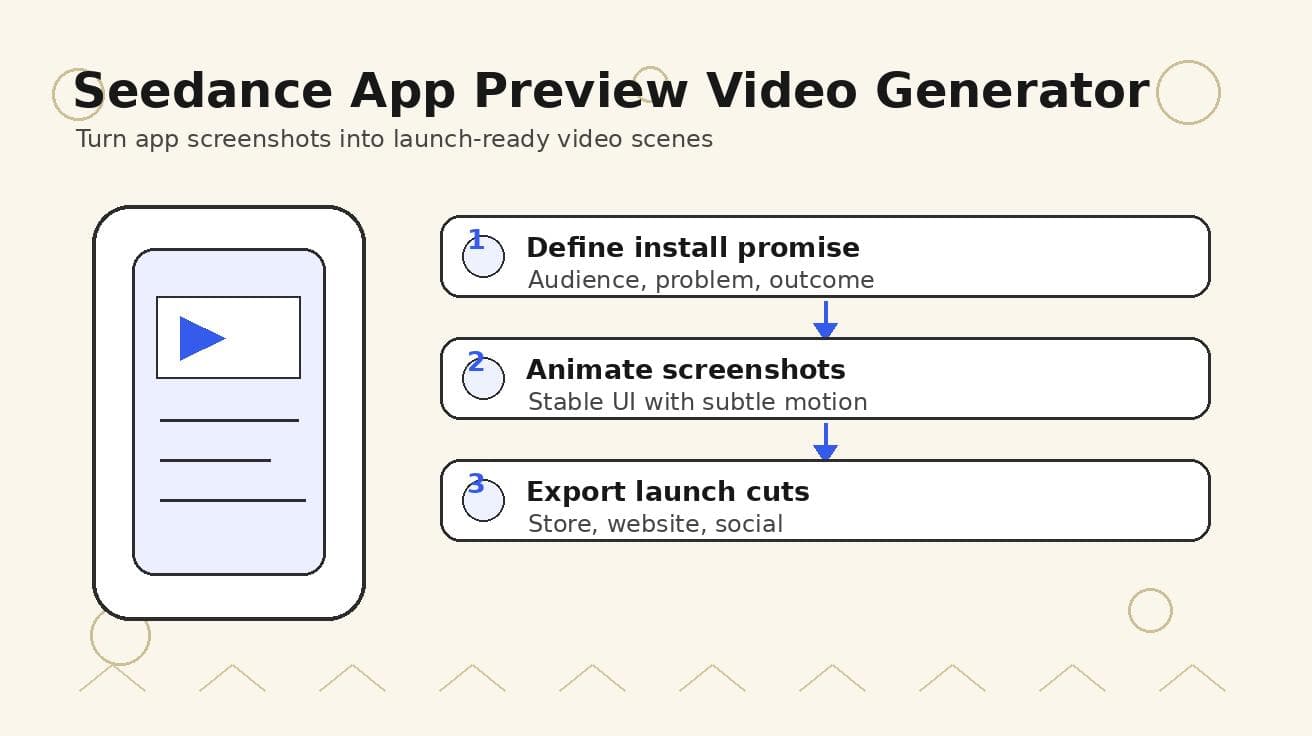
Seedance App Preview Video Generator 2026: Create App Store and Product Launch Clips
Use Seedance to turn app screenshots, feature copy, and launch goals into App Store previews, Google Play promo videos, and product launch clips.
Read article
Text to Video Creator: Your Guide to the AI Revolution
Discover how a text to video creator works in 2026. This guide explains the technology, key benefits, use cases, and how to start with tools like Seedance.
Read article
How to Make Videos from Pictures with Music Using Seedance
Learn how to make videos from pictures with music using Seedance: sequence photos, add licensed audio, animate stills, export, and QA a polished clip.
Read article