How to Make a Nice Video A UK Creator's Guide
Making a good video comes down to three practical steps: planning your shots, capturing clean footage, and editing it into a cohesive story. The secret to a polished final product isn't expensive gear; it’s having a clear, actionable plan from the start that guides every decision you make.
Building Your Video From the Ground Up
Before you even think about hitting the record button, the real work begins. This pre-production phase is where you turn a vague idea into a solid blueprint. I’ve seen countless projects fall flat because this step was rushed—it’s like trying to build a flat-pack wardrobe without the instructions. You might end up with something, but it probably won't be what you had in mind.
A solid plan gives every shot a purpose, ensures every line of dialogue moves the story forward, and helps your final video connect with your target audience.
Define Your Purpose and Audience
First, ask yourself two simple but critical questions: What is this video for? and Who is it for? The answers will shape everything—the tone, the length, the style, and the platform.
Are you making a quick, punchy promo for a new product aimed at UK university students? That’s a totally different beast to a detailed, in-depth tutorial for corporate clients.
-
Actionable Insight (Social Media): Let’s say you're a London-based coffee shop launching a new seasonal drink. Your goal is to get people through the door. Your audience? Local commuters and students on Instagram. Action: Your video must be short (under 30 seconds), look delicious, and be shot vertically for Reels. Focus on visuals like latte art being poured, not a long explanation.
-
Actionable Insight (Corporate): You're creating a training video for new hires. The purpose is education, so clarity is king. Your audience needs simple, step-by-step instructions. Action: This video will be longer (5-10 minutes), use clear on-screen text for key steps, and have a professional, steady tripod shot with clear audio.
Knowing your audience helps you make smart creative choices. A video for teenagers might use trending audio and rapid cuts, whereas a video for an older audience would benefit from slower pacing and larger, more readable text.
From Idea to Script
Once you've nailed down your 'why' and 'who', it's time to create a script. This doesn't need to be a formal, Hollywood-style document. For most projects, a simple outline with bullet points detailing the key messages for each scene is enough.
- Practical Example (Talking-Head Video): Instead of writing a full script, create a bulleted list of your main talking points.
- Intro: Hook the viewer with a question.
- Point 1: Explain the core problem.
- Point 2: Offer the solution.
- Outro: Summarise and give a clear call-to-action.
The point is to create a guide to keep you on track. It prevents rambling and ensures you don't forget crucial information.
A script is your single source of truth. It stops you from waffling, makes sure you don't forget crucial points, and makes the editing process so much easier because you already know the story you're telling.
Creating a Simple Shot List
The final piece of pre-production is your shot list. Think of it as a checklist of every single shot you need to capture. It turns your script into a practical, actionable plan for filming day.
This is the typical workflow I follow, moving from a basic idea to a structured shooting plan.
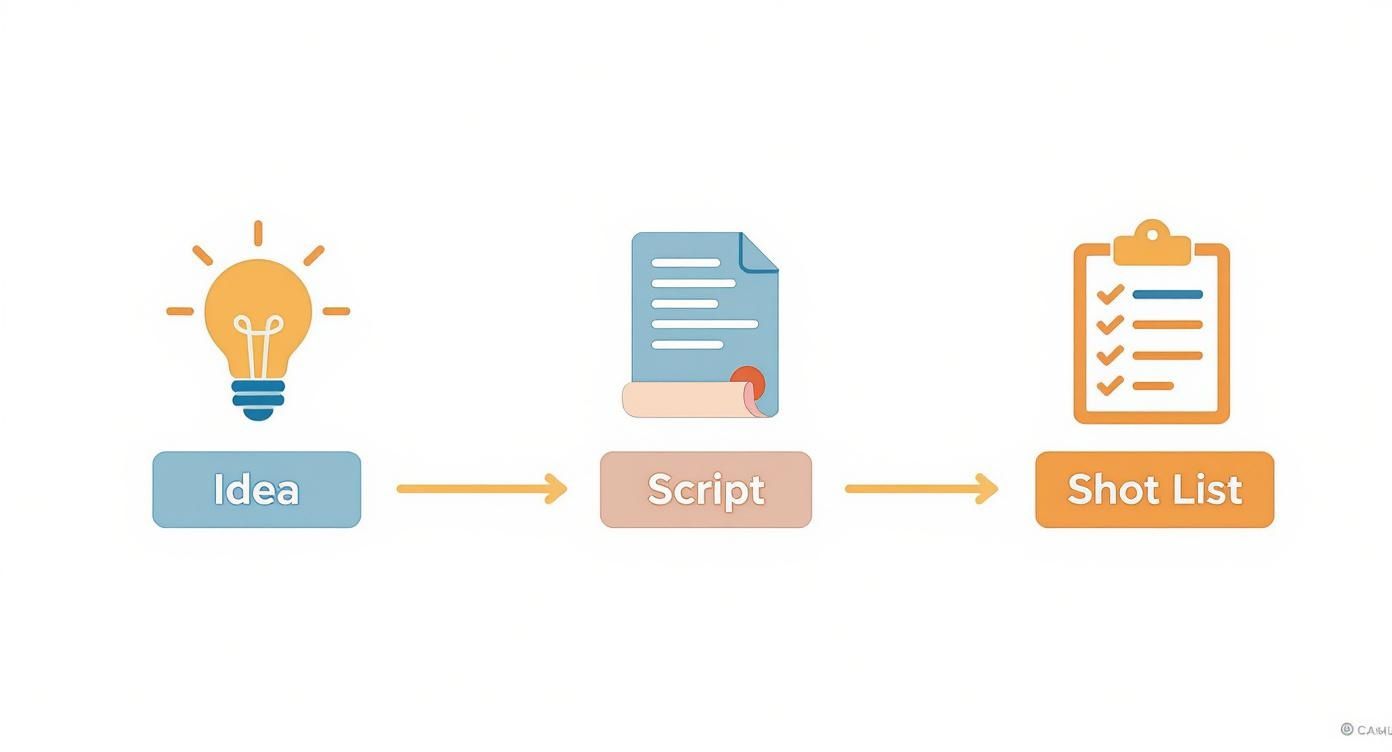
Following a structured process like this ensures that your initial creative spark gets translated into a concrete plan, which is absolutely essential for an organised shoot.
Let’s go back to our London coffee shop example. Your shot list might look something like this:
- Shot 1 (Wide): The whole cafe interior, showing the cosy atmosphere.
- Shot 2 (Medium): Barista pouring the new seasonal latte.
- Shot 3 (Close-Up): The finished latte art and steaming cup.
- Shot 4 (Action): A customer taking their first sip and smiling.
This simple list ensures you get all the footage you need, giving you plenty of options when you get to the edit. For a deeper dive into the whole process, this complete guide on how to create a good YouTube video from idea to launch is a fantastic resource. Good planning also helps you pick the right tools, so it's worth exploring the best video creation software to see what fits your project.
Capturing Professional Footage With Any Camera

One of the biggest myths in video creation is that you need an expensive, high-end camera to get great results. I've seen it time and again: people invest in fancy gear but neglect the fundamentals. The truth is, your smartphone is more than capable of capturing stunning footage once you get a handle on a few core filmmaking principles.
This is fantastic news for anyone looking to get into video, especially now. The UK video production market is absolutely booming, projected to leap from £5.9 billion in 2023 to a staggering £36 billion by 2030. A huge chunk of that growth is being driven by the public's insatiable appetite for fantasy and sci-fi content. This trend opens up massive opportunities for creators who can produce polished, professional-looking work, no matter their budget. You can see the full breakdown of UK video production trends here to understand just how valuable these skills are becoming.
Mastering Composition with the Rule of Thirds
Want an instant upgrade for your shots? Start using the rule of thirds. It’s a classic for a reason.
Picture your screen with a noughts and crosses grid laid over it. The idea is to place the most important parts of your scene along those lines or at the points where they intersect, rather than slap-bang in the centre.
- Actionable Insight: Go into your phone's camera settings right now and turn on the "Grid" or "Gridlines" feature. Leave it on. This simple change forces you to think about composition for every shot you take.
Now, instead of centring your subject, line them up with the left or right vertical line. Filming a sweeping landscape? Place the horizon on either the top or bottom horizontal line.
Practical Example: When filming someone talking, don't put them in the dead centre. Instead, position them on the right third of the screen, looking left into the empty space. Their eyes should align with the top horizontal grid line. This tiny adjustment makes your shot feel more balanced and professional.
This simple trick naturally guides the viewer's eye and adds a sense of depth that a centred shot just can't match.
Harnessing the Power of Light
Lighting is everything. It's not just about visibility; it's about mood, texture, and quality. I've seen footage from a £10,000 camera ruined by poor lighting, and I've seen smartphone video that looks cinematic because the light was just right.
You don't need a fancy lighting kit to begin with. Natural light is your best and cheapest tool.
- Actionable Insight (Window Light): For an interview or a product shot, place your subject facing a large window. The soft, diffused light is incredibly flattering and avoids harsh shadows. Pro Tip: If the sun is too direct, hang a thin white bedsheet over the window to soften the light even more.
- Practical Example (Three-Point Lighting): You can mimic a professional setup with household lamps. Use your brightest lamp as the key light (main light), a dimmer lamp on the other side as a fill light (to soften shadows), and a small desk lamp behind the subject as a backlight (to separate them from the background).
Here’s a quick reference for some fundamental filming techniques that can make all the difference.
Core Filming Techniques at a Glance
| Technique | What It Achieves | Practical Tip |
|---|---|---|
| Rule of Thirds | Creates balanced, dynamic, and visually interesting shots. | Switch on your camera's grid and place subjects on the lines or intersections. |
| Natural Window Light | Provides soft, flattering light for faces and products. | Position your subject about a metre from a large window, facing it at a slight 45-degree angle. |
| Three-Point Lighting | Creates a professional, three-dimensional look with depth. | Use your brightest lamp as the key light, a dimmer one as fill, and a small lamp behind the subject. |
| Golden Hour | Achieves a warm, cinematic glow for outdoor scenes. | Film during the first hour after sunrise or the last hour before sunset for that beautiful, soft light. |
Mastering these basics will give you a solid foundation for any project you take on.
Ensuring Rock-Solid Stability
Nothing screams "amateur" more than shaky footage. It’s distracting and instantly cheapens your work. A smooth, stable shot, on the other hand, immediately elevates the quality.
A tripod is the gold standard, but you can get steady shots without one.
- Actionable Insight: Don't have a tripod? Place your phone or camera on a stack of books or lean it against a water bottle on a shelf. For a smooth pan, place your phone on a tea towel on a flat surface and gently pull the towel to create a slider-like effect. Nailing stability is a crucial step if you want to learn how to make a nice video that keeps people watching.
Editing Your Footage Into a Compelling Story

Right, so you’ve planned your project and captured all your footage. This is where the real magic begins. The edit is where you take those raw clips and start weaving them into a polished, engaging narrative. It's the moment you shape a collection of shots into a story with rhythm, emotion, and genuine impact.
Don't let the technical side put you off. At its core, editing is about making choices. You're deciding what to keep, what to cut, and how to arrange everything to best serve the story you want to tell. Your main job is to guide your viewer's attention and create an experience that feels completely seamless.
Choosing Your Tools and Organising Your Clips
Before you can start cutting, you need a digital workspace. Your editing software, often called a Non-Linear Editor (NLE), is where you’ll be spending your time. There are some incredible, professional-grade tools out there, like DaVinci Resolve, which offers a completely free version that’s more than powerful enough for most creators. Other industry favourites include Adobe Premiere Pro or Final Cut Pro for Mac users.
If you want to dig deeper into the options, this detailed guide on the best video editing software is a great place to start. Actionable Insight: Whichever program you choose, create a simple folder structure before you import anything: "1. Footage", "2. Audio", "3. Graphics". This five-second habit will save you hours of searching later.
The Art of the First Assembly
With all your clips neatly sorted, it’s time to build your first assembly cut. This is a rough-and-ready version of your video where you just lay out your best takes in chronological order. Don't worry about perfect timing or slick transitions just yet.
- Practical Example: Let's say you filmed an interview with 5 different camera angles. For your assembly, just watch through the main "A-cam" footage and place the entire interview on your timeline. Then, layer the best clips from your "B-cam" on a track above it. Now you have a basic structure to start refining.
The whole point here is to see if your story actually works before you get lost in the details.
Your first assembly is for you, not the audience. It’s a messy but essential step that lets you see the big picture and spot any gaps in your story early on.
Trimming the Fat and Pacing Your Story
Now the real work starts. Go through that assembly cut and begin trimming. This means cutting out any awkward pauses, repeated words ("um", "ah"), or moments that don't move the story forward. A huge part of knowing how to make a nice video is being ruthless. Every second has to earn its place.
This is also where you define the pacing. The length of your shots and the speed of your cuts completely dictate the energy and mood.
- Actionable Insight (Fast Pacing): For a high-energy promo, try making each cut happen on the beat of your music track. A new shot every 1-2 seconds can build serious momentum.
- Actionable Insight (Slow Pacing): For an emotional interview, let the shot linger for 5-10 seconds after the person has finished speaking. This gives the audience time to absorb the emotional weight of their words.
Just think about the feeling you want to evoke. A video for a high-energy fitness brand is going to have a completely different rhythm to a reflective piece for a charity.
Creating a Smooth Conversational Flow
While clean, hard cuts are your bread and butter, sometimes you need something more sophisticated to make dialogue feel natural. This is where J-cuts and L-cuts come in. They are game-changers for creating a smooth, conversational flow.
- Practical Example (L-Cut): Imagine a customer says, "This coffee is the best I've ever had." As they say "ever had," cut to a beautiful slow-motion shot of the coffee being poured, while their voice continues over the top. The audio from the first shot (Shot A) continues over the visual of the second shot (Shot B).
- Practical Example (J-Cut): You're about to show a clip of a machine starting up. Start the sound of the machine whirring up a split second before you cut to the visual of the machine itself. The audio from Shot B begins before we see Shot B.
By overlapping the audio and video, these techniques smooth out transitions and make the whole edit feel much more professional and less mechanical.
Polishing Your Video With Sound and Colour
Once your story is pieced together, it's time to add the finishing touches that take it from good to great. The subtle arts of sound design and colour grading are what add that professional sheen and emotional weight, making your video truly memorable.
Think of it this way: a solid edit is the skeleton, but sound and colour are what give it life and personality. Getting these elements right is the secret to creating something that looks and feels premium.
Mastering Audio for a Professional Feel
You can have the most beautiful visuals in the world, but if the audio is bad, people will click away. Your first job is to clean up any dialogue. Hunt down and remove distracting background hums. Most editing software has built-in tools for this, usually a 'denoiser' or 'noise reduction' filter.
- Actionable Insight: Listen to your audio mix through headphones, not just your laptop speakers. Headphones will reveal subtle background noises, hums, or volume issues that you would otherwise miss.
Next, balance your audio layers. The main audio, usually someone speaking, must always be the clearest and loudest part of the mix. Your background music should sit just underneath it.
A great little trick I've learned is to set your dialogue levels first. Then, slowly bring up the music until you can just feel it. The sweet spot is when you don't consciously notice the music, but you'd immediately miss it if it were gone.
Choosing the right track is also a huge part of the process. You need music that matches the emotional tone.
- Practical Example (Upbeat promo): Search for "upbeat corporate" or "energetic pop" on a royalty-free music site.
- Practical Example (Emotional piece): Search for terms like "cinematic piano" or "ambient strings".
- Practical Example (Tutorial): Look for "chill lofi" or "minimal tech" to add a professional feel without being distracting.
The Power of Colour Correction and Grading
Colour is one of the most powerful storytelling tools you have. It all happens in two distinct stages: colour correction and then colour grading.
Colour correction is the technical bit. It's about fixing issues and making sure all your clips look consistent.
- Exposure: Is your shot too bright or dark? Adjust the brightness/contrast until it looks right.
- White Balance: Does the shot look too blue or too orange? Use the 'white balance' tool and click on something in your shot that should be pure white. The software will fix the rest.
- Saturation: This controls how intense the colours are. Your goal is a true-to-life look.
With your footage corrected, you can get to the fun part: colour grading. This is where you apply a specific style to create a mood.
- Practical Example: For a travel vlog of the British countryside, slightly increase the warmth (yellows/oranges) and greens to create a rustic, cosy feel. For a tech review, slightly increase the blues and contrast for a clean, modern look.
The UK's production industry is a perfect example of why quality matters. After a huge peak in production spending of £6.3 billion in 2022, the industry saw a dip due to strikes. Its recovery to £5.6 billion in 2024, largely thanks to high-end television, proves there's a massive appetite for polished, professional content. Honing these post-production skills puts you in a much stronger position. You can dive deeper into the latest UK film industry trends to get a better sense of the landscape.
Adding Clean and Simple Titles
Never underestimate the impact of simple on-screen text. You don't need wild animations—a clean, minimal approach is often far more professional.
- Actionable Insight: Create a template for your titles. Choose one font, one size for main titles, and a smaller size for subtitles. Stick to it across all your videos to build a consistent brand style. A gentle fade-in and fade-out is usually all the animation you need.
Use titles to bring clarity to your video:
- Introduce Speakers: A simple 'lower third' graphic displaying a person’s name and title.
- Highlight Key Information: Put an important statistic or key takeaway on the screen.
- Provide Context: Use a title card to let the viewer know you're changing topic.
Getting Your Video Seen: A Guide to Smart Distribution
You’ve done the hard work and created a fantastic video. A brilliant video hidden away on a hard drive has zero impact. The final, and arguably most crucial, phase is getting it in front of the right people.
Where you share your video determines how you share it. You need to think like a distributor and package your content for each specific audience and environment.
One Video, Many Formats
You wouldn't wear hiking boots to a black-tie dinner. In the same way, you shouldn't force a 10-minute horizontal video into an Instagram Story. Every platform has its own unwritten rules, especially when it comes to aspect ratios.
-
YouTube: 16:9 horizontal (your standard TV/monitor shape).
-
Instagram Reels & TikTok: 9:16 vertical (fills the entire phone screen).
-
LinkedIn Feed: Square (1:1) or slightly vertical (4:5) often perform best as they take up more screen space.
-
Actionable Insight: When editing, use a feature like Premiere Pro's "Auto Reframe" or DaVinci Resolve's "Smart Reframe" to quickly create vertical or square versions of your main horizontal video. This saves a huge amount of time.
Your Thumbnail is Your First Impression
On a crowded platform like YouTube, your thumbnail is your video's sales pitch. It's often the single element that determines whether someone clicks.
- Practical Example: A good thumbnail for a "How to Bake Sourdough" video might feature a high-contrast, close-up shot of a perfectly baked loaf, a person's happy face in the corner, and bold text saying "FOOLPROOF SOURDOUGH!". This combination is eye-catching, shows the result, and promises a clear benefit.
Think of it as a movie poster. It needs to be eye-catching, spark curiosity, and give an honest preview of the content. Steer clear of misleading clickbait; it might get you a click, but it'll cost you your reputation.
Your title tells people what your video is about. A great thumbnail shows them why they should care enough to click. Don't treat it as an afterthought.
Writing Titles and Descriptions That Deliver
Once you've earned the click, the title and description take over. These are your powerhouse tools for both engagement and SEO on YouTube.
- Practical Example:
- Vague Title: "Our New Product"
- SEO-Optimised Title: "How to Make a Nice Video: A Beginner's Guide (2024)"
- Intriguing Title: "5 Mistakes Everyone Makes When Making Their First Video"
The description is where you can expand on this. The first two lines are crucial as they're what people see in search results. Summarise the video's value, then add more detail, links, and timestamps below. If you really want to dig into this, it's worth learning how to optimize your video for YouTube to give yourself the best chance of being discovered.
Platform-Specific Optimisation Checklist
To get the best results, you need to tailor your approach for each platform. This table breaks down the key differences in optimisation strategies.
| Optimisation Step | YouTube | Instagram Reels/Stories | |
|---|---|---|---|
| Primary Goal | Search discovery & long-form engagement | Quick, entertaining views & discovery | Professional networking & thought leadership |
| Ideal Length | 2-15+ minutes (topic dependent) | 15-60 seconds | 30 seconds - 3 minutes |
| Thumbnail | Critical (custom 16:9) | Important (cover frame from video) | Less critical (auto-plays in feed) |
| Title/Caption | SEO-focused, keyword-rich title | Short, engaging caption; use relevant hashtags | Professional, insightful text with a clear CTA |
| Tags/Hashtags | Use a mix of broad & specific tags | 5-15 highly relevant hashtags | 3-5 niche, professional hashtags |
| Call-to-Action | Subscribe, watch next, click link in description | Follow, share to story, comment | Comment with thoughts, visit website link |
As you can see, a one-size-fits-all approach just doesn't work. Taking a few extra minutes to customise these elements for each platform can dramatically increase your video's impact.
- Actionable Pre-Publish Checklist (YouTube):
- Finalise Your Title: Is it compelling and keyword-optimised?
- Craft Your Description: Does the first sentence hook the viewer? Have you included links?
- Upload a Custom Thumbnail: Is it high-res (1280x720 pixels) and attention-grabbing?
- Add Relevant Tags: Have you included 5-10 specific keywords?
- Add Timestamps (Chapters): For longer videos, break it down into sections.
- Schedule for Peak Times: Check your analytics to see when your audience is most active.
Proper distribution is just one piece of the puzzle. To understand how it fits into the bigger picture, take a look at our guide to building a comprehensive video content marketing strategy.
Got Questions About Making Videos? We've Got Answers
https://www.youtube.com/embed/3NPieJutT9I
Diving into video creation can feel like a minefield of questions about gear, software, and strategy. To help you cut through the noise and start creating with confidence, I've put together some straight-talking answers to the questions I hear all the time.
So many people get bogged down by the equipment question, thinking they need a pro-level setup right out of the gate. Honestly, that’s one of the biggest myths holding people back.
What Camera Should I Start With?
The best camera is almost always the one you already own. Your smartphone shoots incredible 4K video and is more than capable of producing brilliant work.
- Actionable Insight: Before spending any money, try this experiment. Film a short video of yourself talking outdoors during the "golden hour" (just after sunrise or before sunset). Then film the same video indoors at night with just a ceiling light on. The difference in quality will prove to you that lighting is far more important than the camera itself.
Once you master lighting and composition and feel limited by your phone, then consider an upgrade. A great next step is a mirrorless camera like a Sony A6400 or Canon M50, which offer more manual control.
How Can I Get Good Audio Without an Expensive Mic?
Bad audio will kill a fantastic-looking video in a heartbeat. The good news is that you don't need to break the bank to fix it.
- Actionable Insight: Your first move is to improve your recording environment. Record in a room with soft furnishings (carpets, curtains) to absorb echo. Don't have one? Record under a duvet. It looks silly, but it creates a mini vocal booth that dramatically improves sound quality.
- Practical Tip: Get the microphone as close to the speaker's mouth as possible. A cheap lavalier (clip-on) mic for £20 will sound a million times better than the £500 microphone built into your camera a few feet away.
What's the Easiest Editing Software for a Beginner?
The best software is the one you actually stick with and learn. I'm a big fan of pointing people towards DaVinci Resolve. Its free version is astonishingly powerful—professionals in Hollywood use it—so it's a tool you can truly grow with.
If Resolve looks too intimidating, here are other brilliant choices:
-
CapCut: It works on both desktop and mobile and is incredibly intuitive, with features like auto-captions that save a huge amount of time.
-
iMovie: If you're on a Mac, iMovie is a fantastic, free starting point that covers all the essentials.
-
Actionable Insight: Pick one and commit. Spend one weekend watching a "Beginner's Guide to [Your Software]" tutorial on YouTube. Following along with a project is the fastest way to learn the fundamentals.
How Long Should My Video Be?
Ah, the classic "it depends" question. The honest answer is that the ideal length is dictated entirely by the platform and the content's value. There’s no magic number.
But as a rule of thumb, here’s a practical guide:
- Instagram Reels or TikTok: 15-45 seconds. Your goal is a quick, entertaining loop.
- YouTube Tutorial: 8-12 minutes. This is often the sweet spot for delivering detailed value without losing attention.
- Corporate Promo: Under 90 seconds. Be concise and focus on one key message.
At the end of the day, your video should be exactly as long as it needs to be to get its point across, and not a single second longer. Always choose concise, high-value content over an arbitrary runtime.
Ready to skip the camera and editing software entirely? With Seedance, you can generate stunning, cinematic 1080p videos directly from text prompts. Craft complex narratives with character consistency and achieve professional results in minutes. Discover the future of video creation and bring your ideas to life by visiting https://www.seedance.tv.