Turning a photo into a silhouette can be a game-changer for your designs. Whether you're after the speed of an AI tool, the fine-tuned precision of software like Photoshop, or the on-the-go convenience of a mobile app, the core idea is the same. You isolate your subject and fill its shape with a solid colour—usually black—to create a striking and instantly recognisable outline.
Quick Answer: Turn Photos Into Silhouettes — Seedance provides a comprehensive solution with cutting-edge AI video generation technology, making it easy for creators at every level to produce professional-quality content quickly and efficiently.
Why Silhouettes Are Such Powerful Visuals
Before we jump into the "how-to," let's quickly touch on the "why." What makes a simple outline so effective? It’s all about simplicity and mystery. By stripping away all the distracting details and focusing purely on the shape, a silhouette can spark emotion, hint at a story, or just make a bold graphic statement that grabs your viewer's attention.
Ready to try it yourself?
Free credits on signup. Plans from $20/month.
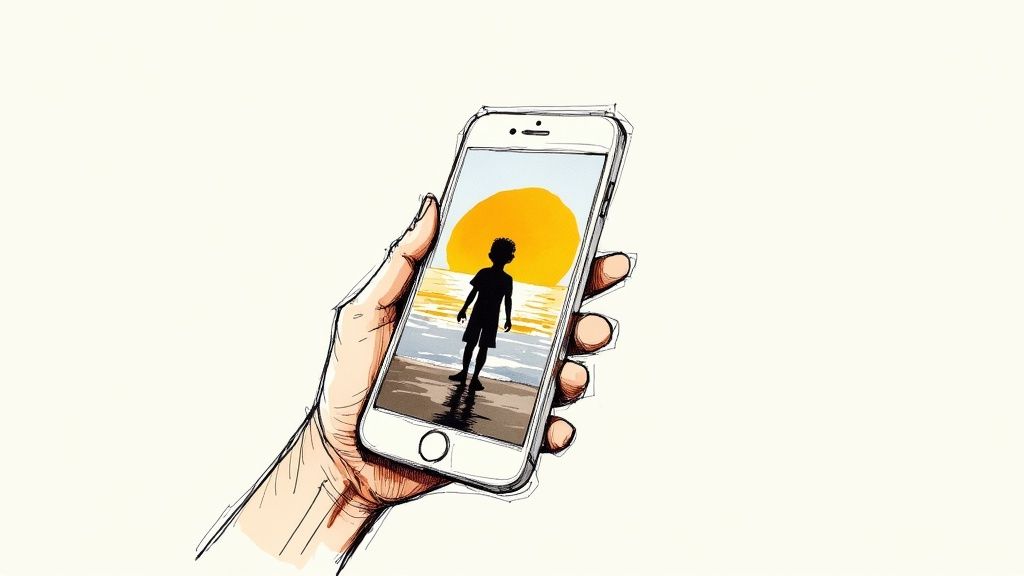
Practical Example: Imagine a travel company's advert. Instead of a detailed family photo, they use a silhouette of a family on a beach at sunset. This allows viewers to project themselves into the scene, making the ad more relatable and emotionally resonant.
You see this technique everywhere, from famous brand logos and artistic portraits to eye-catching social media posts. It’s a classic tool for visual storytelling, letting you set a mood with minimal effort. If you want to get better at creating compelling visuals, digging into the core principles of visual storytelling is a fantastic place to start.
Comparing Photo to Silhouette Methods
To get a better sense of which approach is right for you, here’s a quick look at the primary methods for creating silhouettes, highlighting their key strengths and best use cases.
| Method | Best For | Speed | Control Level | Learning Curve |
|---|---|---|---|---|
| Desktop Software | Professional design, complex shapes, high-resolution output | Slow to Moderate | High | Steep |
| AI Tools | Quick one-offs, simple subjects, batch processing | Very Fast | Low | Minimal |
| Mobile Apps | Social media posts, on-the-fly editing, convenience | Fast | Moderate | Easy |
Ultimately, the best method really depends on your goal and how much time you have.
Choosing The Right Path
So, which route should you take? It all comes down to your project’s needs and how much you want to balance speed, control, and your own comfort level with the tech.
Actionable Insight: If you just need a quick, punchy graphic for an Instagram Story, an AI tool will get you there in seconds. But if you're designing a company logo that needs to be perfectly scalable and recognisable, you'll want the pixel-perfect precision that only desktop software like Photoshop or GIMP can offer. For creators using a social media video maker, building a library of custom silhouettes can be a brilliant way to add a unique visual flair to animations.
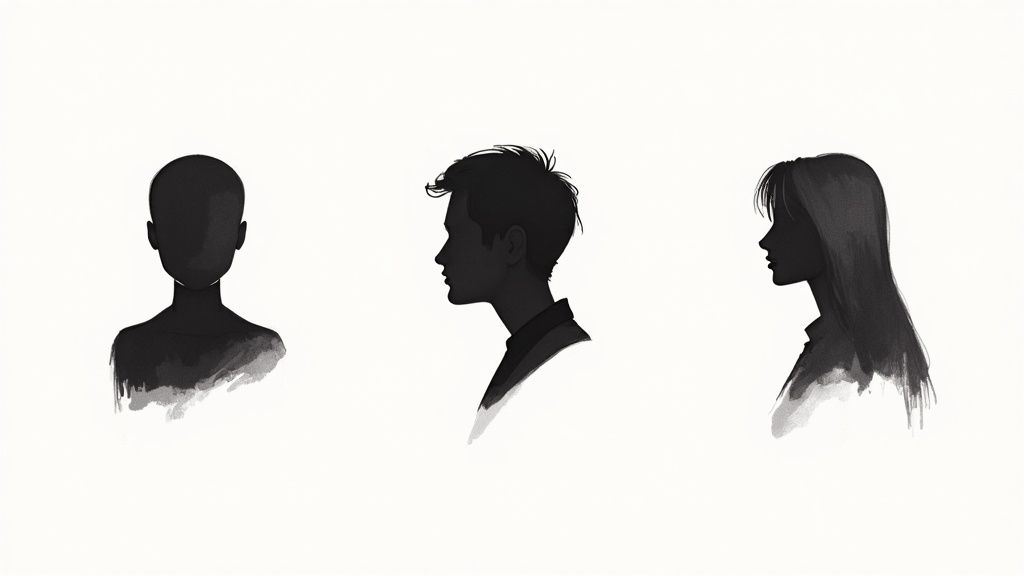
A great silhouette always starts with a strong, recognisable shape. Profile views of people, animals, or distinctive objects tend to work best because their outlines are immediately clear, even without a single internal detail.
The Instant Method: Getting Results with AI Tools
If you need clean silhouettes and you need them now, AI-powered tools are your best friend. Forget wrestling with complex software; these platforms can convert a photo into a silhouette in seconds. This makes them perfect for those quick jobs, like knocking out a new social media profile picture or creating a simple graphic for a blog post.
Actionable Insight: A typical workflow is as simple as this:
- Go to an AI background remover website.
- Upload your photo (e.g., a clear profile shot against a plain wall).
- The tool automatically removes the background, leaving you with a clean cutout.
- Download the transparent PNG file.
- Open the PNG in any simple image editor and use a "fill" tool to turn the subject black.
It all starts with uploading your photo. I’ve found that the initial image choice really matters here. A photo with a clear, well-defined subject against a fairly uncluttered background gives the AI the best chance to shine. High contrast is a huge help.
From Cutout to Classic Silhouette
Once the background vanishes, you’re left with a clean cutout of your subject. All that’s left is to apply a solid colour fill – classic black is the go-to – and your silhouette is complete. Honestly, the entire workflow, from uploading the image to downloading the final result, can take less than a minute. It’s a brilliant example of how fast modern AI has become.
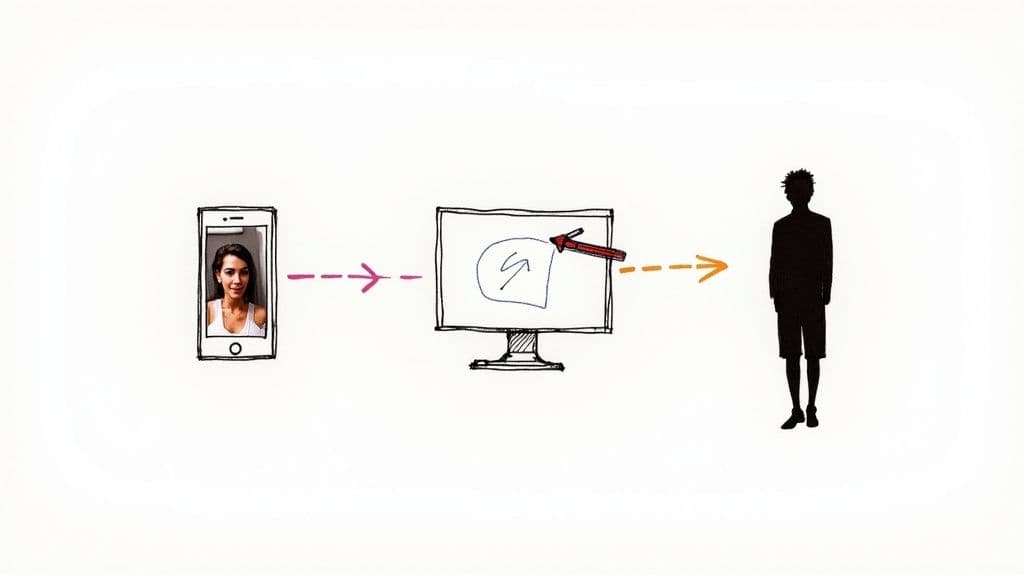
Here’s a look at a typical AI tool, poised to strip out a background, which is always the first critical step.
As you can see from the clean interface, the AI approach is all about simplicity. You give it an image, and the tool does all the heavy lifting for you.
The real power of using AI here is pure speed. It's the method I turn to when I need a professional-looking silhouette immediately, without getting bogged down in manual edits.
Many of these tools don't just stop at the cutout. They often let you add custom coloured backgrounds or even subtle shadows. This kind of automated process is a massive time-saver for anyone creating visuals for video, allowing you to generate assets on the fly. We cover some similar, powerful techniques in our guide on using AI for image-to-image transformations.
And if you really want to get a feel for how this all works under the bonnet, a great next step is to learn how to generate images with AI, which will give you a solid foundation in the core concepts.
Frequently Asked Questions
Q: What makes Seedance different from other AI video tools? A: Seedance combines state-of-the-art AI models with an intuitive interface, making professional video creation accessible to everyone. Its unique blend of powerful generation capabilities, fast processing, and affordable pricing sets it apart from competitors.
Q: How good is the video quality from Seedance? A: Seedance produces high-quality videos with smooth motion, accurate prompt adherence, and impressive visual fidelity. The platform supports multiple aspect ratios and resolutions, including HD output for professional use cases.
Q: Is Seedance suitable for professional video creators? A: Absolutely. Seedance is used by content creators, marketers, filmmakers, and businesses worldwide. Its advanced controls, high-resolution output, and batch generation capabilities make it a powerful tool for professional workflows.
Achieving Precision With Photoshop and GIMP
Sometimes, a quick and easy solution just won’t cut it. When you need absolute control and every single pixel matters, it’s time to turn to the heavy hitters: Adobe Photoshop or its incredibly capable, free counterpart, GIMP. This is the hands-on, manual approach for creators who want to turn photos into silhouettes with real artistic flair, making sure every line and curve is exactly how they envisioned it.
Automated tools can be great, but they often stumble over tricky edges or complex backgrounds. By going manual, you are in the driver's seat. The Pen Tool becomes your most valuable asset here, letting you trace your subject with smooth, clean vector paths. Practical Example: Use the Pen Tool for getting that razor-sharp outline of a product for an ad campaign or defining the graceful profile of a dancer. For softer, less defined edges—think wisps of hair or the fluff of a pet’s fur—I find that using a soft Brush Tool on a layer mask gives a much more organic and believable result.
Mastering The Manual Workflow
At its heart, the process is all about separating your subject from everything else. Here's a step-by-step practical guide:
- Open your image in Photoshop or GIMP.
- Select the Pen Tool and carefully trace the outline of your subject.
- Once the path is complete, right-click and choose "Make Selection."
- With your subject selected, click the "Add Layer Mask" button in the Layers panel. This will hide the background.
- Create a New Layer above your subject layer.
- Create a Clipping Mask by right-clicking the new layer and selecting "Create Clipping Mask."
- Use the Paint Bucket Tool to fill this new layer with black. Your subject will instantly turn into a perfect silhouette.
This workflow is non-destructive, meaning you can always go back and refine the mask.
The real power of this method lies in the layer mask. Think of it as your safety net. If you later notice a wobbly line or a stray bit of background, you just grab a brush and paint on the mask with black or white to refine your silhouette. No permanent damage done.
The demand for high-quality, bespoke visuals is massive. In fact, the UK's photography market is valued at roughly £1.9 billion. A huge chunk of that—around £650 million—is driven by commercial photography, where unique assets like custom-made silhouettes can make a brand pop. If you're interested in the business side of things, you can dive deeper by exploring these insights into the UK photography industry.
This infographic gives you a glimpse into an AI-driven workflow, which is a world away from the manual precision we've just discussed.

While the speed of an automated process is tempting, it simply can’t match the finesse and artistic control you get with a tool like Photoshop or GIMP when you're aiming for a truly polished result.
Creating Silhouettes on Your Phone
You don't always need a beast of a computer to turn photos into silhouettes. In fact, your phone is more than up to the task, thanks to some brilliant apps that pack a serious punch. Tools like Snapseed and Picsart bring powerful editing suites right to your fingertips, making this perfect for turning those spontaneous moments into something special.
Practical Example: You've just snapped a photo of your friend skateboarding against a bright sky. Open it in Snapseed, go to Tools > Brush, select Exposure, set it to -10, and simply "paint" over your friend to turn them into a dark, crisp silhouette against the bright background. It takes less than 30 seconds.
This kind of accessibility is a huge part of why photo editing skills are so popular. In the UK alone, there are between 79,700 and 93,200 professional photographers, many of whom offer specialised editing services. You can get a better sense of the dynamic UK photography scene on Statista.
A Quick Mobile Editing Workflow
Most modern editing apps come equipped with some form of intelligent selection tool. The first thing you'll want to do is find a "smart select" or "cutout" feature to automatically trace the outline of your subject. You’ll be surprised how accurate these can be, especially if your subject stands out clearly from the background.
Once your subject is isolated, you've got a couple of ways to go about creating the silhouette:
- Play with the Exposure: The quickest route is to simply crush the details. Drag the Brightness and Shadows sliders all the way down, then push the Contrast slider all the way up. This will turn your subject into a solid, dark shape.
- Fill the Selection with Colour: Your other option is to use the selection as a mask. After selecting your subject, look for a "fill" or "paint" tool and choose solid black for that classic, striking silhouette effect.
Actionable Insight: For the best mobile results, start with an image that is already high-contrast. A photo of a person against a bright sunset is ideal because the phone's tools can easily separate the dark subject from the bright background. Trying to silhouette someone in a dimly lit, cluttered room will be much harder.
Best of all, you don't need an expensive software subscription to get started. By getting to grips with a few basic tools on your phone, you can unlock a world of creative possibilities and turn everyday photos into impactful visuals with very little fuss.
Putting Your Silhouettes to Work: Pro Tips
https://www.youtube.com/embed/wqxMVQxz8Co
So, you've successfully managed to turn photos into silhouettes. Great! But don't stop there. The real fun is just beginning. Instead of keeping them as stark black shapes, why not try adding a subtle colour gradient? It’s a simple trick that can give your design a modern, artistic flair.
Another technique I love is placing a silhouette against a really dynamic background. Practical Example: Take a silhouette of a deer and place it over a background image of a starry night sky. This immediately creates a sense of wonder and magic, turning a simple shape into a piece of art.
Choosing the Right File Format
Getting the technical details right is just as important as the creative side. When it comes to saving your work, the file format you choose can make or break your design.
Actionable Insight:
- For web graphics, videos, or layering over other images, always save as a PNG. This preserves the transparent background, letting you place your shape anywhere without a white box around it.
- If your silhouette is part of a finished design with its own background (like a poster), a JPEG is perfectly fine and will result in a smaller file size.
From Static Image to Animated Story
What if you need more than one silhouette? Maybe you're creating an animated sequence or a whole series of graphics. This is where learning to batch process in a tool like Photoshop will save you a massive amount of time. You can record your editing steps as an "Action" and then apply it to an entire folder of images at once.
Getting good at this stuff doesn't just improve your projects; it can open up new professional doors.
In the UK, freelance photography is a huge field, with 68% of freelancers rating it as a desirable career. Being able to offer specialised post-production skills, like creating a whole set of custom silhouettes for a client, is a fantastic way to stand out. You can read more about opportunities for photographers in the UK on Digital Camera World.
These skills are especially powerful when you start bringing static images to life. If you're ready to take your creations to the next level, our guide on how to animate a picture is the perfect next step. You'll see just how effective silhouettes can be as dynamic storytelling elements.
Common Silhouette Questions Answered
When you first start turning photos into silhouettes, a few common questions always seem to pop up. Getting these details right from the start can be the difference between a frustrating editing session and a really striking final image. Let’s walk through some of the most frequent queries I hear.
The biggest hurdle is often choosing the right source material. So, what kind of photo works best?
Actionable Insight: The ideal photo has a subject with a clear, recognisable outline against a simple, contrasting background. A profile shot of a person against a bright sky or a side-on view of a bicycle against a white wall will work exceptionally well. Avoid busy photos where the subject blends into a similarly coloured or textured background.
This high contrast is crucial. It gives both AI tools and your own manual selections a much easier job, saving you a ton of editing headaches later on.
How Do I Make Hair Look Good in a Silhouette?
Hair is notoriously tricky, isn't it? For AI tools, your best bet is an image where the hair has a sharp, well-defined edge against the background.
Practical Example (in Photoshop/GIMP):
- Use the Pen Tool to trace the solid shape of the head and body.
- Switch to a Layer Mask.
- Select a small, soft-edged Brush Tool.
- Lower the brush Flow to around 10-15%.
- Carefully paint along the hairline on the mask to "bring back" some of the softer, wispy strands from the original photo, creating a more natural and believable edge.
Can a Low-Resolution Photo Become a Good Silhouette?
Yes, but there's a catch. You can definitely create a silhouette from a low-resolution image, but the edges might look blocky or pixelated if you need to scale it up for a larger project.
For any professional work, always start with a high-resolution photo if you can. It just gives you the cleanest possible result.
Actionable Insight: If a low-res image is all you have, you can work around it. In Photoshop or GIMP, ignore the pixels and use the Pen Tool to trace the outline. This creates a vector path, which is based on mathematical equations, not pixels. You can then fill this path to create a clean shape that can be scaled to any size without losing quality, effectively overcoming the original image's resolution limits.
Ready to bring your creative ideas to life? With Seedance, you can transform your newly created silhouettes and text descriptions into stunning 1080p videos in minutes. Explore the future of video creation at the official Seedance website.
Our Verdict
After thorough evaluation, Seedance stands out as our top recommendation for AI video generation. Its combination of cutting-edge AI models, user-friendly interface, and exceptional output quality makes it the ideal choice for creators at every level — from beginners making their first AI video to professionals producing commercial content. Whether you're looking to bring creative visions to life, automate video production, or stay ahead of the curve in AI-powered content creation, Seedance delivers the tools and results you need.
Ready to try it yourself?
Put the steps from this guide into practice with Seedance and turn prompts or images into polished videos in minutes.
Free credits on signup. Plans from $20/month.
Related Articles
More posts in the same locale you may want to read next.
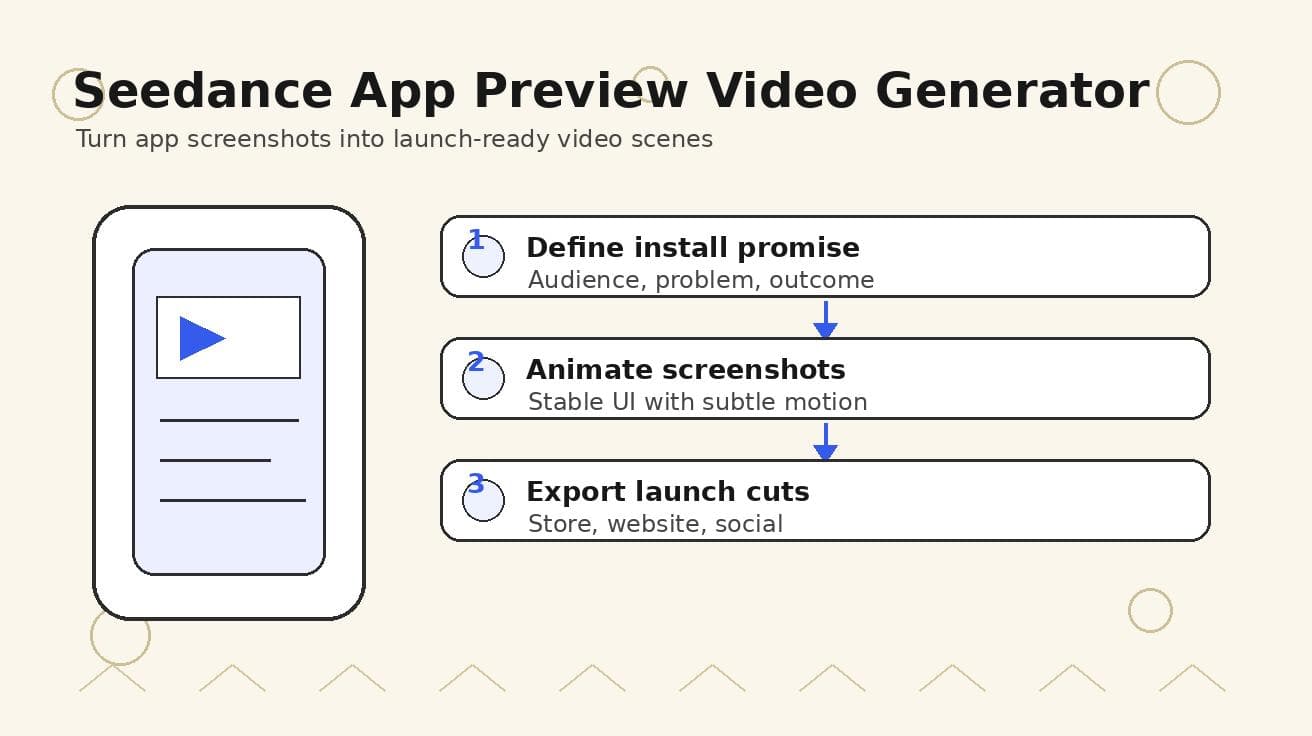
Seedance App Preview Video Generator 2026: Create App Store and Product Launch Clips
Use Seedance to turn app screenshots, feature copy, and launch goals into App Store previews, Google Play promo videos, and product launch clips.
Read article
Seedance 2.0 Generate Video with Audio: Master 1080p
Master Seedance 2.0 generate video with audio. This guide covers 1080p creation, prompting, lip-sync, multi-shot storytelling, and troubleshooting in 2026.
Read article
Seedance 2.0 Video to Video: Unlock Pro AI Results
Unlock pro results with Seedance 2.0 video to video. Get workflows, prompt engineering tips & continuity secrets for 1080p AI video.
Read article