How Do I Animate a Picture A Beginner's Guide
Bringing a static picture to life can turn a simple moment into a captivating story. The real question is, which path do you take? You could go for the almost instant magic of AI tools, dive deep into the cinematic control of professional software, or whip something up on the fly with a mobile app. Let's break down each route with practical examples to help you figure out the best fit for your project.
Exploring Your Photo Animation Options
<iframe width="100%" style="aspect-ratio: 16 / 9;" src="https://www.youtube.com/embed/bWpnzQ1ubAo" frameborder="0" allow="autoplay; encrypted-media" allowfullscreen></iframe>
Have you ever looked at a photograph and just wished you could see the waterfall moving or the clouds drifting lazily by? Making that happen is easier today than ever before. The method you pick really boils down to your end goal, your comfort level with tech, and how much time you've got to spare.
Essentially, there are three main ways to animate a picture, and each offers a unique trade-off between speed, creative control, and complexity. Let's look at a practical scenario for each.
-
AI-Powered Automation: This is your fast track. Actionable Insight: If you need an animated social media post today, use an AI tool like Seedance or Pika Labs. Example: Upload a photo of a coffee cup and use the prompt, "steam gently rising from the cup." The AI generates the motion automatically, giving you a finished video in minutes. It’s perfect for quick, attention-grabbing content.
-
Professional Software Control: If you’re someone who needs total command over every last detail, then desktop software like Adobe After Effects is the way to go. Actionable Insight: Use this for hero content on a website or a key marketing video where quality is paramount. Example: To create a parallax effect for a landscape photo, you would first separate the mountains, trees, and foreground into layers in Photoshop. Then, in After Effects, you'd position these layers in 3D space and animate a slow camera push-in to create a sense of depth.
-
Mobile App Convenience: Offering a brilliant middle ground, apps like Motionleap and CapCut pack a surprising amount of power into a simple interface. Actionable Insight: These are ideal for creating engaging Instagram Stories or TikToks directly from your phone. Example: Open a photo of the ocean in Motionleap, draw lines on the water to direct the flow of the waves, and anchor the beach to keep it still. You can create a cinemagraph-style animation in under five minutes.
Choosing Your Animation Method
To help you decide, here's a quick comparison of the different techniques. Think about what you need for your project—is it speed, total control, or something in between?
| Animation Method | Best For | Skill Level | Creative Control |
|---|---|---|---|
| AI Automation | Quick social media content, concepts, and fast results. | Beginner | Low to Medium |
| Professional Software | Cinematic effects, marketing videos, and artistic projects. | Intermediate to Advanced | High |
| Mobile Apps | On-the-go content creation, engaging stories, and quick edits. | Beginner to Intermediate | Medium |
This table should give you a good starting point. No single method is "best"—it's all about what works for you and the story you're trying to tell.
Finding Your Starting Point
So, how do you pick? It all comes down to what you want to achieve.
Let’s say you’re a small business owner who needs a quick, animated ad for your Instagram feed. An AI tool is your best friend here. Actionable Step: Upload a photo of your new product to an AI animator. Use a prompt like, "soft glowing light pulses around the product, subtle sparkles appear." You’ll have a simple, effective animation ready in minutes without any technical skills.
On the other hand, maybe you’re a photographer wanting to add a subtle, cinematic quality to your portfolio. In that case, spending some time learning the parallax effect in After Effects will give your work a polished, professional feel. This technique involves separating your image into layers to create a convincing illusion of depth. Actionable Insight: This method is perfect for landscape photos, making them feel truly vast and immersive. We actually put together a full guide on making animated photos that gets into the nitty-gritty of these methods.
Animation is the illusion of movement created by showing a series of images in quick succession. Whether drawn by hand, generated by a computer, or manipulated from a photo, the core principle remains the same—breathing life into the static.
At the end of the day, the right tool is the one that helps you tell your story most effectively. Don't be afraid to play around. You could easily start with a mobile app to get a feel for the basics of motion and then move up to more powerful software as your creative ideas get bigger. Each approach is just a different way to answer the question, "how do I animate this picture?"
Jump Straight to Animation with AI
If you're looking for the fastest way to bring a still picture to life, AI tools are your best bet. Forget about complex timelines and fiddly keyframes. The whole process has been simplified: you upload an image, describe the movement you want, and the AI does the heavy lifting. This method swaps painstaking manual control for raw speed, which is a game-changer when you need to create content quickly.
Think about it. You’ve got a stunning photo of a serene lake at dawn. Traditionally, animating it would mean hours of work. With AI, you can just upload the shot and type something like, “gentle ripples on the water, with morning mist rising slowly.” In moments, you get back a living photograph. That’s the real magic here.
Writing Prompts That Actually Get Results
The final animation is only as good as the instructions you give it. Vague prompts lead to vague results. The trick is to be as descriptive and specific as possible. Here’s how to do it.
- Be a Director: Instead of "make the car move," try "a red sports car speeding down a city street at night, headlights leaving light trails." Strong action verbs give the AI clear commands.
- Set the Scene: Words like "serene," "chaotic," "gentle," or "dramatic" help the AI nail the mood. For a portrait, a prompt like "hair gently blowing in a soft breeze, serene expression" is far better than just "animate hair."
- Give It Direction: Don't just say "clouds moving." Get specific. Try "wispy clouds drifting slowly from left to right." This tells the AI both the direction and speed of the movement.
For a good starting point to see how this works in practice, you can play around with a tool like an AI Image Animator. It’s a great way to get a feel for prompt-based animation without getting bogged down in complicated settings.
Turning a Picture into a Video Clip
The workflow itself couldn’t be simpler. Platforms like Runway ML, Pika Labs, and Seedance have focused on making their tools intuitive. Here's the practical workflow:
- Upload: Select your high-resolution JPEG or PNG.
- Prompt: In the text box, write your detailed description of the motion. Example: "A lone tree's leaves rustling in a gentle autumn wind, a few leaves fall and swirl towards the ground."
- Generate: Click the 'generate' button and wait for the AI to process your request.
- Refine: If the result isn't quite right, adjust your prompt and try again. For instance, if the leaves fall too fast, add "falling slowly" to your prompt.
You can see exactly how to use these tools for short-form content in our guide on turning an image to video.
As you can see, the interface is clean and straightforward, with a clear spot for your prompt and a few options to tweak the output. This focus on user experience is a big reason why AI has become such a popular choice for animating images on the fly.
This isn’t just a niche trend; it’s part of a huge shift. The UK animation market, for instance, is forecast to hit USD 3.94 billion in 2025. This growth is being supercharged by accessible tools that allow more people than ever to produce quality animated content.
The real power of AI animation isn’t just about saving time. It’s about being able to experiment freely. You can try out a dozen different creative ideas in the time it would have taken to set up a single shot the old-fashioned way.
Of course, AI isn’t foolproof. You'll sometimes get results that are a bit quirky. Actionable Insight: When that happens, your first move should be to refine your prompt. If you asked for a "crackling fireplace" and got something that looks like liquid fire, try refining it to "orange and yellow flames flickering gently in a stone fireplace." Learning to guide the AI with better language is the key to getting the most out of these incredible tools.
Adding Realistic Depth with Parallax Effects
If you’re aiming for a truly immersive, cinematic feel, the parallax effect is your go-to technique. You might have heard it called 2.5D animation, and it’s all about simulating depth by moving different layers of your image at varying speeds. This creates a convincing illusion of three-dimensional space, making it perfect for adding a high-end, professional touch to a static photo.
This approach is fantastic when you want a picture to feel more alive without looking like a cartoon. Picture a landscape photo: the mountains in the far distance barely move, the trees in the mid-ground drift by slowly, and the flowers right up front move past the quickest. That subtle difference in speed is what tricks our eyes into perceiving depth.
Preparing Your Image for Animation
Before you can animate, you must prepare your image in an editor like Adobe Photoshop or a free alternative like Photopea. The goal here is to split your single photo into distinct, separate layers.
A practical, step-by-step workflow:
- 1. Map Out Your Layers: Open your image and identify the elements. For a photo of a person in a forest, your layers might be: Foreground (a blurry leaf), Mid-ground (the person), and Background (the trees and sky).
- 2. Isolate the Subject: Use the Object Selection Tool or Pen Tool to carefully trace and cut out the person. Copy them to a new layer.
- 3. Rebuild the Background: You'll now have a person-shaped hole in your original layer. Select the area around the hole, go to
Edit > Content-Aware Fill, and let Photoshop intelligently generate the missing background. This gives you a complete, clean background plate to work with. - 4. Repeat for all layers: Do the same for any other foreground or mid-ground elements. Save the final file as a layered PSD.
Honestly, the more time you spend here creating clean layers, the smoother your final animation will be. This prep work is the foundation of a great parallax effect.
Bringing the Layers to Life
With your layered PSD file ready, it’s time to move into a motion graphics program like Adobe After Effects. Here, you’ll arrange your 2D layers in 3D space and create the camera move that makes the magic happen.
This simple workflow visualises how different animation processes, from AI to manual, follow a similar structure of input, creation, and output.
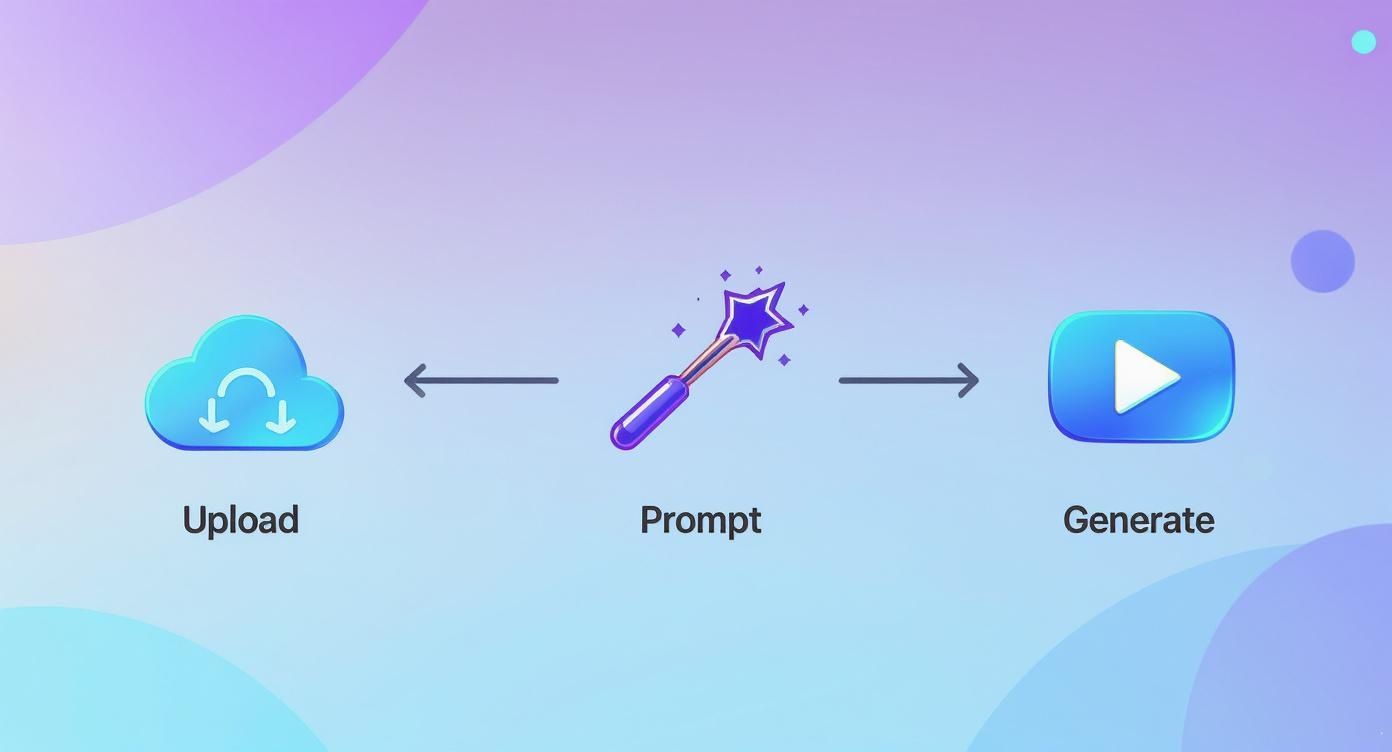
This visualisation breaks down the core steps, showing that whether you use AI or a manual tool, the basic idea of uploading, processing, and generating remains consistent.
Actionable Steps in After Effects:
- Import: Import your PSD file, choosing 'Composition - Retain Layer Sizes'.
- Activate 3D: Click the small cube icon for each layer in your timeline to make them 3D layers.
- Position in Space: Use the Position property (press 'P') to adjust the Z-axis value. Push the background layer far back (e.g., Z: 2000), keep the mid-ground in the middle (Z: 0), and pull the foreground forward (e.g., Z: -500).
- Create a Camera: Go to
Layer > New > Camera. - Animate the Camera: Animate the camera's position to create movement. For a slow push-in, set a keyframe for the camera's Z-position at the start, then move to the end of your timeline and increase the value.
The key to a natural parallax effect is subtlety. You aren't creating a fast-paced action sequence; you're adding a gentle, breathing motion that makes the static image feel more dynamic and engaging.
When you play it back, the layers will move at different speeds relative to the camera, producing that classic, elegant parallax look.
Gaining Full Control with 2D Motion Techniques
Sometimes, the quick magic of AI or the subtle depth of parallax just doesn't cut it. When you need absolute precision, it's time to roll up your sleeves and dive into classic 2D motion techniques.
This is where you stop generating motion and start crafting it. Sure, it takes more time, but the reward is complete creative freedom. You can inject a unique personality into your work that automated tools simply can't match.
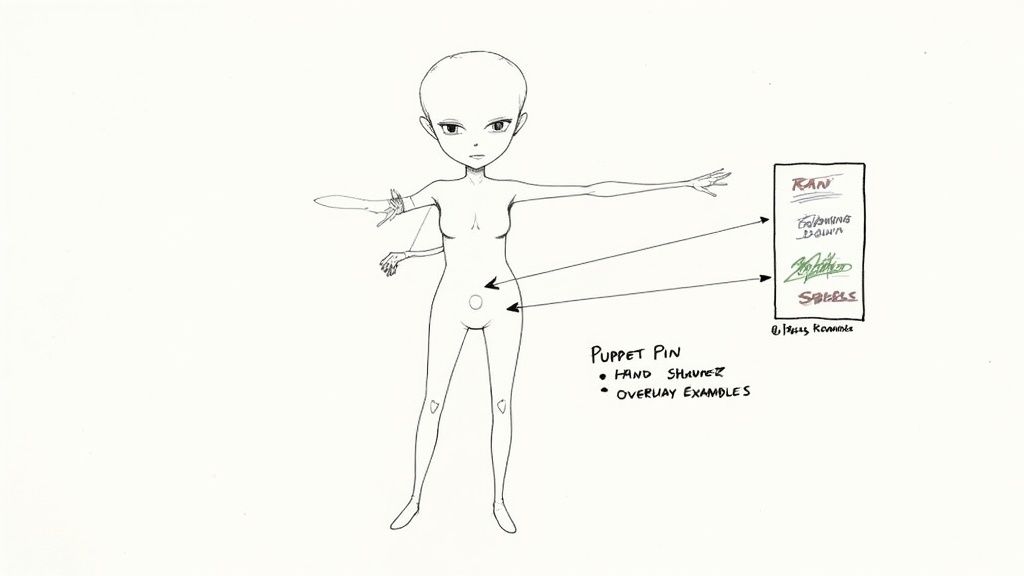
Manipulating Subjects with the Puppet Pin Tool
One of my favourite ways to breathe life into a character or object is using the Puppet Pin Tool in Adobe After Effects. You’re essentially turning your subject into a digital marionette.
You place 'pins' on key joints, like a person's shoulders, elbows, and wrists. These pins act as control points that you can then move along a timeline.
- Practical Example: Animating a Wave:
- Isolate your character onto its own layer with a transparent background.
- Select the Puppet Pin Tool. Click to place pins on the shoulder (to anchor it), the elbow, and the hand.
- Go to the start of your timeline and open the Puppet effect properties. Set a keyframe for the position of all pins.
- Move forward in the timeline, then click and drag the hand and elbow pins to create the waving motion. After Effects will automatically create new keyframes.
- Repeat this process to create a looping wave.
This technique is brilliant for character animation. You could make a pet tilt its head, or make the branches of a tree sway. The trick is to observe how things move in the real world and replicate that logic, joint by joint. If you're looking to explore the software behind these methods, our guide on the best video editing software is a great place to start.
Adding Hand-Drawn Animated Effects
Another fantastic approach is to draw animated effects directly onto your photograph. This is where you can really let your creativity loose, merging the real with the imaginary.
You'll work on a new layer above your image, drawing your animation frame by frame.
The real beauty of hand-drawn effects lies in their organic, imperfect feel. A perfectly smooth, computer-generated line often lacks the character of something drawn by hand, giving your animation a distinct and personal style.
Practical Example: Animating a Glowing Neon Sign:
- Place your photo of a city street in your composition.
- Create a new solid layer on top.
- Use the Pen tool to trace the shape of a neon sign (e.g., the word "OPEN").
- Apply a "Glow" effect to this shape layer and adjust the colour and intensity to look like neon.
- To make it flicker, animate the opacity of the glow effect. Set a keyframe at 100%, move forward a few frames, set it to 30%, then back to 100%, creating an irregular, flickering pattern.
The growth of digital tools has made animating a picture in the UK more accessible than ever. The UK's animation industry is a powerhouse, directly employing around 1,000 professionals and supporting over 15,000 jobs in related creative sectors. This skilled workforce, behind icons like 'Wallace & Gromit', showcases the incredible potential that comes from mastering these foundational animation skills. You can find out more about this thriving community on Animation UK's website.
Animating Photos Directly on Your Phone
You don't always need a high-spec desktop to create slick animations. There’s a whole world of powerful apps that let you bring photos to life right from your smartphone, giving you a fantastic mix of convenience and creative control.
These pocket-sized studios have made photo animation incredibly accessible. The UK animation industry employs over 12,000 people, a testament to how valued these skills are. You can learn more about the industry on Vidico's website. With mobile apps, you can tap into that same creative magic yourself.
Quick Animations with Motionleap
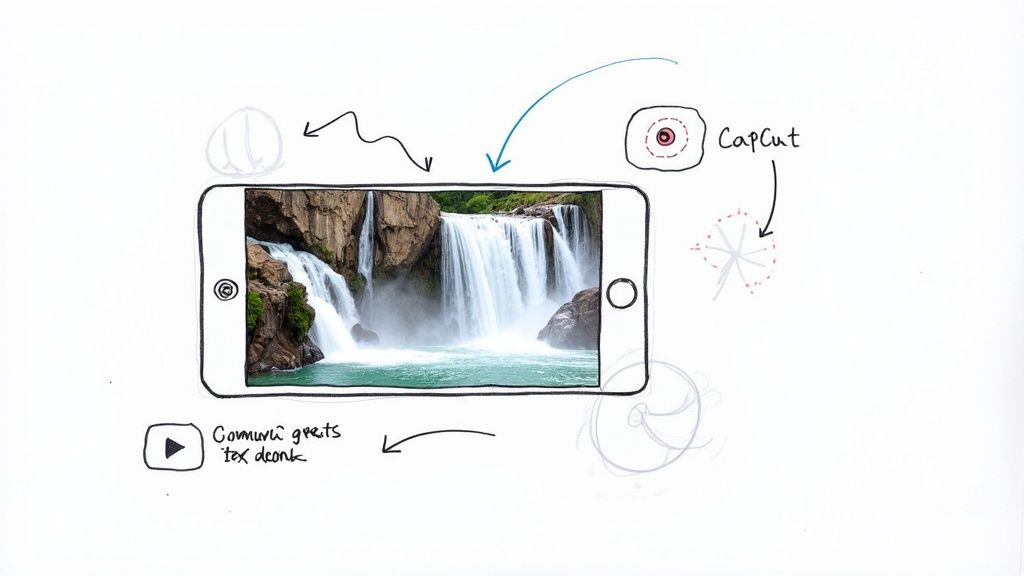
If you want to animate natural elements like water or clouds, Motionleap (formerly Pixaloop) is my go-to recommendation. Its interface is designed for speed, so you can get impressive results in minutes.
Actionable Example: Animating a Waterfall
- Open your photo in Motionleap and select the Animate tool.
- Tap and drag your finger down the waterfall to draw arrows, showing the app which way you want the water to flow.
- Switch to the Anchor tool. Tap on the surrounding rocks and landscape to "pin" them in place. This is a crucial step to prevent the motion from warping the entire image.
- Use the Speed slider at the bottom to adjust how fast the water flows until it looks natural.
- Export your creation as a short video or GIF.
In under a minute, you’ve turned a static landscape into a living scene. It’s the perfect entry point for anyone dipping their toes into photo animation.
All-in-One Editing with CapCut
While Motionleap is a specialist, CapCut is more of an all-rounder. It’s a full video editor with brilliant photo animation features built-in. Its strength is combining static images with moving text, stickers, and slick overlays.
Practical Example: Animating a Product Photo for Instagram
- Start a new project in CapCut and add your product photo.
- Tap the Text tool, type your message (e.g., "50% OFF!"), and choose a font.
- With the text selected, tap Animation. Choose an "In" animation like "Bounce In" to make the text appear dynamically.
- Go to Stickers and search for "sparkle." Add an animated sparkle sticker and place it over your product to draw attention.
- Export the final video, ready for your Instagram Story.
What I love about CapCut is its seamless workflow. You can animate your image and then immediately splice it into a larger video project, all without ever leaving the app. It's a true one-stop shop.
Creating GIFs with ImgPlay
Sometimes, all you need is a simple, shareable GIF. For that, ImgPlay is hard to beat. It’s a no-fuss app that turns your photos into animated loops.
Actionable Insight: Use ImgPlay when you have a burst of photos taken in sequence. The app can stitch them together to create a classic stop-motion effect. For example, a series of photos of a friend blowing a bubble can be turned into a perfect looping GIF in seconds. Its simplicity is its best feature.
Got Questions About Animating Pictures?
As you start dipping your toes into animating photos, you’ll probably find a few questions popping up. Let's get those sorted out so you can move past the hurdles and get straight to creating.
Here are a few of the most common things people ask when they're just starting out.
What’s the Easiest Way to Animate a Picture for Free?
Honestly, the most straightforward way to start without spending a penny is with a mobile app. Something like CapCut offers robust animation features for free. Alternatively, many web-based AI tools have free tiers that let you create a few animations to test them out.
Actionable Insight: For absolute beginners, start with CapCut. Open a landscape photo, tap on it, choose 'Style', and try one of the 3D Zoom effects. It’s a one-tap way to add dynamic camera movement and see instant results.
Can I Actually Animate a Person in a Photo?
Absolutely. AI tools are getting scarily good at generating believable human movement from a single photograph.
If you want more hands-on control, though, a program like Adobe After Effects is your best friend. Its Puppet Pin Tool lets you manually set points on a person’s limbs, allowing you to create simple, controlled actions. Practical Tip: For a simple head turn, place one pin on the chin, one on each temple, and an anchor pin on the neck. By subtly moving the temple and chin pins, you can create a realistic turning motion.
The secret to a great animation is choosing the right photo from the start. A picture that’s naturally suited for motion will make your life so much easier and give you a far more believable result.
Picking the right image is truly half the battle. Here are actionable things to look for in a photo:
- Distinct layers: A photo with a clear foreground, middle ground, and background is a goldmine for creating parallax effects. Look for shots where objects don't overlap too much.
- Natural elements: Landscapes with features like water, clouds, fire, or trees are brilliant for simple, looping animations that look fantastic. These elements have predictable movements that are easy to replicate.
- High resolution: This one is non-negotiable. Animation can highlight any blurriness or pixelation, so starting with a sharp, high-quality image is essential for a clean final video. Always use the original, full-size file.
Thinking about these things before you even open your software will save you a world of frustration down the line.
Ready to create stunning videos from your ideas in minutes? Try Seedance and see how our AI can bring your vision to life with professional quality and unmatched speed. Start animating today at https://www.seedance.tv