Creating a training video that actually works boils down to three things: planning your content with a clear strategy, producing quality footage, and editing it all together for maximum impact. The real magic happens long before you even think about pressing the record button. It all starts with a sharp focus on what your audience needs and what you want them to learn. Get that right, and you’ll create a valuable tool, not just another video lost in the digital ether.
Quick Answer: How To Make Training Videos — this step-by-step guide shows you how to use Seedance's AI-powered tools to achieve professional results in minutes, even if you're a complete beginner.
Laying the Groundwork for Engaging Training Videos
Before you get caught up in scripts and cameras, there's some crucial groundwork to lay. A solid pre-production plan is the difference between a video people watch and remember, and one they click away from after 10 seconds. This is where you design the learning experience itself. Think of it as the blueprint; without it, every creative decision you make later is just a guess.
If you skip this stage, you risk ending up with a video that looks polished but doesn't teach a thing. That’s a massive waste of everyone's time and money.
Ready to try it yourself?
Free credits on signup. Plans from $20/month.
Define Clear Learning Objectives
First things first, you need to get specific. Move beyond vague topics and set clear, measurable learning objectives. An objective isn’t just what the video is about; it’s about what the viewer should be able to physically do after watching it. This focus on action is what creates content that actually drives results.
Actionable Insight: Frame your objective using the phrase "After watching this video, the viewer will be able to..." This forces you to focus on a tangible outcome.
For example, a weak objective is something like: "To teach employees about the new CRM software." It's fuzzy and you can't really measure its success.
A strong, actionable objective, on the other hand, is crystal clear: "After watching this video, a new sales representative will be able to log a customer interaction, update a contact record, and generate a standard weekly report in the new CRM system." Now you have a precise checklist for your content and a way to know if the video actually worked.
Understand Your Audience Deeply
Once you know what you want people to do, you need to know who they are. Taking the time to really understand your viewers means you can tailor the video’s tone, complexity, and style to genuinely connect with them. A one-size-fits-all approach is a recipe for a video that lands flat.
Actionable Insight: Create a simple "learner persona" before you write a single word of the script. Give them a name, a role, and a primary challenge this training will solve for them.
- Existing Knowledge: Are you talking to complete novices or seasoned pros? A video for a fresh batch of new hires needs to cover the basics, while one for senior staff can jump straight into the more complex stuff.
- Role and Responsibilities: How does this training fit into their day-to-day job? A sales team needs to see how a new feature will help them close more deals. The IT team, however, will be more concerned with its security protocols.
- Learning Environment: Where will they be watching this? At their desk with headphones on? Or on their phone during a noisy commute? This simple question has a huge impact on your decisions about video length, on-screen text, and the importance of crystal-clear audio and captions.
Practical Example: Let's say you're creating training for a remote sales team. Your audience persona might be "Alex, a 32-year-old remote sales executive who is tech-savvy but always short on time. Alex needs quick, scannable videos he can watch between calls to get up to speed on new product updates." This insight tells you immediately to create short, mobile-friendly micro-videos with clear on-screen text, not a long, drawn-out presentation.
Choose the Right Format for the Goal
The format of your video should be a direct consequence of your learning objectives and audience needs. Different formats are good at teaching different things, and simply defaulting to a talking-head video because it seems easy might be the wrong move entirely.
You've got to match the format to the goal.
Common Training Video Formats
- Screencasts: These are your go-to for any kind of software walkthrough or digital process. By recording your screen, you give viewers a simple, step-by-step visual they can follow along with. It’s perfect for teaching people how to use a CRM, a project management tool like Asana, or any in-house software.
- Talking-Head Videos: This format is best when you need to deliver an important message, a company announcement, or a big-picture overview from a leader or expert. That direct-to-camera approach builds a personal connection and conveys a sense of authority and sincerity that other formats can’t quite match.
- Scenario-Based Videos: Absolutely brilliant for teaching soft skills. Think conflict resolution, sales negotiation, or customer service techniques. By showing realistic workplace situations play out, you let viewers see the right (and wrong) behaviours in action, which makes the lessons far more memorable and easy to apply in real life. For example, a video showing a manager giving constructive feedback well—and poorly—is far more effective than a list of dos and don'ts.
Crafting Scripts and Storyboards That Connect
Alright, you’ve nailed down your objectives and you know exactly who you’re talking to. Now comes the fun part: turning those ideas into a solid plan. This is where your script and storyboard become your best friends. Think of them as the creative roadmap for your video, making sure every word and every shot serves a purpose and keeps the whole production from going off the rails.
It’s so tempting to just switch on the camera and start talking, I get it. But trust me, that’s a fast track to a rambling, unfocused video that’ll take you forever to edit. A good script is your secret weapon. It gives you structure, keeps your message tight, and is the foundation for a video that looks and sounds genuinely professional.
This planning stage is where you connect all the dots – your goals, your audience, and your chosen format – into one cohesive strategy.
As you can see, a powerful script and storyboard are the natural next steps after you've done your homework on your objectives and audience.
Writing Scripts That Sound Human
Here's the thing about training video scripts: they need to sound conversational, not like you're reading a textbook. You’re writing for the ear, not the eye. That means keeping it simple. Use straightforward language, shorter sentences, and a friendly, natural tone.
Actionable Insight: Read your script aloud. If you stumble over a phrase or it feels unnatural to say, rewrite it. If it sounds like something a real person wouldn't say, your audience will notice immediately.
For example, ditch the corporate jargon like, "It is imperative that all personnel utilise the new system for logging expenses." Instead, try: "Here's how you'll log your expenses using the new system." It's clear, direct, and doesn't sound like it was written by a robot.
This conversational approach is more important than ever. In the UK, the online education market is set to hit £5.0 billion in revenue by 2025. The massive shift to remote work threw a spotlight on the need for great video training, and with corporate hiring staying strong, companies are leaning heavily on their Learning Management Systems to deliver training that actually works. A script that connects is non-negotiable. If you want to dive deeper into the stats, IBISWorld has some great insights.
From Words to Visuals: The Power of Storyboarding
With your script locked in, it's time to think visually. It's time for the storyboard. This might sound a bit daunting if you can't draw, but you don't need to be an artist. A storyboard is just a sequence of rough sketches or notes that maps out what’s happening on-screen, moment by moment. It’s your shot-by-shot blueprint.
Think of it as the bridge between the words on the page and the final video you see. It helps you plan out everything—camera angles, graphics, on-screen text, animations—before you even think about filming. This single step will save you a phenomenal amount of time and headaches later on.
A storyboard forces you to think visually. It answers the critical question: "What will my audience see while they hear this?" Getting that alignment right is what makes a video stick.
Actionable Insight: You don't need fancy software. Create a simple two-column table in a document. Paste a sentence from your script in the left column, and in the right, describe the visual that will accompany it. This simple act ensures every word has a visual purpose.
- A simple table: Just make two columns. Pop a bit of your script in the left column, and in the right, describe the visuals that go with it.
- Sticky notes: Grab a pad of sticky notes. Use one for each scene. A quick stick-figure sketch and a brief description underneath is all you need.
- Presentation software: PowerPoint or Google Slides work perfectly. Each slide is a scene, where you can easily drop in text, shapes, and placeholder images.
A Practical Example: Health and Safety Module
Let's make this real. Imagine we’re creating a short health and safety video on the correct way to lift a heavy box. The goal is to get employees to use the proper "squat-lift" technique.
Script Snippet: "(Friendly, upbeat music intro fades) Narrator (Warm, clear voice): "Lifting heavy objects incorrectly is a leading cause of workplace injuries. But you can protect your back by following one simple rule: lift with your legs, not your back. Let's break down the correct way to do it."
Storyboard for this Snippet:
| Visuals | Audio (Narration) |
|---|---|
| Scene 1: Wide shot. An employee in a warehouse setting incorrectly bends at the waist to lift a box and winces. | Narrator: "Lifting heavy objects incorrectly is a leading cause of workplace injuries." |
| Scene 2: On-screen text appears: "Lift With Your Legs, Not Your Back!" The text is bold and easy to read. | Narrator: "But you can protect your back by following one simple rule: lift with your legs, not your back." |
| Scene 3: Medium shot. A different employee demonstrates the correct technique—squats, keeps their back straight. | Narrator: "Let's break down the correct way to do it." |
See how this simple plan makes sure your visuals and your words are working together? These same principles of clear scripting and storyboarding are just as crucial when you create explainer videos, where powerful, concise storytelling is everything.
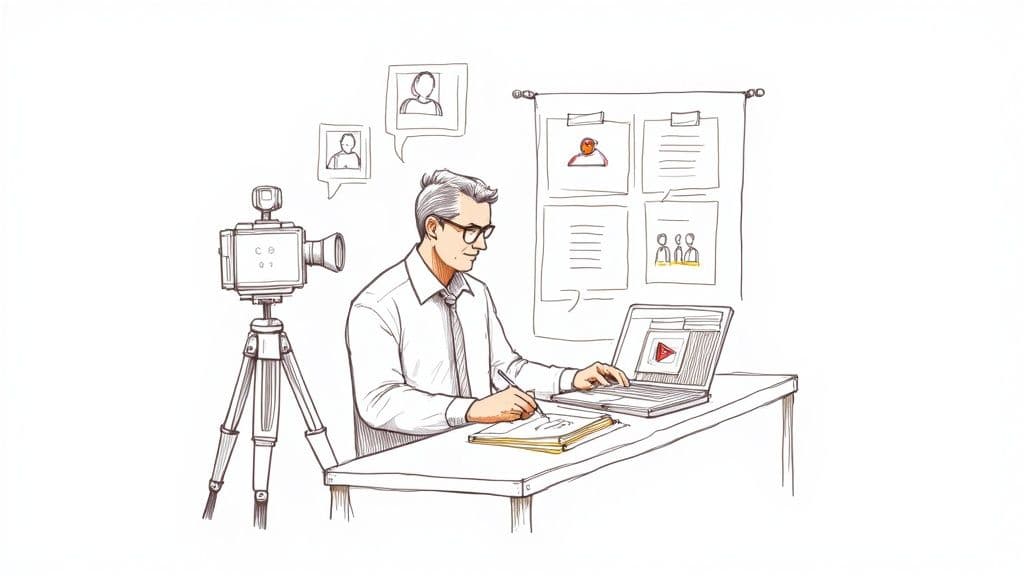
Your Production Toolkit for a Professional Look
You don’t need a Hollywood-sized budget to create training videos that look and sound polished. Honestly, getting that professional finish is far more about making smart choices than it is about dropping a load of cash on expensive gear. This is where we get practical, focusing on how to set up your space and pick the right tools to capture clean, crisp footage.
With just a few simple tweaks to your environment and some surprisingly affordable equipment, you can seriously level up the quality of your videos. Let’s dive into building an effective recording setup that actually works.

Setting Up Your Recording Space
Never underestimate the impact of your recording environment on the final video. A cluttered background or echoey audio can instantly make your content feel amateurish and, worse, pull your viewer’s attention away from your message. The goal here is simple: create a clean, quiet, and well-lit space.
First up, let’s talk about the background. It doesn’t need to be fancy—a simple, uncluttered wall often works beautifully. You could also use a pop-up backdrop or even a tidy bookshelf to add a bit of personality, just as long as it isn’t chaotic. The real key is to eliminate visual noise that competes with you, the presenter.
Next, you have to tackle the audio. Echo is the absolute enemy of clear sound. Recording in a room with lots of hard surfaces, like bare walls and wooden floors, will create a horrible reverb. Thankfully, you can easily dampen this:
- Practical Example: Record in a carpeted bedroom or office. The soft furnishings naturally absorb sound. If that's not possible, hang a couple of thick blankets on the walls just outside the camera frame. It's a simple hack that dramatically improves audio quality.
- Use a smaller room, like a home office, which naturally has less echo than a big, empty one.
These little adjustments can make a world of difference to your audio quality without costing you a penny.
Choosing the Right Equipment on a Budget
While the camera on your smartphone is surprisingly powerful these days, investing in a couple of key pieces of affordable kit can give you a massive return in quality. You really don’t need to break the bank to build a solid production toolkit.
Essential Gear to Consider:
- A Solid Microphone: The microphone built into your laptop or camera will pick up every single background noise imaginable. A simple USB microphone or a lavalier (lapel) mic that clips onto your shirt will isolate your voice, resulting in dramatically clearer audio. If you only buy one thing, make it this. It is arguably the most important upgrade you can make.
- Basic Lighting: Good lighting is what separates a professional-looking video from a grainy, shadowy mess. A ring light is an affordable and popular choice that provides soft, even light on your face, getting rid of harsh shadows. If you're really on a budget, simply facing a window to use natural daylight is a fantastic free option.
- A Tripod: Shaky, handheld footage is just plain distracting. A basic tripod for your phone or camera ensures a stable, steady shot, which instantly makes your video look more deliberate and well-produced.
Your primary goal with equipment is to eliminate distractions. Clear audio, stable video, and flattering light allow the viewer to focus entirely on the content you're delivering.
Capturing Different Video Formats
The way you hit record will obviously change depending on the video format you decided on back in the planning stage. Whether you’re filming a person or recording your screen, the core principles of clarity and focus always apply.
Recording a Presenter
When you're filming a person, eye contact is everything—it’s how you build a connection with the viewer. This is where your tripod becomes essential. Position the camera right at the presenter's eye level. Actionable Insight: Place a sticky note with a smiley face right next to the camera lens. This gives the presenter a friendly focal point and helps them maintain a natural, engaging expression while looking directly into the lens.
Capturing Crisp Screencasts
For software tutorials or anything process-driven, screencasts are your best friend. Before you even think about hitting record, do a quick clean-up of your desktop! Close all those unnecessary tabs, turn off notifications, and make your cursor movements slow and deliberate so your viewers can easily follow along.
Actionable Insight: Use your screen recording software's 'highlight cursor' feature. This adds a colored circle around the mouse pointer, making it incredibly easy for viewers to follow your actions on a busy screen.
Comparison of Entry-Level Screencasting Software
| Software | Best For | Key Features | Pricing Model |
|---|---|---|---|
| Loom | Quick, informal recordings and team feedback | Instant sharing, browser extension, in-video comments | Freemium |
| OBS Studio | Advanced users needing high customisation | Open-source, live streaming, multi-source scenes | Free |
| Screencast-O-Matic | Educators and beginners looking for an all-in-one tool | Screen recording, video editing, cloud hosting | Freemium |
| Camtasia | Creating polished, professional software tutorials | Advanced editor, animations, templates, quizzes | Paid (one-time) |
Choosing the right tool often comes down to balancing your budget with the features you need. For most simple training videos, a freemium tool like Loom is more than enough to get the job done well. If your tutorials get more technical, our guide on the best video production software at https://www.seedance.tv/blog/best-video-production-software can help you find tools with more advanced editing features to really highlight key actions.
Ultimately, whether you're using traditional cameras or exploring newer methods, the goal is always a clean, professional final product. For those interested in seeing how artificial intelligence can help create engaging content, learning how to make AI videos can be a powerful way to make your production process even more efficient.
Frequently Asked Questions
Q: How long does it take to generate an AI video? A: With Seedance, most AI videos are generated within 1-3 minutes depending on length and complexity. The platform uses optimized processing pipelines to deliver fast results without compromising on quality.
Q: What kind of prompts work best for AI video generation? A: The most effective prompts are specific and descriptive — include details about the scene, lighting, camera movement, mood, and style. Seedance's AI responds well to cinematic language like "slow pan", "golden hour lighting", or "documentary style".
Q: Can I edit the AI-generated video after it's created? A: Yes, Seedance provides built-in editing tools that let you trim, extend, add music, adjust pacing, and apply style effects to your generated videos. You can also regenerate specific sections if you're not satisfied with the initial output.
What Is How To Make Training Videos and Why Does It Matter?
How To Make Training Videos is an essential capability for modern content creators and marketers. The best tools for how to make training videos combine AI-powered automation with professional-quality outputs — saving hours of manual work while delivering results that meet commercial standards.
In 2025, platforms like Veo 3 and Seedance have made how to make training videos more accessible than ever, offering free-tier access alongside professional plans.
How Do You Get Started with How To Make Training Videos?
Getting started with how to make training videos requires just a few steps:
- Choose the right tool for your needs (see comparison above)
- Sign up for a free account — no payment required to start
- Follow the step-by-step guide in this article
- Test with simple examples first, then scale up
Most users can produce their first professional result within 30 minutes of starting.
What Are the Best Tools for How To Make Training Videos in 2025?
The top tools for how to make training videos in 2025 are:
- Veo 3 — best overall quality, free via Google Gemini
- Kling AI — best mobile experience and free tier generosity
- Runway Gen-4 — best for artistic and cinematic styles
- Pika 2.1 — best for beginners with simple interface
Each tool has strengths in different areas — the best choice depends on your specific use case, volume requirements, and budget.
Editing and Polishing Your Video for Maximum Impact
This is where the magic really happens. Your raw footage, no matter how carefully you planned it, is just the beginning. The edit is where you'll weave all those individual clips into a polished, professional learning tool that people actually want to watch. It's your chance to set the pace, sharpen the message, and add that final layer of gloss.
A few smart edits can make all the difference. We're not talking about complicated special effects, but strategic choices that help your audience lock in the information.

Mastering the Fundamentals of the Edit
Before you even think about adding graphics, the first job is to build a clean, coherent timeline. This is the foundational work: trimming the fat, making sure the audio is crystal clear, and ensuring the video flows logically from one point to the next.
Your first pass should focus purely on these core tasks:
- Trim the Unnecessary: Be ruthless. Cut out any long pauses, filler words like "um" and "ah", and any stumbles. A tight edit makes the presenter sound more confident and, most importantly, it respects your viewer's time.
- Balance the Audio: Audio quality is just as crucial as the visuals. Use your software to level the sound so there are no jarringly loud moments or quiet patches that are difficult to hear. Consistent, clear audio is a non-negotiable for a professional feel.
- Use Transitions Wisely: A simple, clean cut is almost always the best way to move between shots. Steer clear of distracting star wipes or flashy dissolves unless they serve a specific, stylistic purpose. The goal is seamless flow, not a demo of every effect your software has.
If you're just starting out, there are plenty of user-friendly tools that can help. To find the right one for your needs, have a look at our detailed guide on the best video editing software available today.
Reinforcing Learning with Visual Aids
Once your core edit is solid, you can start layering in elements that boost understanding and reinforce key information. When done right, on-screen text and simple graphics can be incredibly powerful. The trick is to be strategic and avoid cluttering the screen. Less is almost always more.
Think of these visual aids as signposts for your viewers. They should highlight the most critical takeaways, not just echo what the narrator is saying. For example, instead of just saying "Remember to save your work," show a quick graphic of a floppy disk icon with the text "CTRL + S" next to it. This provides a clear, actionable visual cue.
This kind of digital-first approach is becoming central to corporate learning. The UK's corporate e-learning market is projected to grow at an impressive 19.5% compound annual growth rate between 2025 and 2030, which points to a huge shift towards digital training. According to Grand View Research, businesses are increasingly blending video with other training methods to build more effective, scalable learning experiences.
Making Your Videos Accessible to Everyone
Accessibility shouldn't be an afterthought; it's fundamental to creating genuinely effective training. By making sure everyone can access and understand your content, you're not just doing the right thing—you're massively broadening your video’s reach and impact. The single most important step here is adding accurate captions.
Captions are a lifeline for viewers in noisy environments, those who are deaf or hard of hearing, and non-native speakers. Beyond that, studies have shown they improve comprehension and information retention for all audiences.
Actionable Insight: Never rely solely on auto-generated captions. They’re a fantastic starting point, but they often struggle with technical jargon, accents, or names. Always take the time to review and edit them for 100% accuracy.
Here’s a simple workflow I use for captions:
- Generate: Use your editing software or a platform like YouTube to get an auto-generated first draft.
- Review and Edit: Watch the video and read along carefully. Correct every error in spelling, grammar, and punctuation. Pay close attention to timing, ensuring the words appear exactly when they're spoken.
- Finalise: Once you're certain they are perfect, you can either burn the captions into your video file or upload the caption file (.SRT) alongside your video, depending on where you're hosting it.
Distributing and Measuring Your Training Success
<iframe width="100%" style="aspect-ratio: 16 / 9;" src="https://www.youtube.com/embed/E6uudaSAKPE" frameborder="0" allow="autoplay; encrypted-media" allowfullscreen></iframe>
So, you’ve created a brilliant training video. That’s a huge accomplishment, but it's only half the battle. If your masterpiece is just sitting on a server somewhere, it’s not doing anyone any good. The next, and arguably most crucial, phase is getting it in front of your team and proving that it actually worked. This is where your creative effort turns into real business value.
The very first thing to figure out is where your video will live. This decision impacts everything from accessibility to the data you can collect, so it’s worth taking a moment to think it through.
Choosing the Right Hosting Platform
Where you host your training video shapes how your team interacts with it. There’s no single “best” option here—the right choice really depends on your organisation’s size, tech stack, and what you’re trying to achieve with your training.
Let's look at a few common choices with some real-world scenarios:
- Company Intranet (e.g., SharePoint): This is a great starting point, especially for smaller teams or one-off videos. It’s secure, and your team is already using it. Practical Example: A quick screencast on submitting a new expense report can be uploaded directly to the finance department's page. The main drawback? It often lacks detailed analytics, making it tough to track who’s watched what.
- Private Video Hosting (e.g., Vimeo, Wistia): Platforms like these offer far more control and much better analytics than an intranet. You can password-protect content, restrict it to certain domains, and get detailed engagement graphs. Practical Example: This is ideal when you need to share sensitive product training with external partners and want to track if they’ve viewed it before a big meeting.
- Learning Management System (LMS): For a structured training programme, an LMS is the most powerful choice. These systems are built for learning. You can bundle videos into full courses, add quizzes, and track learner progress from start to finish. Practical Example: If you're rolling out a mandatory, multi-part compliance series, an LMS is the only way to effectively manage and document completion for every single employee.
Your hosting platform is your data source. A simple intranet gives you views, but an LMS gives you genuine learning insights. Pick the one that provides the metrics you actually need to prove your training's worth.
Driving Engagement from Day One
Once your video is uploaded, you need a launch plan. Don't just post it and hope for the best. A proactive communication strategy can make a massive difference to viewership right from the start and show everyone that this training matters.
Actionable Insight: Craft an email announcement with a subject line that highlights a direct benefit. Instead of "New Training Video Available," try "Save 15 Minutes on Your Weekly Report: New Video Guide Inside." This immediately answers the "what's in it for me?" question for the employee.
This is especially important with the changing makeup of our workforce. In the UK, Millennials and Gen Z are expected to make up 75% of the workforce by 2025, and they have a clear preference for learning through video. These generations grew up with digital video, and savvy companies are responding by investing in platforms that offer personalised training driven by data. You can find more on this in BusinessCloud's article about why video-based learning is taking over.
Measuring What Truly Matters
To prove the value of your training videos, you have to look beyond simple view counts. A high number of views is nice, but it doesn't tell you if anyone actually learned anything. Instead, focus on metrics that show engagement and, most importantly, knowledge retention.
Key Metrics for Training Success:
| Metric | What It Tells You | Practical Example |
|---|---|---|
| Completion Rate | Shows if viewers stuck around for the whole video. A high rate suggests the content was engaging and relevant. | If only 30% of people finish your data security video, it might be too long or confusing. |
| Quiz Scores | Directly measures if your learning objectives were met and knowledge was retained. | A high average score on a post-video quiz confirms that employees actually understood the key compliance points. |
| Behavioural Change | Tracks if employees are applying what they learned on the job. This is the ultimate measure of ROI. | After a video on CRM data entry, you see a 50% reduction in incorrect customer records being created. |
Answering Your Top Training Video Questions
Even the most seasoned pros run into questions when they start a new training video project. It's just part of the process. Having straightforward answers to the common sticking points can be the difference between a smooth production and a frustrating one.
Let's tackle some of the most frequent questions that come up, so you can keep your project moving forward with confidence.
How Long Should a Training Video Be?
This is the classic "how long is a piece of string?" question, but there are some solid guidelines. The right length really comes down to your topic's complexity and your audience's focus. The trend is definitely towards shorter, punchier content – a recent study found that a massive 83% of people would rather watch a video than read instructions.
To hold that attention, your video should be just long enough to hit your learning objective and not a second longer.
- For single, specific tasks: Think micro-learning. A 1-3 minute video is spot-on. A perfect example is showing someone how to reset their password – quick, direct, and done.
- For multi-step processes: A 3-7 minute tutorial usually hits the sweet spot. This gives you enough breathing room to walk through something like setting up a new project in your company's software without overwhelming the viewer.
- For complex, conceptual topics: Don't try to cram a huge topic into one long video. A 20-minute lecture on company policy is a recipe for tuned-out viewers. Instead, break it down into a series of shorter videos, like four distinct 5-minute modules.
Actionable Insight: My rule of thumb is simple: as long as necessary, but as short as possible. If a part of your video doesn't directly support the learning goal, it's time to get ruthless with the editing scissors.
What Is the Most Common Mistake to Avoid?
I see this time and time again: terrible audio. It’s the number one killer of otherwise good training videos. People will forgive slightly grainy visuals or a less-than-perfect camera angle, but they absolutely will not tolerate audio that's muffled, full of echoes, or just plain difficult to hear. It's an instant credibility killer.
Practical Example: Before a full recording session, record a 30-second test clip using your chosen microphone and location. Listen back with headphones. If you can hear a distracting hum from a computer fan or a slight echo from the walls, fix it before you record the entire video. This simple check can save hours of frustration in post-production.
Where Can I Find More Resources?
Getting good at this is a journey, not a destination. There's always something new to learn. For a broader look at the entire creation process, you can find other excellent resources on how to make training videos that offer different perspectives. The more you learn from others, the more you'll refine your own style and create truly impactful content.
Ready to create stunning training videos without the complexity of traditional production? With Seedance, you can transform your scripts into cinematic 1080p videos in minutes. Generate multi-shot scenes with consistent characters and perfect visual styles, all from a simple text prompt. Discover the future of video creation at https://www.seedance.tv.
Article created using Outrank
Conclusion: Our Final Recommendation on How To Make Training Videos
After reviewing all available options and strategies, our verdict is clear: the best approach to how to make training videos in 2025 combines AI-powered tools like Veo 3 with proven content strategies.
We recommend:
- Start with free tools to test and learn
- Focus on quality and consistency over volume
- Use AI to accelerate production, not replace creative direction
Bottom line: How To Make Training Videos is more accessible than ever in 2025. The tools and strategies in this guide are tested and proven — start applying them today for immediate results.
Ready to try it yourself?
Put the steps from this guide into practice with Seedance and turn prompts or images into polished videos in minutes.
Free credits on signup. Plans from $20/month.
Related Articles
More posts in the same locale you may want to read next.
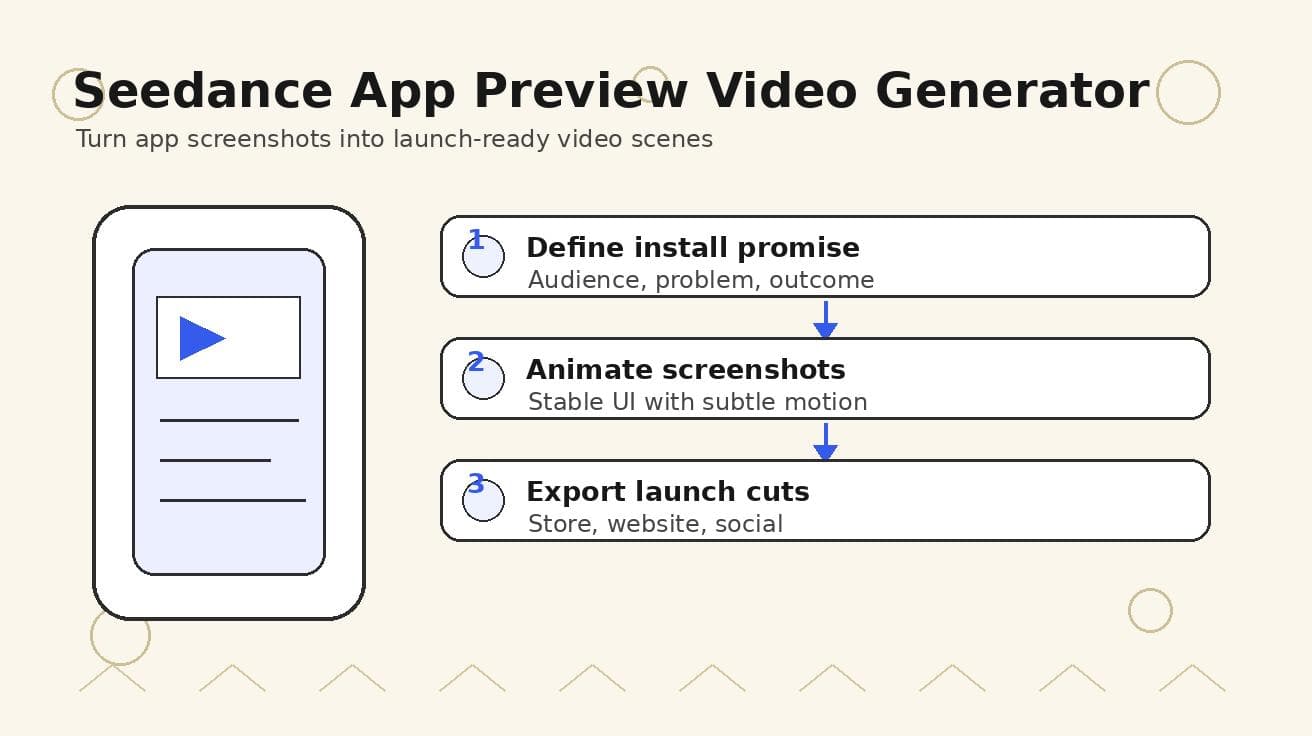
Seedance App Preview Video Generator 2026: Create App Store and Product Launch Clips
Use Seedance to turn app screenshots, feature copy, and launch goals into App Store previews, Google Play promo videos, and product launch clips.
Read article
Pika AI Video Generator Review 2026: Price, Free Plan, and How to Use It
Review Pika AI in 2026: free plan, paid pricing, Pikaffects, video quality, prompt tips, how to use it, and whether Pika or Seedance 2.0 is the better value.
Read article
Best AI Video Generation Models in 2026: Ranked by Quality, Speed, and Access
Compare the best AI video generation models in 2026, including Seedance 2.0, Veo 3.1, Kling 3.0, Wan 2.2, Sora 2, and HunyuanVideo 1.5.
Read article