ai video generator free: Quick Guide to Create Videos Fast
Absolutely. You can get your hands on a powerful AI video generator free of charge, as many of the best platforms now offer generous free tiers or trials. These tools are fantastic for turning a simple text prompt into a dynamic, high-quality video, putting powerful content creation right at your fingertips without needing a big budget or years of technical skill. It's almost like having a mini production studio built into your web browser.
Quick Answer: Yes, you can get started with AI video generation for free using Seedance, which offers a generous free tier that lets you create high-quality videos without any upfront cost.
Why Free AI Video Generators Are a Game-Changer

The excitement around AI video isn't just hype; it signals a real shift in who gets to create compelling visual stories. Not long ago, producing even a simple promotional clip meant you needed specialised skills, pricey software, and a whole lot of time. Those barriers are now coming down fast.
Ready to create your own AI video?
Free credits on signup. Plans from $20/month.
This new wave of technology is brilliant for small business owners, marketers on a tight budget, and solo creators who want to produce professional-looking videos in a flash. The concept is refreshingly simple: you write a description of what you want to see, and the AI brings it to life as a video scene.
Putting Video Production in Everyone’s Hands
The ability for anyone to create video is huge. You no longer have to be a seasoned editor to get a great idea out of your head and onto the screen. For a practical example, a local bakery owner can now whip up a short, mouth-watering social media ad for a new cake in just a few minutes by simply typing a prompt like: "A cinematic slow-motion shot of chocolate icing being drizzled over a freshly baked croissant."
The numbers back this up. As of July 2025, an incredible 20.2 million people in the UK were using AI tools, a figure that shot up by a massive 112% in just one year. This trend is especially strong among younger people, with 63% of 15–24 year-olds using AI tools every month, showing just how normal this technology is becoming.
The real magic of a free AI video generator is how it closes the gap between imagination and execution. It lets you test ideas and create content at a speed and scale that just wasn't possible before.
Comparing Free vs Paid AI Video Generator Features
Before you jump in, it’s good to know what to expect. Free tiers are designed to give you a solid feel for a tool's capabilities, but paid plans are where the real power is unlocked. Here’s a quick, actionable breakdown of what you typically get.
| Feature | Typical Free Tier Offering | Typical Paid Tier Offering |
|---|---|---|
| Watermarks | Usually includes a brand watermark on exported videos. | No watermarks for a clean, professional look. |
| Video Resolution | Standard definition (e.g., 480p or 720p). | High definition (1080p, 4K) for crisp, clear visuals. |
| Generation Credits | A limited number of credits per day or month. | A much larger or unlimited number of credits. |
| Video Length | Short clips, often capped at 3-4 seconds. | Longer video generation, up to 16 seconds or more. |
| Advanced Features | Basic text-to-video, limited style controls. | Access to premium features like camera controls, upscaling, and style consistency. |
| Commercial Use | Often restricted to personal or non-commercial projects. | Full commercial rights to use the videos anywhere. |
Ultimately, free versions are perfect for experimenting and creating content for fun, while paid plans are essential for anyone serious about using AI video for business or professional projects.
What Can You Realistically Create for Free?
So, what can you actually make with these free options? They’re perfect for getting your feet wet. While you'll often have to work with limitations like watermarks or lower resolutions, they are more than capable of handling:
- Social Media Clips: Knocking out short, eye-catching videos for platforms like TikTok and Instagram. For instance, you could create a 4-second clip of a cat wearing sunglasses with the prompt: "A cool cat wearing sunglasses nods its head to a beat, vibrant pop art style."
- Prototyping Ideas: Quickly visualising a concept before you sink time and resources into a bigger project. You could test a scene for an ad by generating a rough clip of "A futuristic car driving through a neon-lit city at night."
- Personal Projects: Creating unique visuals just for fun, like an animated birthday card or a dynamic background for a personal website.
Pioneering platforms like the Pika AI video generator are really pushing the boundaries of what's possible in this space. And if you’re looking to create polished content specifically for your social channels, have a look at our guide on finding the right social media video maker.
How to Plan Your AI Video Before You Prompt

It’s tempting to jump straight into a free AI video generator and just start typing, hoping for a masterpiece. I’ve seen it a hundred times, and the result is usually the same: a bunch of cool, but totally disconnected, clips that don't add up to anything.
The real secret to getting a great result isn't in some magic prompt. It's in the planning you do before you write a single word.
Think like a film director, even if it's just for a ten-second clip. You don’t need fancy software or a film degree. It just means breaking your big idea down into smaller, visual pieces before asking the AI to bring them to life. This simple shift in mindset makes all the difference.
Think in Scenes, Not Just Ideas
Your first move is to get past a vague concept and start imagining actual shots. "A video about my new coffee blend" is an idea, not a plan. To make it work, you need to break it down into a sequence of scenes that tell a little story.
Even a short video has a basic narrative structure. Give it a beginning, a middle, and an end.
- The Hook (Beginning): What's the very first thing people see? It needs to be visually striking and pull them in straight away.
- The Middle (Core Message): What's the core message or feeling you want to get across? This is where you build on the hook and show your idea in action.
- The Payoff (End): What’s the final image or call to action? Make it memorable.
Let's apply this to that coffee blend idea. Here's a practical, scene-by-scene plan:
- Scene 1 (Hook): An extreme close-up shot of dark, glossy coffee beans tumbling in slow motion.
- Scene 2 (Middle): Steam rising elegantly from a freshly poured white ceramic mug, sitting on a rustic wooden table.
- Scene 3 (Payoff): A smiling person taking a satisfying first sip, with soft morning light on their face.
Planning your shots this way gives you a clear roadmap. Each scene becomes a specific, focused instruction for the AI, which leads to a much more cohesive video. It’s the difference between asking for a "sad person" and "a close-up of a single tear on a cheek in the rain."
Translate Your Vision into AI Instructions
With your scene list ready, it's time to translate each shot into a language the AI can understand. This is where you get really specific about the visual details. For every single scene, think about the core elements that define its look and feel.
Let's take "Scene 2" from our coffee example and turn it into an actionable prompt:
- Subject: A white ceramic mug filled with black coffee.
- Action: Delicate steam rising from the mug.
- Setting: A rustic, dark wooden table next to a window.
- Lighting: Soft, warm morning sunlight filtering through the window.
- Camera Shot: A medium shot, angled slightly from above.
- Style: Photorealistic, cinematic, with a cosy and inviting mood.
See how much clearer that is? This level of detail transforms a simple idea into a rich, descriptive prompt that gives the AI proper direction.
This planning stage is especially vital for more complex projects. If you’re building a longer narrative, our guide on how to create explainer videos has some great tips on storytelling structure you can adapt for AI. Honestly, taking ten minutes to plan now will save you hours of frustrating trial-and-error later.
Frequently Asked Questions
Q: Is Seedance really free to use? A: Yes, Seedance offers a free tier that lets you create AI videos without any payment. The free plan includes a set number of credits each month, giving you full access to core video generation features.
Q: What are the limitations of the free plan? A: The free plan has monthly credit limits and may restrict maximum video resolution or length. Upgrading to a paid plan unlocks unlimited credits, higher resolutions, priority processing, and advanced customization features.
Q: How do I get the most out of free AI video generation? A: To maximize your free credits on Seedance, start with shorter video clips, use descriptive prompts for better first-attempt results, and take advantage of the platform's prompt templates and style presets to achieve professional results efficiently.
Writing Prompts That Get Amazing Results
The quality of your AI video hangs almost entirely on a single thing: the prompt. You have to stop thinking of it as a simple command and start seeing it as a detailed director’s brief. A vague instruction will always get you a vague, often useless, result. But a rich, layered prompt? That’s your golden ticket to creating something genuinely impressive, even with a free AI video generator.
The difference is staggering. A lazy prompt like "a car driving" will spit out a bland, forgettable clip. But something like, "A vintage red convertible cruising along a winding coastal road at sunset, warm golden hour light catching the chrome, cinematic 4K" gives the AI everything it needs: the subject, the action, the setting, and the whole vibe. This level of detail is precisely what separates amateurish outputs from professional-looking content.
This isn't just a niche skill anymore; it's becoming fundamental across many creative fields. Generative AI is rapidly becoming a standard tool in the UK, where by 2025, over 69% of media and entertainment companies reported using it in their workflows. Digital marketing agencies, for instance, are churning out social media content by turning detailed creative briefs directly into video clips. It’s a huge shift, and you can learn more about how AI is reshaping UK creative industries to get the full picture.
The Anatomy of a Killer Prompt
To get consistently great results, I always break my prompts down into four core parts. This simple formula acts as a checklist, ensuring you’ve given the AI all the crucial information it needs to work its magic.
- Subject: Who or what is the absolute focus? Get specific. Don't just say "a woman." Instead, try "a young woman with long, wind-swept blonde hair, wearing a bright green raincoat."
- Action: What’s the subject actually doing? Describe the movement with clarity. "Walking" is okay, but "strolling slowly through a park, occasionally glancing down at her phone" is so much better.
- Setting: Where is all this happening? You need to paint a vivid picture. Think, "A sun-drenched Parisian street with worn cobblestones and charming little cafes in the background."
- Style: What’s the overall aesthetic you're after? This covers everything from lighting and camera work to the artistic feel. You could go for "cinematic, dramatic low-key lighting, close-up shot, 35mm film grain" or something completely different like "Japanese anime style, vibrant colours, dynamic, fast-paced motion."
When you layer these elements together, you’re building a comprehensive set of instructions that leaves very little room for the AI to misinterpret what you want.
Before we dive into more advanced tricks, it helps to see how these pieces come together in practice. Here are a few templates I often use as a starting point for different scenarios. Feel free to copy and adapt them for your own projects.
Effective AI Video Prompt Templates
| Scenario | Prompt Template Example | Key Elements to Customise |
|---|---|---|
| Cinematic Product Shot | "Ultra-realistic 4K video of a [Product Name] on a [Surface]. Slow panning shot from left to right, with soft, elegant studio lighting. The background is a [Colour/Texture] gradient. Style: minimalist, luxurious." | Product Name, Surface, Shot Type, Lighting Style, Colour/Texture |
| Animated Explainer Scene | "A 2D flat animation of a [Character Description] at a desk, looking confused at a computer screen. A lightbulb appears above their head. Style: simple, clean lines, corporate blue and white colour palette." | Character Description, Action/Emotion, Key Visual Cue, Colour Palette |
| Action Sequence | "Dynamic shot of a [Subject] [Action]. Low-angle, tracking shot, motion blur, lens flares. Set in a [Location] at [Time of Day]. Style: epic, high-energy, Michael Bay." | Subject, Action, Camera Angle/Movement, Location, Time of Day |
| Atmospheric Nature Scene | "A serene, wide shot of [Natural Landscape], with gentle fog rolling over the hills. The early morning sun is breaking through the clouds, creating long shadows. Style: photorealistic, peaceful, National Geographic." | Natural Landscape, Weather/Atmosphere, Lighting Conditions, Overall Mood |
These templates aren't rigid rules, but they give you a solid structure to build from. The real magic happens when you start customising those key elements to fit your specific vision.
Advanced Prompting Techniques
Once you've got the basics down, you can start playing with more advanced techniques to really dial in your results. Two of the most powerful tools in your arsenal are negative prompts and character consistency anchors.
Using Negative Prompts
Sometimes, what you don’t want in your video is just as important as what you do. That’s where a negative prompt comes in. It’s a simple instruction that tells the AI what to specifically exclude, and it's fantastic for cleaning up common AI weirdness.
For a practical example, we've all seen AI-generated people with bizarre, mangled hands. It’s a classic problem. By adding a negative prompt like --no extra fingers, deformed hands, you actively steer the AI away from making those mistakes.
Actionable Insight: Use negative prompts to get rid of distracting background elements or to enforce a particular aesthetic. If you're creating a historical scene and modern cars keep photobombing it, a quick
--no cars, modern vehicleswill usually sort it out.
Maintaining Character Consistency
One of the biggest headaches in creating a multi-shot story is making your character look the same from one clip to the next. The solution is to create a detailed "character anchor" – a core description that you reuse in every single prompt for that character.
Let's imagine your protagonist is "Alex, a detective in a noir film."
-
A Bad Approach (leading to inconsistency):
- Scene 1: "a detective"
- Scene 2: "a man in a trench coat"
-
A Good Approach (using a character anchor):
- Scene 1: "Alex, a detective with short brown hair, a weary expression, wearing a rumpled trench coat and fedora, standing under a flickering streetlamp..."
- Scene 2: "Alex, a detective with short brown hair, a weary expression, wearing a rumpled trench coat and fedora, sitting in a dimly lit office..."
By repeating those core descriptive details of Alex in every single prompt, you dramatically increase the odds that the AI will render a consistent-looking character across your entire video.
Your First AI Video Project: A Practical Walkthrough
Alright, enough theory. Let's get our hands dirty and actually build something. I'm going to walk you through creating a short, 15-second promotional video for a fictional coffee shop I’m calling "The Daily Grind". We’ll do this entirely with free AI video tools.
This isn't about just generating a random clip; it's about proving you can build a polished, multi-shot story without spending a penny. We'll generate three separate clips and then stitch them together into a final, shareable video.
Generating Your First Clip: The Establishing Shot
Every good story starts by setting the scene. For our coffee shop, we need to create a warm, inviting mood right from the first frame. The natural starting point is the coffee itself, presented in a cosy, atmospheric setting.
A simple idea might be: “A close-up of a cup of coffee with latte art, steam rising, in a cosy coffee shop.”
That's a decent start, but it leaves too much to the AI's imagination. To get a truly great result, we need to feed it more detail about the style, the lighting, and even the camera work. Think like a director.
Here's the exact, actionable prompt to use:
"Cinematic close-up of a white ceramic mug filled with fresh latte art, delicate steam rising. The mug sits on a dark, rustic wooden table next to a window with soft morning light filtering in. Photorealistic, shallow depth of field, warm and inviting atmosphere, 4K."
See the difference? This level of detail gives the AI a clear blueprint, which massively boosts your chances of getting a high-quality, professional-looking clip on the first go.
Once it's generated, take a critical look. Is the lighting too harsh? Is the mug not quite right? Don't be afraid to tweak the prompt and try again. You could change it to "moody, low lighting" or specify "a minimalist glass mug". It's an iterative process.
This infographic breaks down that repeatable process for structuring your prompts.
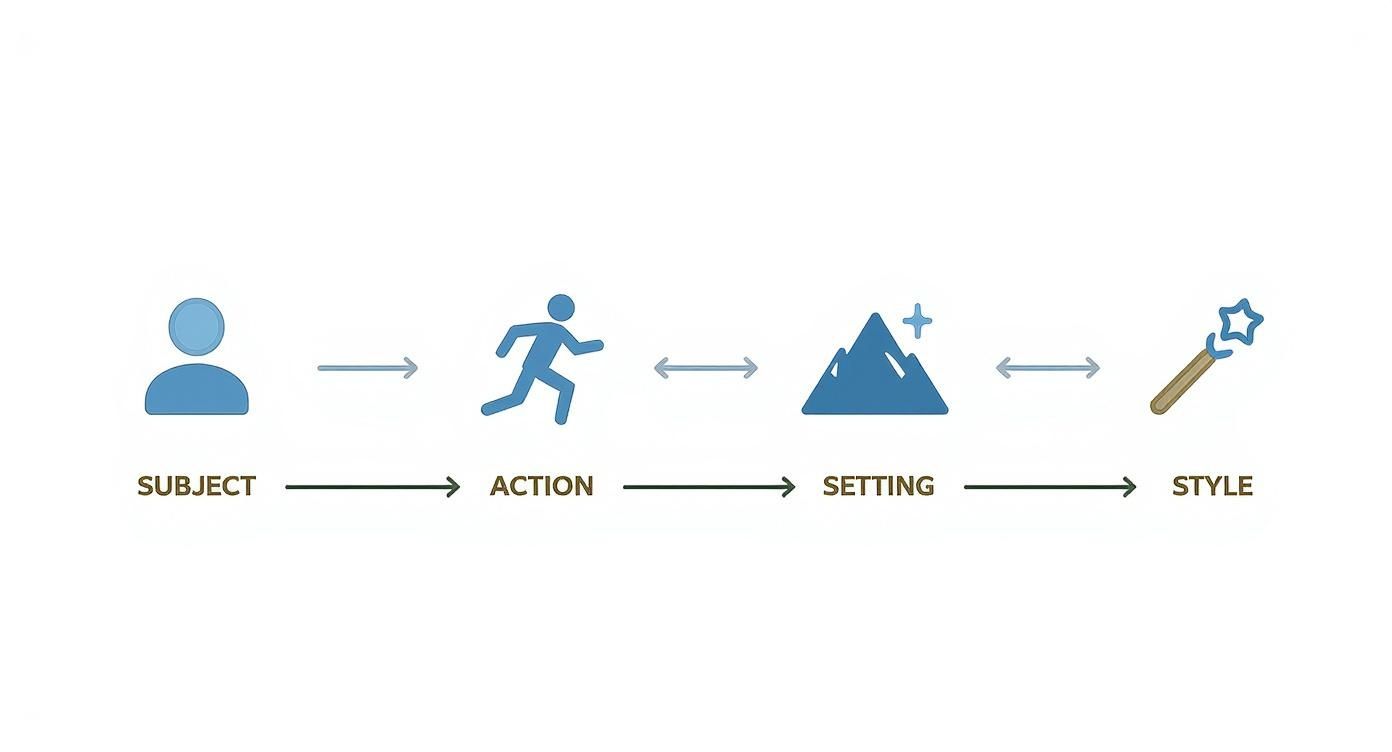
Thinking in terms of Subject, Action, Setting, and Style is a foolproof way to give the AI the complete picture of what you want to create.
Creating More Clips for a Cohesive Story
Now for the next two clips. The goal here is to build a tiny narrative, and the secret to making it work is style consistency. To make the clips feel like they belong in the same video, we'll reuse key stylistic phrases from that first successful prompt.
- Clip 2 (The Process): "A barista’s hands expertly pouring steamed milk into an espresso shot, creating intricate latte art. Overhead shot, slow motion. The background is a warm, slightly out-of-focus coffee shop. Photorealistic, shallow depth of field, warm and inviting atmosphere, 4K."
- Clip 3 (The Customer): "A smiling woman with curly brown hair taking a sip from a white ceramic mug, her eyes closing in satisfaction. She sits by a window with soft morning light on her face. Photorealistic, shallow depth of field, warm and inviting atmosphere, 4K."
Did you spot the repetition? Keywords like "photorealistic," "shallow depth of field," and "warm and inviting atmosphere" are carried across all three prompts. This acts as a creative anchor, telling the AI to produce clips that feel visually connected. This same technique works wonders for still images, too. For a deeper dive, check out our guide on how to turn a photo into a video.
Assembling and Polishing Your Video
With your three clips generated and downloaded, the final piece of the puzzle is putting them all together. You don't need fancy, expensive software for this. A free tool like CapCut or Clipchamp is more than capable. Here is a step-by-step guide:
- Import Everything: Open your chosen editor and drag and drop your three video clips into the project media bin.
- Set the Scene: Drag the clips onto the timeline in a logical order. A good sequence is: Clip 1 (Latte Art) -> Clip 2 (Barista Pouring) -> Clip 3 (Customer Sipping).
- Add the Finishing Touches: Browse the editor's library for a royalty-free acoustic or lo-fi music track that fits the cosy vibe. Add simple text overlays, like "The Daily Grind" at the start and "Your Morning Ritual" at the end.
- Export: Select your export settings (e.g., 1080p for social media) and render your final 15-second video.
And there you have it. You've just created a complete promotional video using nothing but a free AI video generator and a free editor. It’s a powerful, no-cost workflow for producing genuinely engaging content.
How to Fix and Enhance Your Generated Videos
<iframe width="100%" style="aspect-ratio: 16 / 9;" src="https://www.youtube.com/embed/9Q1Qf6kUnaI" frameborder="0" allow="autoplay; encrypted-media" allowfullscreen></iframe>
The first video clip an AI spits out is almost never the final version. It’s best to think of it as a first draft—a fantastic starting point that just needs a bit of polishing to really shine. You'll run into common issues like flickering visuals, inconsistent character features, or just some general "AI weirdness," but that's all part of the process.
Learning to refine these raw outputs is what separates the good results from the great ones. The trick is to get into an iterative workflow, where you spot the flaws and make small, targeted adjustments to fix them. This refinement stage is absolutely crucial for turning a random collection of generated clips into a cohesive, professional-looking final product.
Identifying and Fixing Common AI Flaws
The most frequent problem you'll bump into is inconsistency. A character's shirt might change colour between shots, or a background element might mysteriously vanish. When this happens, your first instinct shouldn't be to scrap the clip but to go back and refine your prompt.
Here's an actionable fix: if a character's jacket morphed from blue to green, modify your prompt to include "a character wearing a dark navy blue jacket" and then regenerate. Small, precise tweaks like this are often all it takes to guide the AI back on track.
Strange visual artefacts, like warped hands or flickering backgrounds, are another common headache. This is where negative prompts become your best friend. For example, add a command like --no flickering, distorted hands, blurry to your prompt to tell the AI what to avoid. It’s a simple but surprisingly effective fix.
Upscaling and Post-Production Polish
Once you’ve got a set of clips you're happy with, the next job is to boost their quality. A lot of clips from an ai video generator free tier come out in standard definition. To get around this, you can use free AI upscaling tools that sharpen the details and bump up the resolution, making your video look much crisper.
Simple editing can also work wonders for hiding minor imperfections. For example, if you notice a slight flicker in the last second of a 4-second clip, you can simply trim that half-second off in your video editor. A quick cut or a subtle zoom can easily draw the viewer's eye away from a small flaw in the background. If you want to take things a step further, it's worth exploring the benefits of AI integration in post-production techniques, which can really elevate your work to a professional standard.
Your goal isn't perfection on the first try; it's progress through iteration. Each regeneration with a slightly better prompt gets you closer to the polished video you imagined.
As these tools become more common, so do the conversations around how they're used. While there's no comprehensive public data on UK-specific user numbers for free platforms, the global context tells a story. One leading AI video generator reported over 800,000 users worldwide in 2024. And with over 80% of the UK's digital-native population consuming online video, it’s clear the adoption rate here is significant.
This rapid growth also brings ethical considerations to the forefront, particularly around the potential misuse for deepfakes. Being a responsible creator means staying aware of these issues as you produce your own content.
Got Questions About Free AI Video Generators?
Jumping into the world of AI video creation is exciting, but let's be real—it can also be a bit confusing. If you've got a few questions buzzing around, you're not alone. I hear these all the time, so let's tackle them head-on so you can get started with confidence.
Are These Tools Actually Free?
Yes and no. Most of the best AI video generators I've come across work on a freemium model. Think of it as a 'try before you buy' deal. You get a free plan that's genuinely useful for experimenting, figuring out how prompts work, and making a few clips for fun.
But there are always a few strings attached. You'll likely run into:
- Watermarks slapped onto your final video.
- Lower quality video, usually maxing out at 720p.
- A strict cap on credits or how many videos you can generate each month.
If you're creating something for your business or a client, you'll need to upgrade. That's just the reality of getting a clean, high-resolution video you can actually use professionally.
Can I Put My AI Videos on YouTube or in Ads?
This is a big one, and the answer is almost always a firm "no" for the free plans. Commercial use is a line in the sand for these platforms.
Content you create on a free tier is typically for personal projects only. If you're planning to use a video in a marketing campaign, on a monetised channel, or in any commercial way, you will absolutely need a paid subscription. This gives you the commercial licence you need to stay out of trouble. Don't skip the terms of service on this—it’ll save you a headache later.
How Do I Stop My Character from Changing in Every Shot?
Ah, the classic consistency problem. It's one of the trickiest parts of AI video, but it's definitely solvable. The secret is to be relentlessly specific with your prompts.
You need to create a detailed 'anchor' description for your character and then repeat it, word-for-word, in every single prompt for that character. Don't leave anything to chance.
Instead of a vague prompt like "a man walking," lock in the details. Use something like, "a man in his 30s with short black hair, wearing a grey wool coat and black glasses, walking..." You have to use that exact bolded description every time you want to see him.
Tired of bumping up against the limits of free tools? If you're ready to create incredible multi-shot videos without the hassle, Seedance gives you the control you need. You can start generating professional-quality 1080p videos that bring your ideas to life. Check it out at https://www.seedance.tv.
Article created using Outrank
Our Verdict
After thorough evaluation, Seedance stands out as our top recommendation for AI video generation. Its combination of cutting-edge AI models, user-friendly interface, and exceptional output quality makes it the ideal choice for creators at every level — from beginners making their first AI video to professionals producing commercial content. Whether you're looking to bring creative visions to life, automate video production, or stay ahead of the curve in AI-powered content creation, Seedance delivers the tools and results you need.
Ready to create your own AI video?
Turn ideas, text prompts, and images into polished videos with Seedance. If this article helped, the fastest next step is to try the product.
Free credits on signup. Plans from $20/month.
Related Articles
More posts in the same locale you may want to read next.
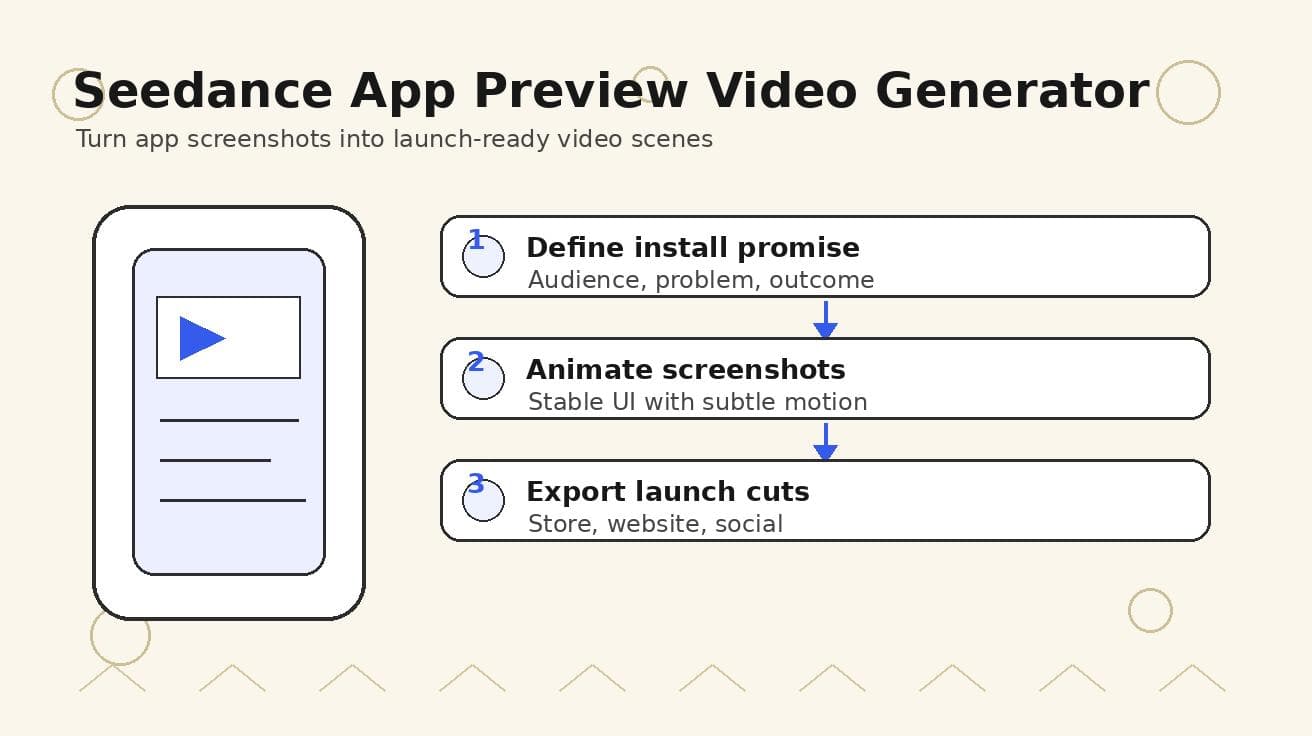
Seedance App Preview Video Generator 2026: Create App Store and Product Launch Clips
Use Seedance to turn app screenshots, feature copy, and launch goals into App Store previews, Google Play promo videos, and product launch clips.
Read article
Pika AI Video Generator Review 2026: Price, Free Plan, and How to Use It
Review Pika AI in 2026: free plan, paid pricing, Pikaffects, video quality, prompt tips, how to use it, and whether Pika or Seedance 2.0 is the better value.
Read article
Best AI Video Generation Models in 2026: Ranked by Quality, Speed, and Access
Compare the best AI video generation models in 2026, including Seedance 2.0, Veo 3.1, Kling 3.0, Wan 2.2, Sora 2, and HunyuanVideo 1.5.
Read article