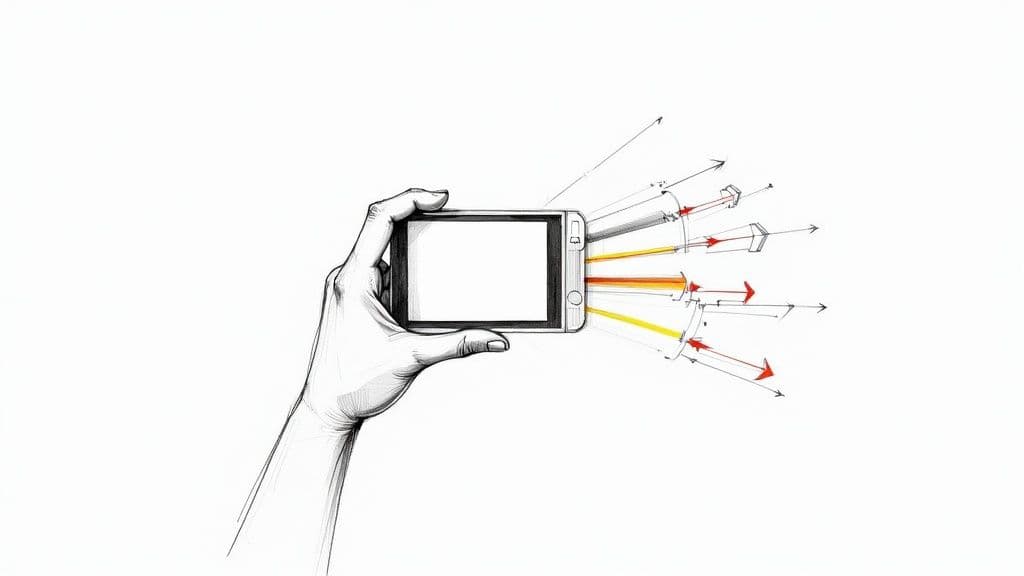
So, you've got a killer image and want to bring it to life? The fastest way I've found is to use an AI video generator. Tools like Seedance or Pika Labs let you upload a picture, type in what you want to happen, and—voilà—your static photo becomes a short, dynamic video in minutes. It really does make animation accessible to anyone, not just the pros.
Why Animate Pictures with AI?
Have you ever looked at a favourite photo and just wished it could move? That’s no longer the stuff of science fiction. Animating pictures used to be a highly specialised skill, but with today's AI, you can turn your static images into genuinely captivating videos. We're going to walk through exactly how to do it, focusing on practical steps you can use right away.
Ready to try it yourself?
Free credits on signup. Plans from $20/month.
This isn't just about slapping a glitter filter on a photo and calling it a day. We're talking about giving an AI creative direction, letting it generate completely new motion based on your ideas. I'll show you how to prep your images, get the hang of writing effective prompts, and use specific tools to create some seriously impressive 1080p videos.
The Creative Potential of Animated Photos
Whether you're a content creator trying to make your social media feed pop, a marketer looking to build more engaging ads, or just someone who enjoys experimenting, learning to animate pictures is a fantastic skill to have in your back pocket. It unlocks a whole new level of visual storytelling.
For instance, a static shot of a calm lake can become a peaceful video with water gently rippling and clouds drifting lazily across the sky. You could take a portrait and bring it to life with a subtle smile or a thoughtful glance, adding an emotional weight that a still image just can't match.
At the heart of AI animation are a few core techniques you'll want to get familiar with.
Core AI Animation Techniques at a Glance
Here’s a quick rundown of the main AI-driven animation techniques we'll be applying to our pictures. Understanding these will help you craft much better prompts and get the results you're after.
| Technique | Best For | Practical Example |
|---|---|---|
| Camera Motion | Landscapes, architectural shots, expansive scenes | Use a "slow zoom in" on a photo of a mountain to create a feeling of grandeur and draw the viewer's eye to the peak. |
| Character Animation | Portraits, group photos, images with people or animals | Take a photo of your pet and use a prompt like "dog's ears twitch and tail wags slightly" to add lifelike personality. |
| Element Motion | Cityscapes, product shots, still life compositions | Animate a photo of a coffee cup with a prompt like "steam rises gently from the cup" to make the scene feel warm and inviting. |
These techniques are your building blocks. Once you get a feel for them, you can start combining them to create much more complex and interesting animations.
The real power of AI animation isn't just making things move; it's about directing that movement to tell a better story. From my experience, subtle motion often has a much greater impact than dramatic, over-the-top effects.
In the end, these tools give you a completely new canvas to express your ideas. Let's get started.
Getting Your Pictures Ready for Animation
Before you can start animating, you need to lay the right groundwork. A little bit of prep work at this stage makes a huge difference, turning what could be a clunky animation into something smooth and professional. It all begins with picking the right image.
Frankly, not every picture is a great candidate for animation. I always look for images with a clear, defined subject – whether it’s a person, an object, or a landmark. For example, a crisp photo of a single person against a simple background is much easier for an AI to animate cleanly than a crowded, busy street scene. A compelling background is just as important, as it gives you plenty of room to play with subtle camera movements or add environmental effects.
Tweaking and Refining Your Image
Once you've settled on a picture, it's time for some light editing. The idea here is to give the AI a clean, high-quality canvas to work on. If your image is a bit low on resolution, your first job is to upscale it. AI animation often uses zooms and pans, which will quickly expose a low-quality image by making it look pixelated and blurry.
Here are a few actionable steps I always take:
- Boost the Resolution: I use tools like Adobe Photoshop’s 'Super Resolution' feature, but free online editors like Photopea also do a fantastic job. You’ll want to aim for at least 1920x1080 pixels (1080p) to get a sharp video at the end.
- Clear Out Distractions: Take a moment to remove anything that might get in the way of the animation. For instance, if you're animating clouds moving across a sky, remove a stray bird using Photoshop's 'Content-Aware Fill' or the clone stamp tool to prevent weird visual glitches.
- Isolate Your Subject: This isn't always essential with newer AI tools, but for character animations, separating the subject from the background can give you far more creative control. In a portrait, creating a simple layer mask around the person helps the AI understand to only animate their expression, not the wallpaper behind them.
Think of this stage like a chef doing their mise en place. A few minutes of thoughtful editing before you start animating can save you a world of frustration and helps the AI produce much cleaner, more believable movement.
Why a Good Quality Image is Non-Negotiable
A high-quality starting image gives the AI more information to work with, plain and simple. Imagine a crisp, detailed photo of a forest. The AI can easily tell individual leaves and branches apart, making it possible to create realistic swaying motions. A blurry photo, on the other hand, forces the AI to guess, which often results in those weird, wobbly artefacts we all want to avoid. You can find more practical guidance on making animated photos that really pop in our other guide.
By choosing a strong image and doing these basic edits, you’re setting your project up for success. This groundwork ensures the AI can focus on what it does best: creating fluid, intentional movement, not fighting with a poor-quality source file.
Bringing Your Image to Life with Seedance
With your image prepped and looking sharp, it's time for the fun part: the animation itself. We're going to use Seedance to breathe life into that static picture, focusing on creating motion that feels both deliberate and natural. Let’s work through a practical example together. Imagine we have a portrait, and our goal is to make the subject offer a subtle, thoughtful smile while their eyes gently glance to the side.
This is the kind of nuance that makes an animation truly captivating. It’s not just about movement for movement's sake; it’s about directing that movement to tell a micro-story and convey an emotion. With the right AI tool, achieving this is surprisingly straightforward.
Before getting bogged down in complex prompts, it's useful to have a clear mental map of the process. A good workflow is your best friend here, making sure you tick all the boxes from start to finish.
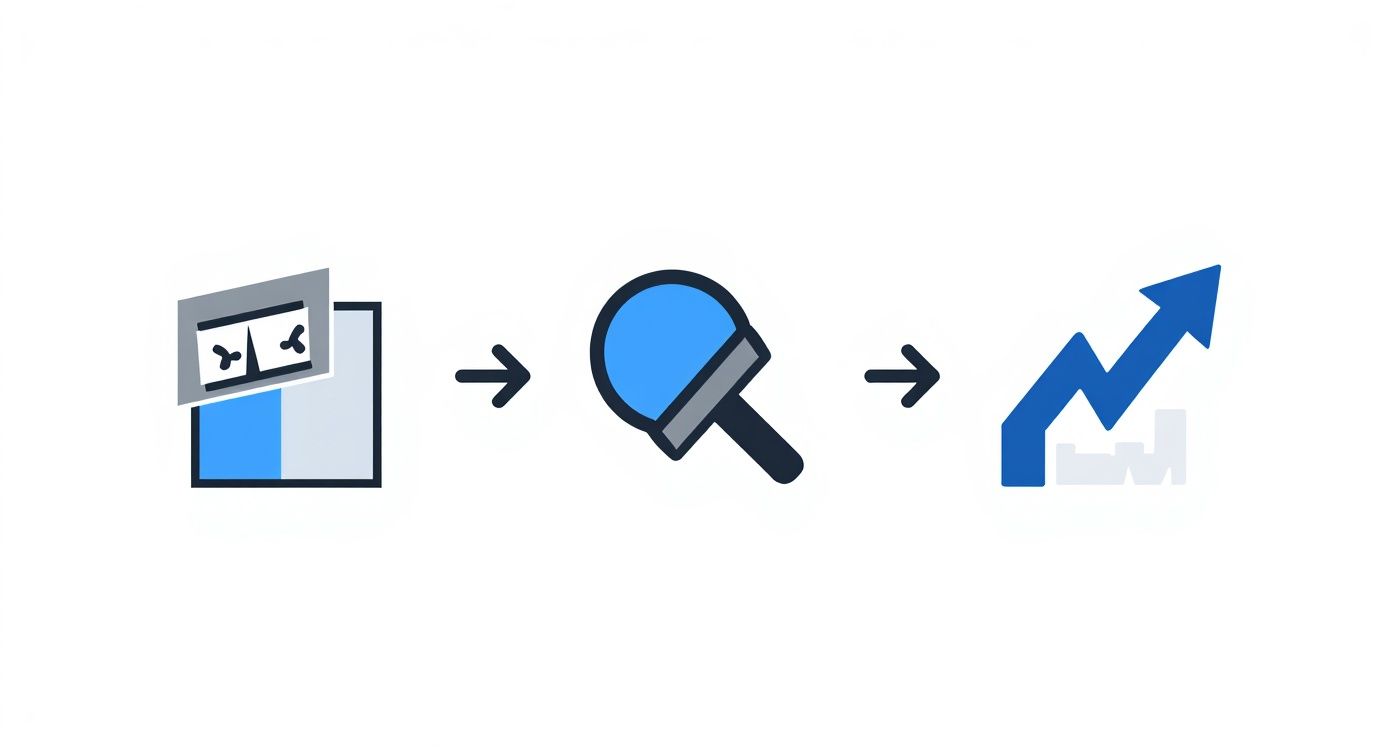
Think of this as your foundation. By selecting a great image, making those crucial edits, and upscaling it for maximum clarity, you’re giving the AI the best possible canvas to work its magic on. Sticking to this process helps you sidestep common headaches like pixelation or muddy results down the line.
Crafting Prompts That Actually Work
The prompt is where the magic really begins. This is your direct line to the AI, and vague instructions just won't cut it. A lazy prompt like "make her smile" will likely give you a generic, slightly uncanny animation. Specificity is everything.
Let's revisit our portrait example. A far more effective prompt would be:
"A gentle, thoughtful smile slowly appears on her face as she looks slightly to the left. Her eyes blink naturally once. Keep the background static."
Why does this work so much better? It breaks the action down into clear, manageable steps for the AI. It defines the type of smile ("gentle, thoughtful"), gives a clear direction for the glance ("slightly to the left"), and adds a secondary natural action ("eyes blink naturally"). Crucially, it also includes a negative constraint—telling the AI what not to do—by keeping the background still. This ensures all the focus remains squarely on the subject's expression.
Using Multi-Shot Storytelling for a Bigger Impact
Sometimes a single animated clip isn't enough. What if you want to build a more complex narrative? This is where Seedance's multi-shot storytelling feature comes into play. It allows you to chain several animations together to create a short, cohesive sequence.
Here is a practical example of a two-part story using a wide shot of a mountain landscape with a lone hiker:
- Shot 1 (The Wide Shot): With your landscape image, use a prompt like, "Slowly pan the camera from left to right across the mountain range, clouds drifting overhead." This sets the scene beautifully and gives a real sense of scale.
- Shot 2 (The Close-Up): Now, upload a separate close-up image of the hiker. Prompt it with something like, "The hiker turns their head to look up at the summit, a look of determination on their face."
By stitching these two shots together, you’ve created a simple but effective narrative arc. You establish the vast environment and then zoom in on the human element within it. If you want to dive deeper into these kinds of advanced techniques, Seedance has a fantastic guide on its official image-to-video page.
Fine-Tuning Motion and Camera Settings
The final piece of the puzzle is dialling in the animation settings. Your prompt tells the AI what to do, but the settings control how it does it. Think of these as the director's final notes.
- Motion Intensity: This slider dictates the power behind the movement. For our subtle portrait smile, you'd want a very low intensity, perhaps around a 2 or 3 out of 10, to keep it feeling realistic. For something more dramatic, like animating a photo of crashing waves, you would crank this value up to 8 or 9.
- Camera Controls: Don't forget you can manually direct the camera. Add a slow zoom, a gentle pan, or a slight tilt. For instance, using a gradual zoom-in on a portrait can create a powerful sense of intimacy, while a smooth pan can make a static landscape feel vast and alive.
Honestly, getting these settings perfect often involves a bit of trial and error. Don't be afraid to generate a few different versions to see what looks and feels right. This iterative process is a core part of mastering how to animate pictures and is key to translating the vision in your head into a polished, compelling video.
Exploring Alternative AI Animation Tools
<iframe width="100%" style="aspect-ratio: 16 / 9;" src="https://www.youtube.com/embed/29Toeq0oyM8" frameborder="0" allow="autoplay; encrypted-media" allowfullscreen></iframe>
While I find Seedance incredibly capable for most of my projects, it’s always a good idea to keep a few other tools in your back pocket. The world of AI animation is moving at a breakneck pace, and different platforms have their own unique strengths. The real trick to mastering how to turn a photo into a video is knowing which tool is right for the job at hand.
This constant evolution is a great sign for creatives. The animation industry is booming, supporting a huge number of professionals. Just look at the UK, where the animation sector provides around 15,390 jobs. What's really telling is that about 52% of the workforce are freelancers, which speaks to the flexible, project-driven nature of this creative field. If you're curious, the trade association Animation UK has some fascinating insights on the industry's makeup.
Runway ML for Precise Control
When you need to get surgical with your animation, Runway ML is a true powerhouse. Its secret weapon is the Motion Brush, which literally lets you paint movement onto specific parts of your image.
Actionable Insight: Imagine a static photo of a waterfall. Instead of hoping the AI figures it out, you can use the Motion Brush to paint directly over the flowing water. You then set the directional vectors to point downwards. This tells the AI, "Animate just this part, in this direction," keeping the surrounding rocks perfectly still for a more realistic effect.
Pika Labs for Speed and Simplicity
At the other end of the scale, you have Pika Labs (or just Pika). Its main claim to fame is its sheer speed and simplicity. You give it an image and a text prompt, and within seconds, you have a moving clip.
Actionable Insight: I've found Pika is brilliant for brainstorming ideas or cranking out content for social media where speed is everything. Say you have a product shot of a perfume bottle. You could use a quick prompt like, "ethereal light particles swirl around the bottle, subtle lens flare," to get a dynamic, eye-catching social media clip in under a minute. It’s all about creative momentum rather than painstaking detail.
It often boils down to a classic trade-off: do you need absolute control or raw creative speed? For artistic, detailed animations, Runway ML is my go-to. For something fast and punchy, Pika Labs usually wins out.
Of course, these are just two examples. The ecosystem of AI tools is expanding all the time. If you want to see what else is out there, this list of the 12 best AI tools for content creators is a great place to start exploring.
Polishing and Exporting Your Final Animation
You've done the creative work and brought your image to life. Fantastic! But the job isn't quite finished. Now comes the crucial final stretch: troubleshooting any little glitches and exporting your animation so it looks just as brilliant online as it does on your screen. Getting this part right is what makes your work truly shine.
Even with incredible AI tools, things don't always go perfectly on the first try. You'll inevitably run into hiccups, but don't worry—they're usually minor and just need a small tweak to your approach.
Solving Common Animation Glitches
Ever generated a clip where the movement is just… off? Maybe it’s a bit too frantic, or a character's expression doesn't feel quite right. These are completely normal hurdles, and thankfully, they’re easy to overcome.
Here are a few common problems and actionable fixes:
- Jittery or Flickering Motion: This is a classic sign that the motion intensity is too high. If you're animating a flag waving and it looks like it's in a hurricane, dial the intensity setting in Seedance down from 7 to around 3 and regenerate. A lower value almost always encourages a smoother movement.
- Unnatural Character Movements: If a character’s smile looks more like a grimace, the problem is often in the prompt. Instead of "make them smile," try a more descriptive prompt like, "a gentle, slow smile forms as their eyes soften." This adds emotional context and pacing, leading to much more realistic results.
- Inconsistent Motion: When animating water or clouds, you might notice choppy or erratic movement. Fix this by reinforcing consistency in your prompt. For example, add phrases like "smooth, consistent flow of water downstream" or "clouds drift gently and steadily from left to right" to guide the AI towards the desired effect.
I’ve found that the solution to most animation quirks comes down to one of two things: refining the prompt or adjusting the intensity. Think of it as giving the AI clearer directions. The more specific you are, the better your animation will be.
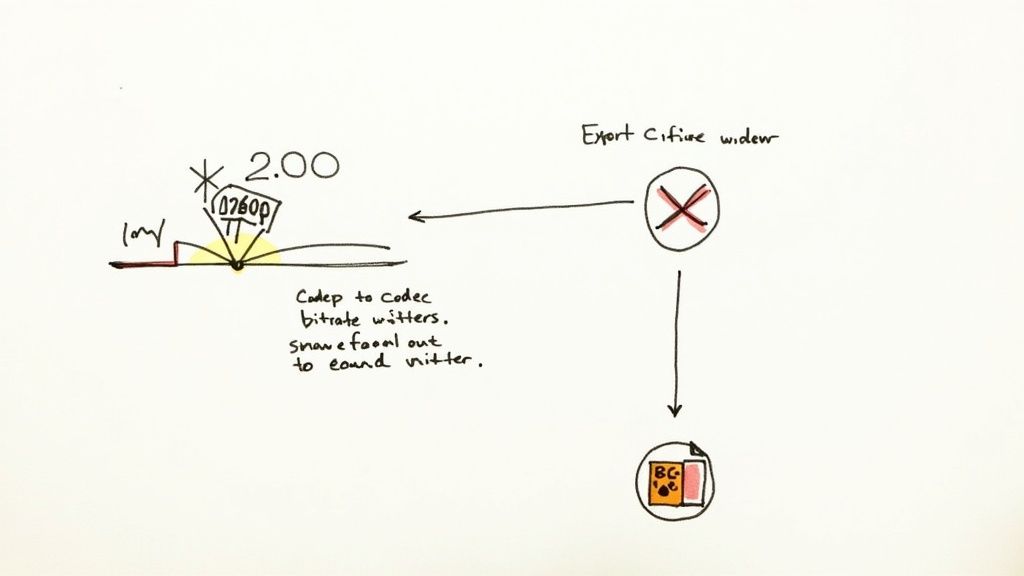
Getting Your Animation Ready for the World
Once your masterpiece is polished, it’s time to export it. The real goal here is to strike that perfect balance between stunning visual quality and a file size that doesn't take forever to upload or buffer.
The UK's animation sector, a powerhouse contributing to a global market estimated at $391.48 billion, has this down to a fine art. Studios creating hits like 'Peppa Pig' for giants like Disney and Netflix have perfected their export workflows to ensure their work looks flawless on any device.
For sharing on social media or embedding on a website, these are the settings I always rely on for a crisp 1080p output:
| Setting | My Go-To for Social Media | Why It Matters |
|---|---|---|
| Resolution | 1920 x 1080 pixels | This is the gold standard for high-definition video, making sure your work looks sharp and professional on most screens. |
| Format | MP4 | You can't go wrong with MP4. It offers the best compatibility across virtually every platform, from YouTube to Instagram. |
| Codec | H.264 | This codec is brilliant at compression. It keeps your file sizes manageable without a noticeable drop in quality. |
| Bitrate | 8-12 Mbps | I find this is the sweet spot for high-quality streaming that won't leave your viewers waiting for it to buffer on a standard connection. |
For shorter clips, a common challenge is learning how to compress GIF without losing quality to keep that visual punch. By getting comfortable with these export settings, you can be confident that your creative vision is preserved perfectly, no matter where your audience finds it.
Answering Your Questions About Animating Pictures
As you start exploring how to bring your pictures to life, you’re bound to have a few questions. I've been there myself. Getting these sorted out early on makes the whole process feel much less intimidating and helps you sidestep some common frustrations.
Can I Animate Any Image I Find Online?
This one comes up all the time. While you technically can animate almost any image file, the real question is whether you should. It's crucial to get your head around copyright. Using someone else’s photograph for a public or commercial project without their blessing is a fast track to legal headaches.
Actionable Insight: For any project you plan to share publicly, stick to images you’ve created yourself or use royalty-free stock photos. Sites like Unsplash and Pexels are fantastic for this. From a practical standpoint, search for images with a clear subject, good lighting, and a high resolution. A sharp starting image is non-negotiable if you want to avoid a blurry mess at the end.
How Long Does It Really Take?
Another big question is about the time commitment. With an AI tool like Seedance, you can create a simple but effective animation of 3-4 seconds in just a couple of minutes, provided you have a good prompt. That’s it.
For a practical example, animating a photo of a candle with the prompt "The flame flickers gently, casting a warm glow" can be generated in under 90 seconds. Naturally, if you're piecing together a more complex story with multiple shots, you might be looking at closer to an hour. The main point is that what used to take a specialist hours can now be done in a tiny fraction of the time.
What are the Common Mistakes to Avoid?
Getting great results often means knowing what not to do. I see a few mistakes pop up again and again with people new to this.
- Going overboard with movement: It’s tempting to add dramatic camera swoops. Resist the urge. In most cases, subtle, natural motion feels far more professional. For instance, instead of a fast zoom, try a "very slow dolly zoom in" to add a touch of cinematic suspense.
- Starting with low-quality images: If you feed the AI a blurry, low-resolution photo, you’ll get a blurry, pixelated video. No exceptions. Always start with an image that is at least 1080p if you're aiming for a crisp, clean final cut.
- Writing lazy prompts: A prompt like "animate this person" is a gamble. It gives the AI too much room for interpretation, which usually results in something generic or not at all what you pictured.
The secret to a truly compelling animation is a specific, descriptive prompt. Instead of just "make him look happy," try something like, "a slow, warm smile spreads across his face as his eyes crinkle slightly." That kind of detail gives the AI clear direction, leading to a much more nuanced and lifelike result.
Keeping these pointers in mind will help you dodge the most common pitfalls. You'll find that mastering how to animate pictures is less about being a technical genius and more about thoughtful preparation and giving the AI clear, creative instructions.
Ready to transform your static images into captivating videos? With Seedance, you can create stunning 1080p animations in minutes using the power of AI. Start telling your story today at https://www.seedance.tv.
Article created using Outrank
Ready to try it yourself?
Put the steps from this guide into practice with Seedance and turn prompts or images into polished videos in minutes.
Free credits on signup. Plans from $20/month.
Related Articles
More posts in the same locale you may want to read next.
AI Video Generator for Instagram Reels: Create Viral Content in Minutes (2026)
Use AI video generators to create Instagram Reels that get views. Best tools, Reel formats, prompts, and posting strategies for 2026.
Read article
How to Make Product Demo Videos with AI
Learn how to make product demo videos with AI using prompts, screenshots, image-to-video workflows, and simple editing systems that convert better.
Read article
AI Video Generator Free: No Limits, No Watermark, No Sign Up (2026)
Find the best free AI video generators with no limits, no watermark, and no sign up. Compare Seedance, Runway, Pika, and more — tested and ranked for 2026.
Read article