Ever looked at a photo and imagined it moving? We all have. Now, thanks to some clever AI tools, you can turn that static moment into a short, dynamic video with just a few clicks. This guide provides actionable insights on how to do it, using accessible AI generators like Seedance to breathe new life into your pictures.
Making Your Images Move with AI
The magic behind animating a picture with AI is actually quite simple to grasp. These tools look at two things: your original image and a separate video that provides the movement. The AI then intelligently maps the motion from the video onto your picture.
This isn't just slapping one on top of the other. The AI has to understand the subject's shape and figure out how to apply the new movements in a way that looks natural.
Ready to try it yourself?
Free credits on signup. Plans from $9.9/month.
This opens up a world of creative fun. For a practical example, imagine taking a stoic family portrait from the 1950s and applying a motion video of someone subtly smiling. The result is a surprisingly touching clip that makes your ancestors feel present. It's a fantastic way to inject personality or storytelling into an otherwise still image.
Before we dive into the 'how-to', let's get your toolkit ready. Animating pictures with AI doesn't require a lot, but having the right components makes all the difference.
Your AI Picture Animation Toolkit
| Component | What You Need | Actionable Insight |
|---|---|---|
| Source Image | A clear, well-lit picture (PNG or JPG) | Higher quality source images produce smoother animations. Use a photo where the subject is in focus and forward-facing for the best results. |
| Motion Video | A short video clip (MP4) with the desired movement | This is your 'motion template'. To make a portrait nod, use a video of a person nodding. The AI will directly copy this movement. |
| AI Tool | An account with an AI video generator like Seedance | This is the engine that does all the heavy lifting. A good tool will offer a library of pre-set motions as well as custom video uploads. |
With these three things, you have everything you need to start creating.
So, What Can You Actually Do With This?
The possibilities are genuinely exciting and go far beyond just a novelty trick.
Think about a product photo for a social media advert. For a practical example, a static image of a coffee mug can be animated with a subtle steam effect using a motion video of rising smoke. This looping movement is just enough to grab someone's attention as they scroll. Or if you've drawn a character, you could bring them to life for a short animated clip by recording yourself acting out a gesture and applying it to your drawing.
Here's an actionable insight: A marketing team could take a static photo from a customer's testimonial and animate it with a gentle nodding motion to make their quote feel more alive and personal. A history teacher could animate a portrait of Marie Curie to have her "explain" her discovery of radium, making the lesson far more engaging for students.
The real power here is bridging the gap between a static picture and a full-blown video. You're giving a single, frozen moment a story and a spark of life, all without needing to learn complicated animation software.
The Human Touch Behind the AI
While AI makes this process feel effortless, it's standing on the shoulders of giants. It builds on decades of human skill and artistry in the animation industry.
The UK animation sector is a perfect example of this deep-rooted talent. While around 1,000 people work directly as animators, the industry supports a much wider ecosystem of over 15,390 jobs. It's also a remarkably diverse field. Women make up 51% of the workforce and hold an impressive 89% of production management roles.
It's this skilled and varied talent pool that laid the creative groundwork for the AI tools we can all use today. You can discover more insights about the UK animation workforce and see the human expertise that powers the industry.
Preparing Your Picture for Perfect Animation
The secret to a stunning AI animation almost always starts with the quality of your source image. Think of it like this: you can't build a great house on a shaky foundation. The same idea applies here. When you want to animate a picture, the AI needs clear, detailed information to work with to produce a convincing result.
So, what exactly makes a picture ‘AI-friendly’? It really comes down to a few key elements that help the software accurately map motion onto your subject. Get these right, and you're golden. Get them wrong, and you might end up with distorted or unnatural movements.
Choosing an AI-Friendly Image
First things first, always start with high-resolution images. A sharp, clear picture gives the AI so much more detail to analyse, which translates directly into smoother, more realistic motion. Giving the AI a blurry or pixelated photo is like asking it to navigate with a fuzzy map—it’s going to get lost.
The subject of your photo is just as important. From my experience, the best results come from pictures where the person is:
- Clearly visible without anything major blocking them.
- Facing forward or at a slight, three-quarter angle.
- Well-lit, with balanced contrast and no harsh, distracting shadows.
A person looking straight at the camera is the ideal scenario. This is because the AI can easily lock onto key facial features like the eyes, nose, and mouth. A full side profile can sometimes work, but it’s a bit of a gamble as the AI has much less information to go on, which can lead to some pretty strange results.
Here's a practical example: Imagine you have two photos of yourself. One is a crisp, well-lit portrait taken in a studio. The other is a grainy selfie from a dark concert, with your friend's hand partially covering your chin. The studio portrait will animate beautifully, but the selfie will likely produce a distorted, jerky mess. The actionable insight here is that the AI needs unobstructed facial features to work its magic.
Simple Edits for Better Animations
The good news is you don’t need to be a Photoshop wizard to get dramatically better results. Just a few quick tweaks in any basic photo editor can make a world of difference. These small adjustments are all about helping the AI interpret your image accurately before it starts bringing it to life.
Before you hit that upload button, give these simple prep steps a try:
- Crop to Centre the Subject: Don't be afraid to cut out any unnecessary background noise. This helps the AI focus entirely on the person or object you actually want to animate.
- Adjust Contrast and Brightness: Make your subject pop. Bumping up the contrast a little can help define the edges of the face and body, making it much easier for the AI to track movement.
- Remove Obstructions: If you can, edit out anything that's blocking the face or body, like stray hair falling across an eye or the glint from sunglasses. The clearer the view, the better the final animation.
Taking just a couple of minutes to prep your image is a fundamental part of learning how to animate a picture well. It can save you a ton of frustration and lead to a final video that looks far more impressive. And if you're interested in more advanced creative work, you can explore how AI handles powerful image-to-image style transfers, which is another area where a clean source file is absolutely key.
Your Practical Walkthrough Using Seedance
Right, let's get our hands dirty. You've got your image prepped and ready, so now comes the fun part: bringing it to life with Seedance. The whole process is refreshingly straightforward, designed to get you from a still picture to a moving video clip without any headaches. I'll walk you through it.
The main decision you'll make is how you want your image to move. Seedance gives you two main ways to go about this. You can either use their pre-set motion templates for a quick result, or you can upload your own custom video for something truly unique. Understanding the difference is key to getting the most out of the tool.
Starting with Motion Templates
Think of motion templates as the express lane to animation. These are ready-made, short video clips of common gestures like a simple smile, a nod, or someone glancing around. They’re absolutely perfect when you just need to add a subtle, realistic touch of life to an image without a lot of fuss.
Here's a practical example: You have a professional headshot for your LinkedIn profile. It's a solid photo, but it's just… static. By applying a 'nod and smile' template, you can instantly make it feel more approachable and engaging.
Here’s the actionable process:
- First, you upload your headshot to the platform.
- Next, have a browse through the library of available motion templates.
- Pick one that fits, like the 'nod and smile', and see how it looks in the preview.
- Happy with it? Just hit generate.
In less than a minute, your professional photo suddenly has a flicker of warmth and personality, making it far more likely to catch someone's eye. For anyone just starting out, this is a fantastic way to begin.
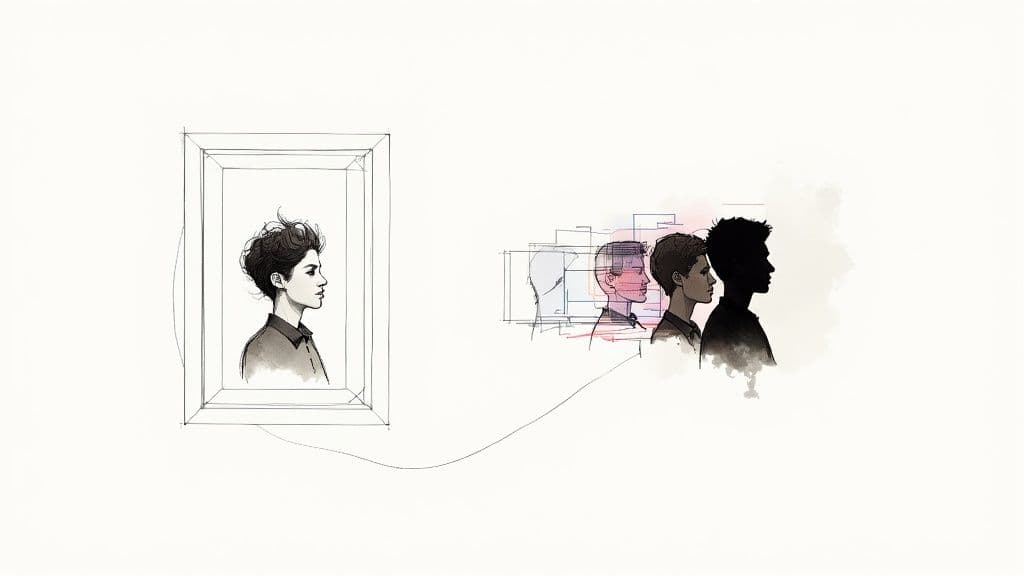
This simple journey from a static start to an animated end is the core of the entire process.

As the diagram shows, animating a picture is all about giving the AI a starting point (your image) and an endpoint (the desired motion), then letting it cleverly fill in all the frames in between.
Using a Custom Motion Video
This is where you can really let your creativity run wild. Instead of using a pre-set from the library, you can upload your own video to act as the motion source. This opens the door to creating animations that are completely unique and personal to you.
Let's use a practical example: What if you want your company's cartoon mascot to give a thumbs-up in a promotional video? Simply record a quick video of yourself giving a clear thumbs-up. Upload your mascot's image and your video. The AI will map your gesture onto the cartoon character, creating a custom piece of branded content in seconds.
This is where the tool's real strength lies. On one hand, you can create subtle, professional animations for a corporate website. On the other, you can generate bizarre, imaginative clips that are perfect for social media. The only real limit is your imagination and the motion videos you can find or create yourself.
Finalising Your Animation Settings
Once you’ve locked in your motion, there are just a couple of final tweaks to think about. These settings will fine-tune the quality and format of your final video.
- Output Resolution: This is all about the clarity of your video. For most things you'd post online, 1080p is the sweet spot. It gives you fantastic quality without creating a massive file that’s slow to load.
- Video Length: You can also trim the animation down to the exact length you need. Short, snappy clips are great for GIFs or social media reactions, while you might want something a bit longer for a presentation or another video project.
Getting comfortable with these options is a big part of learning how to animate a picture effectively. If you want to dive even deeper and play around with the interface, you can explore Seedance’s dedicated image-to-video generator page.
It’s worth remembering that tools like this are built on the skills of a global animation industry. In the UK alone, London continues to be Europe's biggest animation hub, home to 10,564 professionals. Despite some recent market changes, that deep pool of talent shows just how resilient and important the UK is in the world of animation.
Going Beyond the Basics for Truly Creative Results
Once you've got the hang of the simple stuff – making a picture nod or smile – you can start to really push the boundaries of what's possible. This is where you move from basic animation to genuine digital storytelling, using the AI as a creative partner to turn a static image into something truly compelling.
Think about the potential here. For a practical example, you could bring a historical portrait to life, giving a subtle, knowing smirk to the Mona Lisa. Or you could take your favourite comic book hero and have them strike a dynamic, action-ready pose by applying motion from a video of a martial artist.
Of course, getting more ambitious also means learning how to troubleshoot. AI is a powerful tool, but it's not magic. You'll inevitably run into the odd glitch, like a distorted face or a movement that just looks… off.
Fine-Tuning Your Animations
When an animation doesn't turn out quite right, don't just scrap it and start over. More often than not, a small tweak is all it takes to get it looking great.
Here's an actionable insight: If a character's arm moves in a strange, disjointed way, the culprit is probably the motion source video. Your first move should be to find a different video where that arm movement is cleaner and less ambiguous for the AI to interpret. Sometimes, though, a quick edit to the original image itself can work wonders. Just slightly adjusting the contrast or sharpness can give the AI the extra information it needs to produce a much smoother result.
Here’s a look at the Seedance interface, where you can see just how easy it is to experiment with different source images and motion videos.
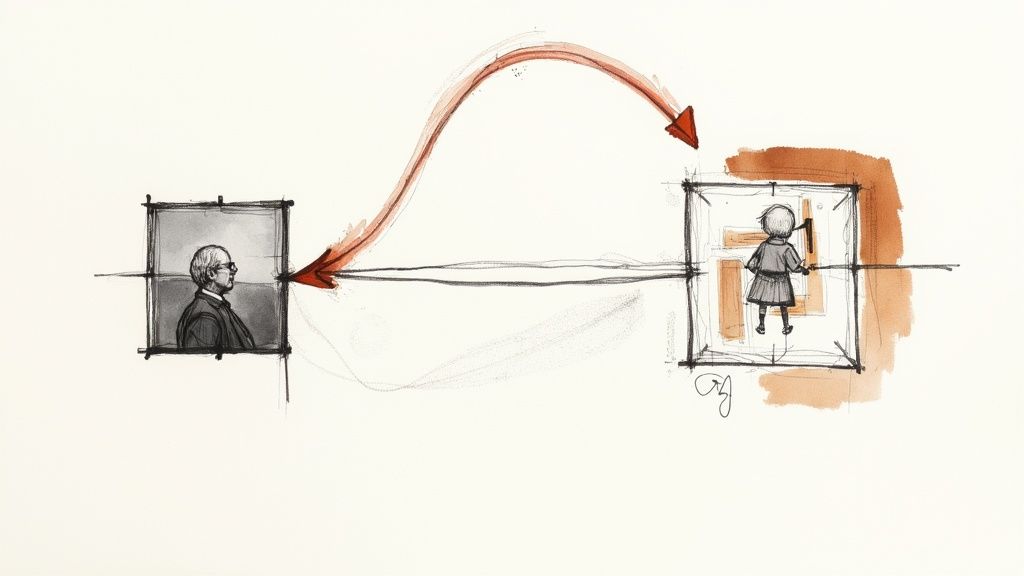
The clean layout is designed for rapid iteration. You can swap out elements and see the results almost instantly, which makes the whole process of refining your animation feel intuitive rather than frustrating.
Actionable Tip: If you're animating a face and the expression looks distorted, try to find a motion source where the person has a similar facial structure to your subject. Matching these details gives the AI a much better chance of creating a believable and natural-looking animation.
Weaving a Story with Motion Chaining
One of the most powerful techniques is motion chaining. It's pretty straightforward: you create several short, distinct animated clips from the same static image, and then you stitch them together in a separate video editor. This lets you build a longer, more complex narrative.
Here’s a practical example of motion chaining: Starting with a single picture of a character, you could create:
- A short clip of them looking to the left.
- A second clip where they glance to the right.
- And a final one where they turn and smile at the camera.
When you sequence these clips, you're no longer just animating a picture; you're telling a micro-story where your character seems to be actively reacting to their surroundings. This is how you elevate a simple effect into something truly engaging. With the UK's animation market projected to hit USD 9.36 billion by 2030, there's a huge appetite for these kinds of dynamic visual stories across advertising, social media, and entertainment.
This piecemeal approach also gives you incredible control. By blending different movements, you can layer in personality and emotion. For an even more professional finish, you can add different video effects to each clip before you combine them, giving your final creation a unique and polished feel.
Showcasing and Sharing Your Animated Pictures
https://www.youtube.com/embed/RZNAaVI5sOA
You've done the hard part and brought your static image to life—that’s a huge win. But the job isn't quite finished. Now it's time to get your creation out there where it can really make an impact. The secret to making it look great everywhere is to match your export settings to the platform where it'll be seen.
This might sound like a small detail, but it’s crucial. An animation destined for a crisp YouTube video needs a completely different treatment than a lightweight GIF you’d drop into a social media comment. Luckily, Seedance makes this pretty straightforward by giving you clear options to tweak your output.
Optimising Your Animation for Different Platforms
Before you hit export, take a moment to think about your audience. Where are they going to see this? Each platform has its own technical quirks and expectations. A one-size-fits-all approach just doesn't cut it, so exporting a few different versions is the most actionable strategy.
Here’s a practical breakdown for different scenarios:
- High-Quality Video (YouTube, Vimeo, Presentations): For these, you’ll want to export a high-resolution MP4. This format keeps all the fine details and gives you smooth playback on bigger screens. It's perfect for a business presentation or even as a dynamic B-roll clip in a longer video.
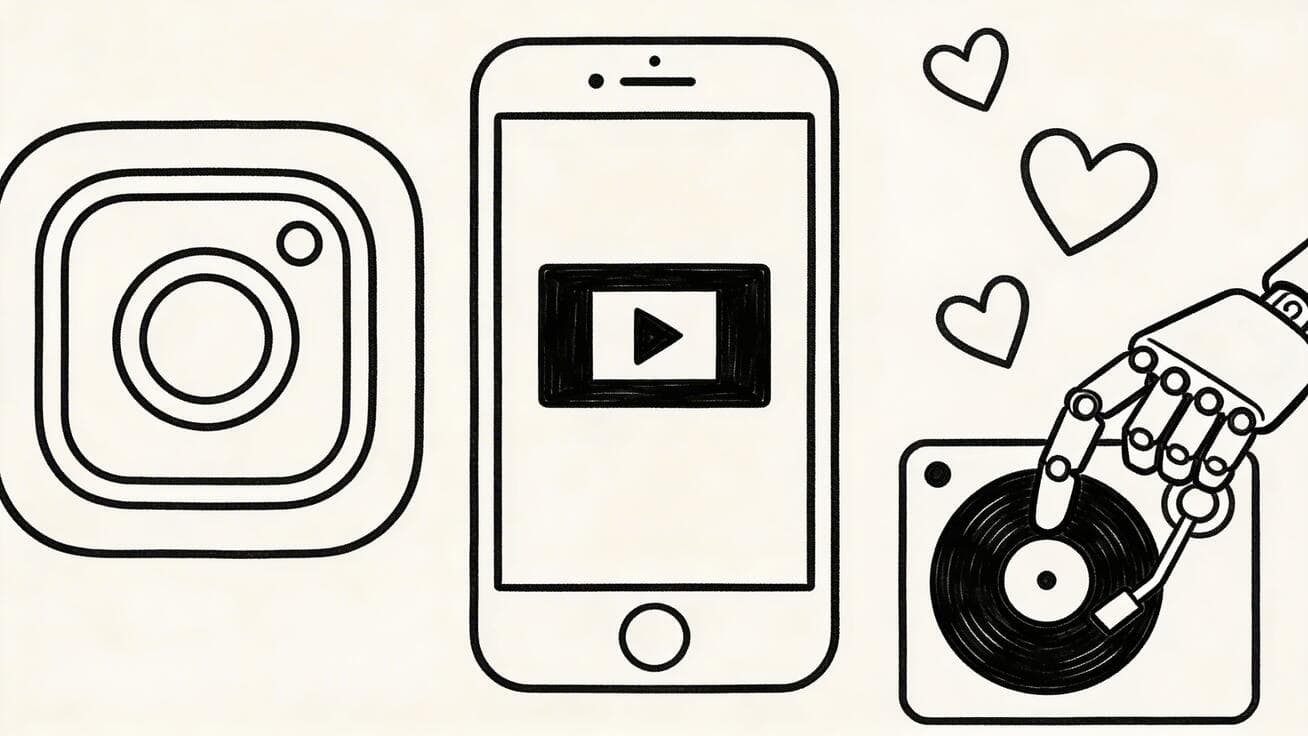
- Social Media Feeds (Instagram, Facebook, X): A slightly compressed MP4 is still your best friend here. These platforms crunch your videos anyway, so starting with a clean, high-quality file helps the final result look sharp instead of pixelated.
- Quick Reactions & Comments (Discord, Forums): This is where the GIF really shines. Export a short, looping version of your animation. GIFs are lightweight, they auto-play almost everywhere, and they’re the ideal format for a quick, eye-catching visual reply.
Here's an actionable insight I've learned: Always create a high-quality MP4 master file first. Think of it as your original negative. From that master, you can easily create smaller, compressed versions like GIFs without having to go back and re-render everything from scratch. It’s a real time-saver.
Adding That Final Professional Touch
A silent animation can sometimes feel a bit… empty. One of the quickest ways to elevate your animated picture from a neat trick to a polished piece of content is to add a little audio. You don’t need to be a sound engineer or have fancy software; many simple, free video editors can handle this perfectly.
For a practical example, add a subtle sound effect that matches the motion—like a gentle "whoosh" for a head turn. This small step adds a layer of professionalism that makes your creation feel much more complete and engaging, helping it truly stand out. You could also add a short, royalty-free music clip to set a specific mood.
Common Questions About Animating Pictures with AI
As you start experimenting with animating photos, you’ll naturally run into a few questions. This technology is incredibly powerful, but knowing its little quirks is the key to getting results you’re actually happy with. Let's walk through some of the most common queries I hear, so you can get creating with confidence.
What Kind of Pictures Work Best for AI Animation?
For the most reliable results, especially with a tool like Seedance, you’ll want to start with a high-resolution image. Think crisp and clear. The subject should be well-lit, facing forward, and not obscured by anything. A practical example of a perfect source image is a professional headshot or a clear holiday photo where the person is looking at the camera.
Now, you can throw anything at it, but images with busy backgrounds, multiple people, or side profiles can sometimes throw the AI for a loop. The same goes for photos where a hand is covering the face or the person is wearing sunglasses. This can sometimes lead to some funky, distorted results. The actionable insight? Start with a clean, straightforward image to build a solid foundation for your animation.
Can I Animate Animals or Objects?
You absolutely can, but be prepared for some… interesting results. Most AI animation models have been trained on mountains of data showing human movement. This means getting a person to dance looks far more realistic than, say, getting your cat to do the same routine. The AI just understands human anatomy better.
That said, this is where the real creative fun begins. Pushing the boundaries can lead to some wonderfully surreal and funny animations. For example, applying a video of a person breakdancing to a picture of a garden gnome could create a hilarious viral clip. The actionable insight is to lean into the absurdity for comedic or artistic projects rather than aiming for pure realism.
How Can I Make My Animations Look More Natural?
Getting a truly believable animation often comes down to a few key things. First, always start with a high-quality source image. The more detail the AI has to work with, the cleaner and more refined the final video will be.
Next, be picky about your motion source video. Actionable insight: A smooth, well-filmed clip of a simple, clear motion is going to translate much better than a shaky video with a dozen different things happening. For example, to make a picture wave, film a slow, deliberate wave against a plain background.
Finally, start small. Subtle movements like a gentle head nod, a simple wave, or a smile often look far more convincing than a fast, over-the-top dance number. As you get more comfortable, you’ll get a feel for which bigger, more dynamic motions produce the best results.
A great animation always starts with great source files. It’s a bit like cooking – the better your ingredients (your image and motion video), the better the final dish. Taking an extra minute to find the right inputs will save you a ton of frustration down the line.
Do I Need a Powerful Computer?
Nope, and that’s one of the best things about web-based AI tools. All the heavy lifting, the real number-crunching, happens on powerful servers in the cloud, not on your own machine. All you really need is a decent internet connection and a standard web browser.
This means you can create stunning animations from pretty much any modern computer, laptop, or even a tablet. You don’t need to fork out for an expensive graphics card or specialised software to get started.
Ready to stop just looking at your photos and start bringing them to life? With Seedance, you have everything you need to turn your static images into something truly special. Give it a go and create your first AI-powered animation today at https://www.seedance.tv.
Ready to try it yourself?
Put the steps from this guide into practice with Seedance and turn prompts or images into polished videos in minutes.
Free credits on signup. Plans from $9.9/month.
Related Articles
More posts in the same locale you may want to read next.
AI Video Generator for Instagram Reels: Create Viral Content in Minutes (2026)
Use AI video generators to create Instagram Reels that get views. Best tools, Reel formats, prompts, and posting strategies for 2026.
Read article
How to Make Product Demo Videos with AI
Learn how to make product demo videos with AI using prompts, screenshots, image-to-video workflows, and simple editing systems that convert better.
Read article
AI Video Generator Free: No Limits, No Watermark, No Sign Up (2026)
Find the best free AI video generators with no limits, no watermark, and no sign up. Compare Seedance, Runway, Pika, and more — tested and ranked for 2026.
Read article