How to Improve Video Quality: Actionable Tips for Stunning Results
Often, the biggest leaps in video quality happen long before you hit the record button. It really boils down to three core areas: lighting, stability, and audio. Getting these fundamentals right will make a much bigger difference than buying a new camera, and it sets a professional foundation for everything you shoot.
Start with Strong Video Fundamentals
Before you get lost in the weeds of camera settings or fancy editing software, remember that the most dramatic improvements are made right there on set. Nailing the basics is what separates amateur-hour footage from content that looks genuinely professional. Think of it as building a house – without a solid foundation, the fanciest decorations won't matter.
Master Your Lighting Setup
Lighting is, without a doubt, the most important piece of the puzzle. A well-lit scene just looks clean and sharp. On the flip side, poor lighting will make even a top-of-the-line camera produce grainy, muddy-looking footage. The good news? You don't need a Hollywood budget to get it right.
Ready to try it yourself?
Free credits on signup. Plans from $20/month.
The classic three-point lighting setup is an industry standard for a good reason. It uses a trio of lights to shape your subject and kill off any unflattering shadows. Here's a practical breakdown:
- Key Light: This is your main and brightest light. Position it at a 45-degree angle to your subject, slightly above eye level. For example, if you're filming a person at a desk, place the light off to their left or right side.
- Fill Light: Placed on the opposite side, this is a softer light that "fills in" the shadows from the key light, which helps to reduce harsh contrast. A practical action is to set this light to about half the brightness of your key light.
- Backlight: Sometimes called a hair light, this goes behind your subject. It creates a subtle glowing outline that separates them from the background, adding a fantastic sense of depth to the shot. Aim it at the back of the subject's head and shoulders.
Actionable Tip: If you have no budget for lights, use a large window as your key light. Position your subject facing the window to get beautiful, soft, natural light. Then, take a white foam board from a craft store and hold it on the opposite side of your subject to bounce light back and act as your fill light.
Achieve Rock-Steady Shots
Nothing screams "amateur" quite like shaky footage. It's distracting for the viewer and instantly cheapens your production. Thankfully, getting smooth, stable shots is easier and more affordable than it's ever been.
For any kind of static shot, like an interview or a product demo, a tripod is non-negotiable. Actionable step: Before you even think about framing your shot, set up the tripod, level it, and lock your camera onto it. This guarantees a perfectly still frame.
But what if you need to move? To follow a subject or grab some dynamic B-roll, a gimbal is the tool you need. It uses a clever system of motors to keep your camera perfectly level, giving you that buttery-smooth, cinematic motion that looks so good. For example, use a gimbal to smoothly walk alongside a person as they enter a building, creating a professional-looking intro shot.
Prioritise Crystal-Clear Audio
Here’s a secret from the pros: audiences will forgive slightly dodgy visuals, but they have zero patience for bad audio. If your sound is muffled, echoey, or full of background noise, people will click away in a heartbeat. The built-in microphone on your camera or phone just isn't cut out for the job.
One of the smartest investments you can make is an external microphone.
For interviews or talking-head videos, a lavalier mic (the little one that clips onto a shirt) is perfect for capturing crisp, clean dialogue. Practical advice: Clip it to the centre of the person's chest, about 6-8 inches below their chin, and hide the wire under their shirt. For more general filming, a shotgun mic that mounts onto your camera is a great choice. To use it effectively, always point the microphone directly at your sound source to reject noise from the sides.
Dial in Your Camera Settings for Maximum Clarity
Leaving your camera on "auto" is a bit like letting a satnav choose your holiday destination – you'll get somewhere, but probably not where you actually wanted to go. To really get that crisp, professional look, you have to grab the wheel and go manual. It’s not as intimidating as it sounds. A little know-how about a few key settings is all it takes to unlock your camera's true potential.
The foundation of any great shot is the "exposure triangle": aperture, ISO, and shutter speed. These three elements work in tandem, and learning to balance them is the first real step towards mastering your camera.
For example, if you're filming an interview indoors, set your aperture to a low f-stop like f/1.8 or f/2.8. This practical action creates a shallow depth of field, which throws the background into a soft, pleasing blur and makes your subject pop.
Getting the Balance of Light and Motion Just Right
Now, let's talk about shutter speed. The golden rule here is the "180-degree rule". It sounds technical, but it’s dead simple: your shutter speed should be double your frame rate. So, if you’re shooting at 25 fps (the standard in the UK), your shutter speed should be 1/50th of a second.
Following this rule gives your video a natural-looking motion blur. For example, if you're filming a person walking, their movement will look smooth and lifelike. If you set the shutter too fast (e.g., 1/1000 sec), their movement will appear jerky and unnatural.
The final piece of the puzzle is ISO, which is your camera's sensitivity to light. My best advice? Keep it as low as you possibly can. Every camera has a "native" ISO (usually 100 or 200) where it performs best. If you crank the ISO up in a dark room, you’ll introduce a grainy digital "noise" that butchers your video quality. It's always, always better to add more light to the scene than to rely on a high ISO.
I see this all the time at dimly lit events. People push their ISO to the max and end up with a grainy, unusable shot. A much better approach is to use a faster lens (one with a wider aperture) or even a small LED light. The difference in clarity is staggering.
Locking in Resolution and Perfect Colour
Always, and I mean always, shoot in the highest resolution your camera offers, like 4K. Why? Even if your final export is only 1000p, that extra data gives you incredible flexibility. For instance, you can crop a wide shot into a tight close-up during editing without losing any sharpness.
Getting your white balance right is another one of those small things that makes a massive difference. Auto white balance is easily confused by mixed lighting. Actionable step: Before filming, point your camera at a white or grey card in the same light as your subject and use your camera's custom white balance function. This ensures your colours are true-to-life and skin tones look natural. If you're curious about how different looks can set a tone, you can learn more about the psychological effects of video.
To help you get started, here are some recommended settings for a few common filming situations.
Recommended Camera Settings for Common Scenarios
This table is a quick cheat sheet to get you in the right ballpark. Remember to always check your shot and adjust as needed, as no two environments are exactly the same.
| Scenario | Resolution/Frame Rate | Suggested ISO | Shutter Speed Rule | Key Consideration |
|---|---|---|---|---|
| Outdoor Daylight | 4K / 25 fps | 100-200 (native) | 1/50 sec | Action: Use an ND filter to reduce light so you can maintain a wide aperture for a blurry background. |
| Indoor Interview | 4K / 25 fps | 100-800 | 1/50 sec | Action: Set up a three-point lighting system before you touch your camera settings. |
| Slow Motion (B-Roll) | 1080p / 100 fps | As low as possible | 1/200 sec | Action: Bring in extra lights. High frame rates need significantly more light to get a clean exposure. |
| Low-Light Event | 4K / 25 fps | 800-3200 (max) | 1/50 sec | Action: Use a prime lens with a wide aperture (e.g., f/1.8) to maximize light intake. |
Ultimately, these settings are your starting point. The real expertise comes from practice—getting out there, shooting, and seeing what works best for your specific camera and style.
The image below shows a classic three-point lighting setup, which is a fantastic technique for making your subject look their best.
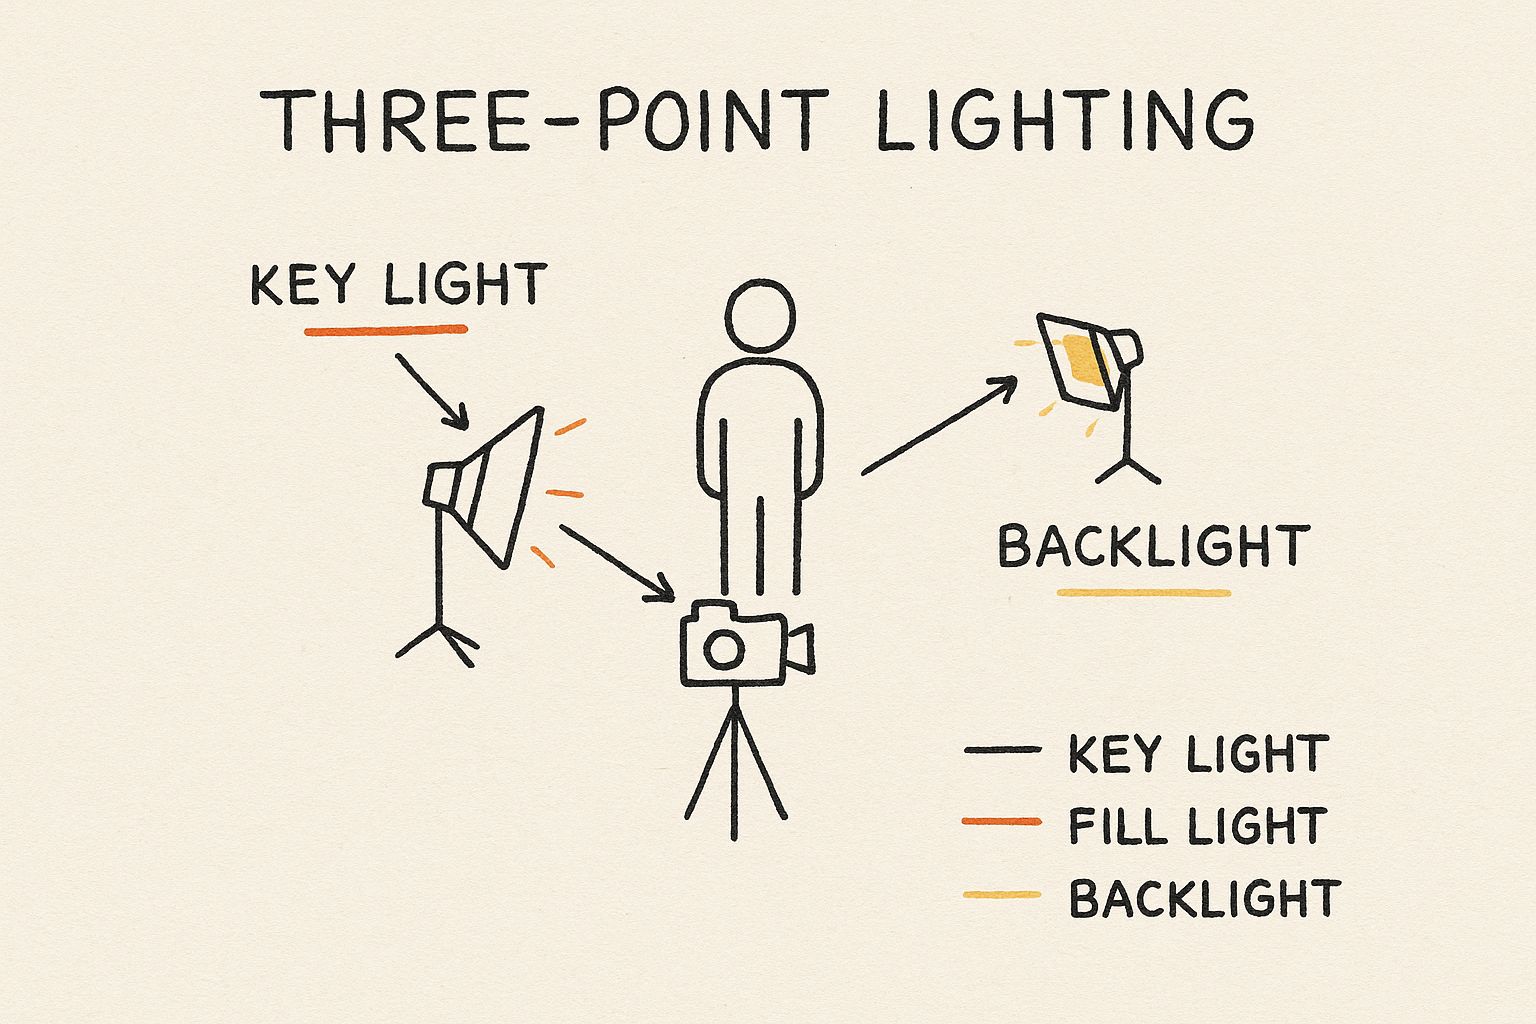
You can see how the key light, fill light, and backlight work together. This combination defines the subject's shape, gets rid of ugly shadows, and separates them from the background, adding that crucial sense of depth every great video needs.
Transform Your Footage in Post-Production
Shooting great footage is really only half the battle. The magic truly begins in the edit, where you can take good clips and turn them into something captivating. Post-production isn't just about splicing scenes together; it’s your chance to refine, polish, and inject your unique style to seriously improve video quality.
This is where you can fix mistakes, enhance the details that matter, and create a specific mood that really connects with your audience. With a few key techniques, you can add that professional sheen that makes your content stand out from the crowd.
Colour Correction Versus Colour Grading
First things first, let's clear up a common point of confusion: the difference between colour correction and colour grading. They sound similar, but they have very different jobs.
Think of colour correction as the technical, foundational step. It's all about fixing problems and making the footage look natural. Here's what to do:
- Adjust Exposure: Use your software's waveform monitor to bring the brightest parts of your image close to the 100 IRE line and the darkest parts near 0 IRE.
- Fix White Balance: Use the white balance dropper tool and click on something in your shot that should be pure white or neutral grey.
- Balance Saturation: Tweak the saturation slider until colours look realistic, not overly vibrant or washed out.
Colour grading, on the other hand, is where the artistry comes in. For example, to achieve a 'blockbuster' look, you might push teals into your shadows and oranges into your highlights. To create a vintage feel, you could desaturate the colours and add a subtle yellow tint.
An actionable professional workflow is to first apply a correction LUT to every clip to get them to a neutral starting point. Then, create an adjustment layer over your entire timeline and apply your creative LUT or grade to that layer. This ensures consistency.
Using Professional Tools for Precision
To get truly precise results, you can't just rely on your eyes, as monitors can vary wildly. This is where professional scopes come in. Tools like the Vectorscope, found in software like DaVinci Resolve or Adobe Premiere Pro, are indispensable for nailing perfect skin tones. Practical tip: When grading a person, adjust your colours until the line on the vectorscope falls directly on the "skin tone indicator line."
Here’s a look at the colour page in DaVinci Resolve, which gives you an idea of the powerful tools available for grading.

The interface is packed with scopes, colour wheels, and node graphs, giving editors surgical control over every aspect of the image. For a quick cinematic look, many editors turn to a LUT (Look-Up Table). A LUT is basically a preset colour formula you can apply to your footage. A subtle, well-chosen LUT can instantly give your video that polished, film-like appearance.
Refining the Details with Sharpening and Noise Reduction
Once your colour is dialled in, the final touches often involve sharpening and noise reduction. A word of caution: these tools must be used sparingly. Overdoing it is a fast track to making your video look artificial.
Apply a subtle sharpening filter to make key details pop. For example, in Premiere Pro, use the "Unsharp Mask" effect and start with a low value like 25 for "Amount" and 1.0 for "Radius".
If you have footage shot in low light, you'll likely see some digital noise or grain. Modern noise reduction tools are incredibly good at cleaning this up. Apply the effect carefully and review the playback, making sure you remove the distracting grain without making the footage look overly soft or waxy. These final tweaks are often what separates good video from great video, and for those looking to create dynamic visuals from static pictures, exploring an image to video tool can offer another layer of creative possibility.
Get Your Video Compression and Export Settings Right
You've shot some beautiful footage, spent hours crafting the perfect edit, and now you're at the final hurdle: exporting. Honestly, this is where so many creators trip up, accidentally throwing away quality at the very last moment. If you can get your head around compression and dial in the right export settings, your video will look just as crisp on YouTube as it does on your editing timeline.
<iframe width="100%" style="aspect-ratio: 16 / 9;" src="https://www.youtube.com/embed/T0boiBk6-hY" frameborder="0" allow="autoplay; encrypted-media" allowfullscreen></iframe>
Think of compression like packing a suitcase. You need to fit all your video data in, but you don't want to crush everything and end up with a wrinkled mess. The video codec is the specific technique you use to do that packing.
For a long time, H.264 (AVC) was the undisputed king. Its biggest selling point is that it just works—pretty much every device and platform on the planet can play it. But now there's H.265 (HEVC), a much more efficient packer. It delivers similar quality at a significantly smaller file size.
Actionable Advice: For YouTube and social media, export using H.264 for maximum compatibility. If you are creating a 4K master file for archiving or for a high-end platform like Vimeo, use H.265 to save significant storage space without sacrificing quality.
How to Choose the Right Bitrate
If there’s one setting that has the biggest impact on your final video quality, it’s the bitrate. It's essentially the amount of data allocated to each second of your video. A higher bitrate means more data, which translates to better quality and a larger file.
Here's a practical guide for exporting:
- 1080p Video for Web: Set your target bitrate to 8-12 Mbps (megabits per second).
- 4K Video for Web: Aim for a target bitrate between 35-65 Mbps.
Getting this balance right is more important than ever. In the UK alone, over 19 million households are subscribed to streaming services. These platforms use clever adaptive bitrate tech to adjust video quality based on the viewer's internet connection. This just goes to show how vital it is to give them a high-quality source file to work with from the start. You can dig into more details about the UK's streaming market on Statista.com.
Use Platform-Specific Presets to Save Time
The good news is you don't always have to fiddle with these settings manually. Most modern editing software, like Premiere Pro or DaVinci Resolve, comes loaded with handy export presets built for specific platforms.
- YouTube: In Premiere Pro's export window, select "Format: H.264" and then "Preset: YouTube 1080p Full HD". This automatically sets the correct bitrate and codec for you.
- Instagram & TikTok: These apps are all about vertical video. Look for presets that match a 9:16 aspect ratio and use H.264. This ensures your video plays smoothly on mobile phones without endless buffering.
- Vimeo: Known for prioritising quality, Vimeo’s presets typically use higher bitrates than YouTube's. This makes it the perfect choice when you need to showcase your work in the best possible light.
Starting with these presets is easily the smartest move. This final step is your last chance to protect all the hard work you’ve put into making your video look fantastic. Don't fall at the final hurdle
Give Your Footage an AI-Powered Boost
AI-powered video enhancement isn’t just some sci-fi concept from blockbuster films anymore. It's a genuinely practical tool you can use right now to drastically improve your video quality. These smart bits of software can breathe new life into older, low-resolution footage, pulling off complex fixes that were once the stuff of dreams.
Rather than just stretching out pixels like a basic digital zoom, AI models actually analyse the content of your video. They intelligently rebuild details, sharpen up blurry areas, and clean away ugly compression artefacts with a precision that’s frankly incredible. This is a complete game-changer if you’re working with archival clips, old family videos, or any footage shot on less-than-ideal gear.
From Grainy Footage to Crisp Visuals
Picture this: you've got a treasured family video shot in standard definition decades ago. It's grainy, soft, and looks lost on a modern 4K screen. An AI upscaler can transform it. For example, software like Topaz Video AI can take that 480p file and intelligently upscale it to 4K, adding realistic detail to faces and backgrounds that wasn't visible before.
An AI upscaler works differently. It looks at the footage, identifies objects in the frame—faces, trees, buildings—and uses a massive library of training data to reconstruct them with convincing high-resolution details. The transformation can be stunning, turning a pixelated memory into a clean, sharp 4K clip that looks surprisingly natural.
The real magic is in the intelligence. AI doesn't just enlarge the image; it understands it. This is what allows it to add detail that feels authentic, rather than creating that waxy, artificial look you sometimes see.
This approach is becoming essential in the professional sphere, too. Here in the UK, consumer habits are changing, with 42% now preferring Ad-supported Video on Demand. This puts pressure on providers to deliver top-tier quality without breaking the bank. AI upscaling lets them repurpose older content for today's high-res screens. You can dig into more data on this trend in the 2025 UK CTV Pulse Survey.
Getting Natural-Looking Results
To get the most out of these AI tools, always start with the best quality source file you can get your hands on, even if it’s only 480p. Try to avoid using footage that’s already been compressed over and over, as this creates a jumble of artefacts that can confuse the AI.
Here are a few actionable tips:
- Pick the right AI model. Most good tools offer different models trained for specific types of content, like animation, live-action, or CGI. For an old home movie, you'd choose a model designed for "Interlaced" or "Low-Resolution" footage.
- Be patient with it. AI enhancement is a heavy-duty process for your computer. Rendering even a short clip can take a while, so set it running and go grab a coffee.
- Don't go overboard. Start with the software's recommended settings. Only increase sharpening or noise reduction in small increments if the initial result isn't clean enough. A light touch is key.
This same technology is also popping up in the creation process, with tools that can generate video clips directly from a simple text prompt. To learn more about where this is all heading, have a look at our guide on text-to-video AI generators.
Common Questions About Improving Video Quality

Even after you've got the basics down, you’ll inevitably run into specific snags when trying to polish your videos. Let's tackle some of the most frequent questions I hear, with practical answers to help you get unstuck and back to creating.
Why Does My Video Look Blurry on Social Media?
This is a classic headache. You export a crystal-clear video, upload it, and it suddenly looks soft and pixelated. The culprit is almost always aggressive compression. Platforms like Instagram and Facebook have to shrink massive video files to handle the sheer volume of uploads, and that process often sacrifices quality.
Actionable solution: Export your video using the platform's exact recommended settings. For Instagram Reels, for example, export as an H.264 file, 1080x1920 resolution, at around 10-15 Mbps. This gives their algorithm a file that's closer to their final format, reducing the damage they do during re-compression.
Can I Genuinely Improve Video Quality on My Phone?
You absolutely can. Modern smartphones have phenomenal cameras, but their two biggest Achilles' heels are audio and lighting. Focusing on these two elements will give you the most dramatic boost in quality.
For starters, get yourself a simple external microphone. Even an inexpensive lavalier mic that plugs into your phone will make your audio sound infinitely more professional than the built-in mic. Then, find good light. Filming near a window with soft, natural light is ideal, but even a well-placed lamp can make a huge difference.
Here are a few other actionable tips for phone filming:
- Use the back camera. Its sensor and lenses are miles better than the selfie camera.
- Lock your focus and exposure. Before recording, just tap and hold on your subject. A yellow box will appear, confirming the settings are locked. This stops the camera from distractingly "hunting" for focus mid-shot.
- Try a pro camera app. Apps like FiLMiC Pro give you manual control over things like bitrate and frame rate, letting you operate your phone more like a professional camera.
What is the single most important factor for high-quality video?
It’s lighting. Hands down. Good lighting can make footage from a budget camera look clean and sharp. Conversely, even the most expensive cinema camera will produce a grainy, unprofessional-looking image in a poorly lit room. If you only have time to focus on one thing, make it your lighting.
Ready to create stunning videos without the hassle of cameras, lighting, or complex editing? With Seedance, you can turn a simple text description into a cinematic 1080p video in minutes. Describe your vision, and our advanced AI brings it to life with professional quality. Explore the future of video creation at https://www.seedance.tv.
Ready to try it yourself?
Put the steps from this guide into practice with Seedance and turn prompts or images into polished videos in minutes.
Free credits on signup. Plans from $20/month.
Related Articles
More posts in the same locale you may want to read next.
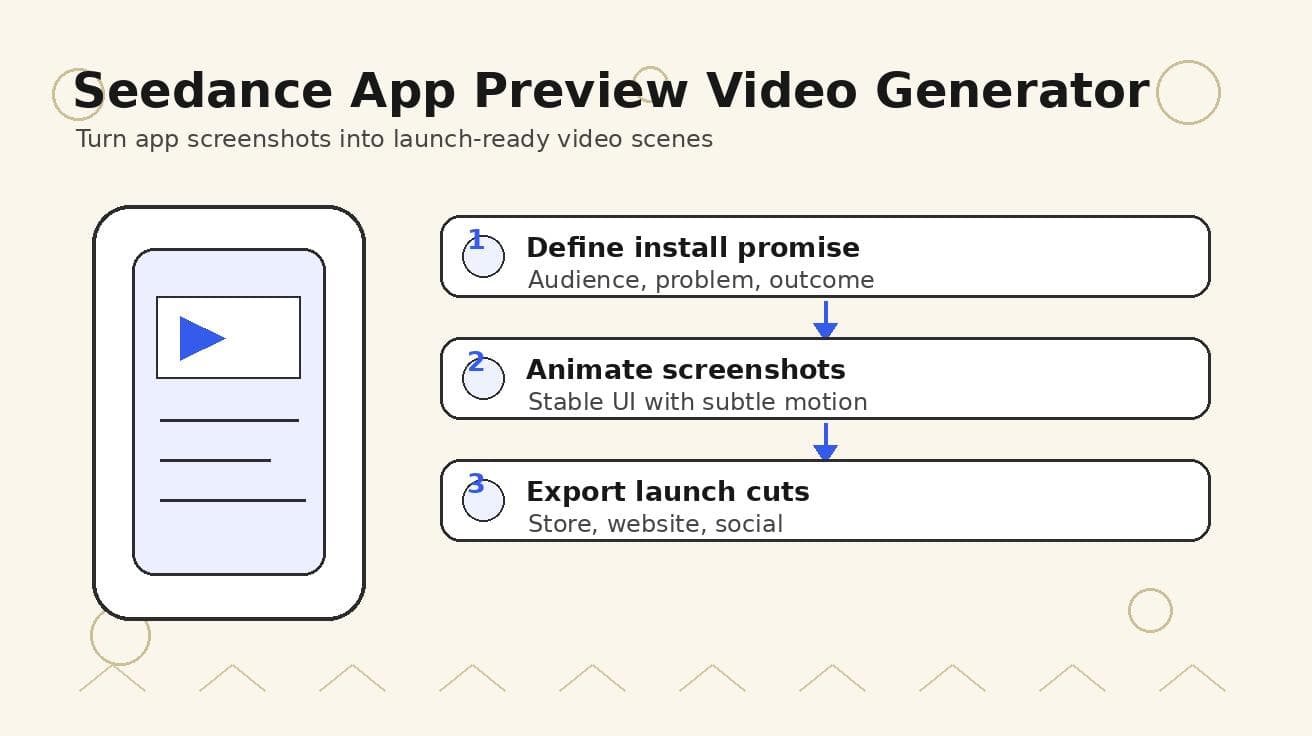
Seedance App Preview Video Generator 2026: Create App Store and Product Launch Clips
Use Seedance to turn app screenshots, feature copy, and launch goals into App Store previews, Google Play promo videos, and product launch clips.
Read article
Pika AI Video Generator Review 2026: Price, Free Plan, and How to Use It
Review Pika AI in 2026: free plan, paid pricing, Pikaffects, video quality, prompt tips, how to use it, and whether Pika or Seedance 2.0 is the better value.
Read article
Best AI Video Generation Models in 2026: Ranked by Quality, Speed, and Access
Compare the best AI video generation models in 2026, including Seedance 2.0, Veo 3.1, Kling 3.0, Wan 2.2, Sora 2, and HunyuanVideo 1.5.
Read article