Adding a picture to a video isn't just a technical trick; it's a simple, powerful way to make your content far more dynamic and engaging. You can weave still images into moving footage to drive home key details, set the scene, or just switch up the visual rhythm to keep your audience glued to the screen.
Quick Answer: Adding Pictures To Video — Seedance provides a comprehensive solution with cutting-edge AI video generation technology, making it easy for creators at every level to produce professional-quality content quickly and efficiently.
Why Merging Photos with Video Creates Better Stories
Ever watched a video and thought a single, clear photo would have explained things better? You’re not alone. Combining static images with moving footage is a classic storytelling technique used by the best creators to sharpen their narratives. It's not about filling gaps—it’s about making your message land with more impact.
A travel vlog, for example, might open with a breathtaking landscape photo to establish the new location before diving into the action. This simple pause gives the audience a moment to soak in the beauty and get their bearings. In the same way, a product tutorial can cut to a high-resolution image to show off a specific feature, making sure viewers see every critical detail without the distraction of movement.
Ready to try it yourself?
Free credits on signup. Plans from $20/month.
Enhancing Clarity and Focus
One of the biggest wins of adding pictures to your video is the control it gives you over your audience's attention. A well-placed image acts like a visual full stop, pausing the motion to spotlight a crucial piece of information. This is incredibly effective for educational or instructional content where getting the point across is everything.
Imagine a cooking tutorial. While the video shows the chef busy mixing ingredients, a quick cut to a photo of the final, beautifully plated dish can build anticipation and give the viewer a clear, delicious goal to aim for. For example, a fitness instructor's workout video could cut to a static image with text overlay showing the correct form for a complex exercise, holding it for a few seconds to let the information sink in.
Boosting Viewer Engagement
Let's face it, visual variety is what keeps people watching. In the UK, video is a massive part of online life. Platforms like YouTube reach an incredible 54.8 million users here, which is nearly 79% of the population. To stand out, your content needs to be memorable. Adding pictures and other visual elements is a proven way to improve engagement and keep people watching longer. You can dig deeper into UK social media trends over at Sprout Social.
By weaving still images into your video, you create a richer, more textured viewing experience. This variety prevents visual fatigue and encourages viewers to stay connected to your story from start to finish.
This technique also gives your work a layer of professional polish. It signals that you've put real thought into building your narrative, using every tool in the box to tell the best story you can. Before we jump into the "how-to," getting a firm grip on this "why" will help you make more deliberate and effective editing decisions down the line.
Creating Videos Instantly with AI Generators
Ever wished you could turn a pile of your favourite photos into a slick, shareable video in just a few minutes? Without wrestling with complicated software or staring at a confusing timeline? That’s exactly where modern AI video generators come in. They’re built for speed and simplicity, making the process of adding pictures to video feel almost effortless, even if you’ve never edited a thing in your life.
Think about a local café wanting to create a quick, vibrant promo for its social media. Instead of the time and expense of a full video shoot, they could just grab their best photos—gorgeous latte art, freshly baked pastries, the cosy shop interior—and upload them to an AI tool. They'd pick a style that matches their brand's vibe, and the AI takes over, intelligently sequencing the images, adding seamless transitions, and even applying subtle animations to make those still shots pop.
The AI-Powered Workflow
The biggest win here is just how much time you save. Artificial intelligence is genuinely changing the game for video production in the UK, making it faster and far more accessible. It’s not just a trend; a recent UK survey found that a staggering 84% of video professionals are already using AI in their work for everything from generating visuals to speeding up edits.
This streamlined approach turns a previously technical chore into a few simple clicks, which is a massive help for small businesses, marketers, and solo creators. If you're looking to put this on autopilot, tools like an AI Reel Generator are designed to do just that.
To get your head around the creative process, this flow shows how you can build a narrative from a collection of stills.
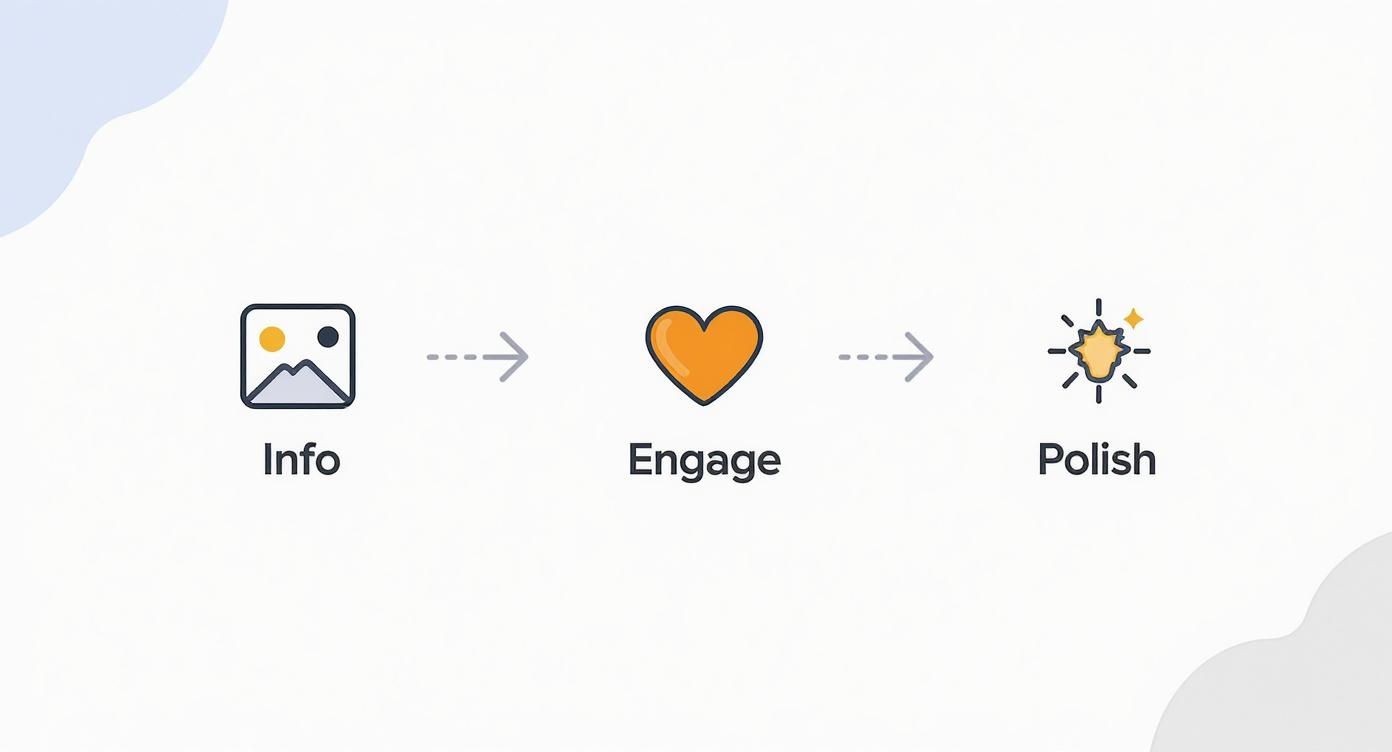
It really breaks down into three core phases: gathering your assets, piecing them together to engage the viewer, and then adding that final polish for a professional finish.
When you're trying to decide whether to go with an AI tool or a more hands-on editor, it helps to weigh up what each offers.
Choosing Your Method: AI vs. Traditional Editors
| Feature | AI Video Generators (e.g., Seedance) | Traditional Editors (e.g., Premiere Pro, CapCut) |
|---|---|---|
| Speed & Ease of Use | Extremely fast, minimal learning curve. Ideal for beginners. | Steeper learning curve, requires manual editing. |
| Creative Control | Less granular control; you guide the AI. | Full control over every element (timing, effects, layers). |
| Ideal For | Quick social media content, marketing promos, slideshows. | Detailed projects, short films, vlogs, professional work. |
| Consistency | Maintains a consistent style automatically based on a template. | Consistency depends entirely on the editor's skill and effort. |
| Cost | Often subscription-based, but very cost-effective for fast output. | Can range from free (CapCut) to expensive subscriptions (Premiere Pro). |
Ultimately, AI is your best bet for speed and convenience, while traditional editors give you the keys to the kingdom for ultimate creative freedom.
From Static Image to Animated Scene
The really clever bit is that many of these AI tools don't just place your photos in a sequence. They can actually create movement within the images themselves, adding a dynamic, cinematic feel that keeps people watching far longer than a basic slideshow ever could. If you're curious about how that works, we have a whole guide on how to animate a picture.
The real magic of AI generators is their knack for producing professional-looking results from very little input. The AI analyses your photos and applies effects that feel thoughtful and intentional, giving the final video a polished, cohesive look.
At the end of the day, these tools are opening up video creation to everyone. By handling the heavy lifting of animation and transitions, they let you focus on what really matters: telling a great story with your pictures. You get a high-quality video, ready to go in a fraction of the time.
Going Hands-On with Desktop and Mobile Editors
When you need to get your hands dirty and have complete creative say over every last detail, nothing beats traditional editing software. While AI is fantastic for speed, desktop and mobile editors give you the power to nudge, tweak, and perfect how your pictures appear in a video. It’s the best route when your vision calls for that personal, human touch.
The good news? You don't need a blockbuster budget to get professional results. Incredible desktop software like DaVinci Resolve packs a professional punch for free. On the other hand, mobile apps like CapCut make it ridiculously easy to produce high-quality videos right from your phone.
This flexibility is a game-changer. You can start a project on your computer and add the finishing touches while you're out and about. If you're weighing up the options, have a look at our guide to the best video editing software to find the right fit for you.
Getting Precise with Desktop Editors
Working on a desktop computer gives you a bigger workspace and a more powerful toolkit, which is ideal when you’re getting into the nitty-gritty of a project. The heart of any desktop editor is the timeline—it’s where you’ll see your video laid out visually, allowing you to layer video clips, images, and sound.
A typical workflow for adding a picture looks something like this:
- Gather Your Assets: First things first, import your video clips and the images you want to use into the software’s media library or "bin".
- Layer it Up: Drag your main video clip onto the timeline. Then, pull your image onto a separate track directly above the video track. This makes the picture appear as an overlay on top of your footage.
- Get the Timing Right: In the timeline, you can simply click and drag the edges of the image clip. This lets you decide exactly how long it stays on screen, whether it’s a quick flash or a longer, more thoughtful moment.
This sort of control is where real storytelling happens. Picture a documentary scene: as someone is speaking, you can layer a relevant photograph on top of the footage to illustrate their point, all without losing the flow of their speech.
Bringing Still Images to Life with Keyframes
One of the secret weapons in a desktop editor's arsenal is keyframing. Think of a keyframe as a bookmark that tells the software an object's properties—like its size, position, or rotation—at a specific moment.
By setting a keyframe at the start and another at the end with different properties, the software automatically fills in the gaps, creating smooth, fluid motion. It’s how you can make a photo slowly zoom in to build drama, or gently pan across a wide landscape to give it that cinematic feel. It’s a simple technique that completely transforms a static image into a dynamic part of your video.
Creating on the Fly with Mobile Editors
For sheer speed and simplicity, mobile apps like CapCut are hard to beat. They’re built for creating content that’s perfect for platforms like TikTok or Instagram Reels.
The real magic of mobile editors lies in their huge libraries of ready-made effects and transitions. You can add a slick, professional-looking animation to a photo with a single tap—something that would take careful manual keyframing on a desktop.
And there’s a massive audience for this style of content. In the UK alone, 83% of consumers say they want to see more video content from brands. Short-form videos often hit a 66% average retention rate by packing in engaging visuals like photos and graphics. You can dive deeper into these video marketing statistics to see just how powerful this is. This makes getting quick and effective with mobile editing an incredibly valuable skill.
Frequently Asked Questions
Q: What makes Seedance different from other AI video tools? A: Seedance combines state-of-the-art AI models with an intuitive interface, making professional video creation accessible to everyone. Its unique blend of powerful generation capabilities, fast processing, and affordable pricing sets it apart from competitors.
Q: How good is the video quality from Seedance? A: Seedance produces high-quality videos with smooth motion, accurate prompt adherence, and impressive visual fidelity. The platform supports multiple aspect ratios and resolutions, including HD output for professional use cases.
Q: Is Seedance suitable for professional video creators? A: Absolutely. Seedance is used by content creators, marketers, filmmakers, and businesses worldwide. Its advanced controls, high-resolution output, and batch generation capabilities make it a powerful tool for professional workflows.
Creative Tips for Blending Images Seamlessly
Just dropping a picture onto your timeline gets the job done, but the real craft is in making it feel like it belongs there. You want it to be a seamless, intentional part of your story. Let’s dig into some of the techniques that can take your edits from looking like a first attempt to a polished, professional video.
A static image can really kill the momentum of a moving video. The trick is to introduce a little bit of motion. This is where effects like the classic Ken Burns effect—a slow, gentle zoom or pan across the photo—are invaluable. Actionable tip: In your editing software, apply this effect to make a photo of a mountain slowly pan upwards, giving the illusion of revealing its scale. This simple movement keeps the dynamic energy flowing, fooling the eye and turning a flat picture into something much more engaging. If you want to dive deeper into this, we've got a whole guide on how to turn a photo into a video.
Mastering Transitions and Timing
How you get from a video clip to a still image (and back again) has a massive impact on the emotional tone. The right transition can set the mood and control the entire pace of your story, but the wrong one can feel clunky and out of place.
- Hard Cut: Need a jolt of energy? A simple, instant cut is your friend. It works brilliantly in fast-paced montages or when you need to snap the viewer's attention to an important detail.
- Fade: For a softer, more nostalgic feel, you can't beat a slow fade-in or fade-out. It’s perfect for introducing a memory, creating a reflective moment, or ending a scene on a thoughtful note.
- Dissolve: A cross-dissolve, where one clip gently melts into the next, gives you a smooth and graceful transition. It’s a fantastic all-rounder that feels less abrupt than a hard cut but quicker than a long fade.
Beyond the type of transition, timing is absolutely everything. Try syncing your images to the beat of your music. Making a photo appear right on a drumbeat or during a powerful melodic shift creates a rhythm that just feels right, making the whole video feel more cohesive and intentionally crafted.
Creating a Consistent Visual Style
One of the biggest giveaways of an amateur edit is a clashing visual style. If your video footage is all warm and saturated, but the photos you drop in are cool and muted, it’s going to be jarring for your audience. This is where a little bit of colour correction and grading makes a world of difference.
Your goal isn't to make every photo look identical to your video footage, but to ensure they exist in the same visual world. A few simple tweaks can make your entire project feel more unified and intentional.
Even basic editing apps on your phone have simple tools to adjust temperature, saturation, and contrast. Take a moment to tweak your photos so they better match the colour palette of the surrounding video clips. For instance, if your video has a golden-hour feel, slide the temperature of your photo slightly towards yellow and orange to make it blend in naturally. A slight adjustment to the warmth or a small boost in saturation can be all it takes to bridge that visual gap, making the jump between moving and still images feel completely natural.
Optimising Your Files for a Flawless Final Cut
The creative part of dropping pictures into a video is always fun, but it's the technical prep work that really makes the final cut look sharp and professional. Getting your files sorted before you even think about editing saves a world of pain later on—no blurry images, no ugly black bars, and no videos that look dreadful on social media.
Think of it as the groundwork. You wouldn't build a house on a shaky foundation, and the same principle applies here. Getting the files right from the start is the key to a quality finish.
Choosing the Right Image Format
You’ll quickly learn that not all image files are created equal. For most projects, you'll be dealing with JPEGs and PNGs, and knowing which one to grab for the job is a game-changer.
-
JPEG (or JPG): This is your workhorse for standard, full-screen photographs. JPEGs are fantastic at compressing detailed photos into manageable file sizes. They're perfect for background images or any full-frame shot where you don't need transparency. Practical example: Use a JPEG for a landscape photo that fills the entire screen behind an interview subject.
-
PNG: The superpower of a PNG file is its ability to handle transparency. If you need to overlay a logo, a lower-third graphic, or any image with a see-through background, a PNG is the only way to go. Try using a JPEG for a logo, and you’ll be stuck with a clunky white box around it. Trust me, it never looks good.
Making the right choice here is a simple trick that keeps your video looking clean and professional.
Matching Aspect Ratios to Avoid Those Dreaded Black Bars
Ever watched a video and been distracted by the black bars on the sides or at the top and bottom? That’s almost always caused by a mismatch in the aspect ratio—the relationship between an image's width and its height.
To create a seamless, immersive viewing experience, your images need to match the aspect ratio of your video project. For most online video today, that means sticking to a 16:9 widescreen format.
If your video is heading to YouTube or a standard TV screen, a 16:9 ratio (think 1920x1080 pixels) is the industry standard. For something like Instagram Stories or TikTok, you’d simply flip this to a vertical 9:16. Taking a moment to crop your images to the correct aspect ratio beforehand ensures they fill the screen perfectly, without any weird gaps.
Demystifying Export Settings
You’ve done all the hard work, and now it's time to export the final video. The settings you pick here are crucial—they determine the final quality and file size of your masterpiece. The menus can look intimidating, but you only need to focus on a few key things to get brilliant results.
The H.264 (or AVC) codec is the universal standard for web video. It hits that sweet spot between high quality and a file size that won't take forever to upload. You’ll also see an option for bitrate, which controls how much data is packed into your video. A higher number means better quality but a bigger file.
To make things easier, here's a quick reference guide I use for getting export settings just right for major platforms.
Recommended Export Settings for Popular Platforms
This table should help you get crisp, high-quality playback no matter where you're sharing your video.
| Platform | Resolution | Codec | Recommended Bitrate (Mbps) |
|---|---|---|---|
| YouTube | 1080p (Full HD) | H.264 | 8-12 Mbps |
| Instagram Feed | 1080p | H.264 | 3-6 Mbps |
| TikTok/Reels | 1080p (Vertical) | H.264 | 5-10 Mbps |
| Vimeo | 1080p (Full HD) | H.264 | 10-20 Mbps |
Sticking to these guidelines ensures your video, complete with its perfectly placed pictures, looks just as good online as it did in your editor.
Hitting a Snag? How to Troubleshoot Common Editing Problems
Even the most experienced editors run into trouble. When you’re deep in the creative zone, a technical glitch can completely derail your flow. Let's walk through some of the usual suspects you might encounter when adding pictures to video and, more importantly, how to fix them.
Why Does My Photo Look Blurry?
One of the most common headaches is dropping a photo onto your timeline only to find it looks blurry or pixelated. Nine times out of ten, this is a resolution issue.
Think of it this way: if your video is a crisp 1080p (that’s 1920x1080 pixels), but the photo you’ve imported is a tiny 600x400 pixels, your editing software has to stretch that small image to fill the big screen. The result? A blocky, low-quality mess. The golden rule is to always start with the highest-resolution photo you can get your hands on. You can always scale down, but you can’t create detail that isn’t there.
Fixing Mismatched Shapes and Sizes
So, what about that vertical photo you’re trying to squeeze into a horizontal 16:9 video? Forcing it just leads to weird stretching or those ugly black bars on the sides. Nobody wants that.
Here’s a pro trick I use all the time:
- Place your vertical photo on the timeline.
- Duplicate that same photo and place it on a track underneath the original.
- Scale up the bottom layer until it fills the entire screen.
- Apply a blur effect to this background layer.
This technique fills the empty space beautifully, creating a soft, complementary background that keeps the focus right where it should be—on your main image.
Colour and Brightness Go Awry
Sometimes a photo just doesn't feel right next to your video clips. It might look too dark, overly bright, or the colours might clash. This is an easy fix with a quick dip into your editor's colour correction tools.
Don't be afraid to gently tweak the exposure, contrast, or saturation. A tiny adjustment is often all it takes to make a photo look like it truly belongs in the scene, rather than feeling like it was just dropped in.
Smoothing Out Jerky Animations
Ever applied a "Ken Burns" zoom effect and had it look jerky or robotic? This usually happens when the movement starts and stops too abruptly. The secret is in the keyframes.
Instead of a linear motion, look for an "ease in" or "ease out" option in your animation controls. This simple change adds a subtle acceleration and deceleration to the movement, making it look far more natural and professional. It’s a small detail that makes a huge difference in guiding the viewer’s eye smoothly across the frame.
Got More Questions?
Stuck on a few details about adding pictures to your videos? Let's clear up some of the most common questions that pop up. Here are a few quick answers to get you over the finish line with your project.
How Many Photos Can You Realistically Use in a Video?
There isn't a hard and fast rule here; it all comes down to purpose. Every single photo you add should have a clear reason for being there, whether it's to drive home a point, set a certain mood, or show a product from a different angle.
A good guideline is to think about your audience's attention span. For a snappy, one-minute video for social media, sticking to 3-5 really impactful images is usually plenty. If you're working on a longer-form documentary, you might use dozens to build a compelling story. The moment it starts feeling less like a video and more like a random slideshow, you know you've gone too far.
Can I Just Drop a Picture into a Finished Video?
You certainly can. Pretty much every video editor out there, from mobile apps like CapCut to professional desktop software, is built on a layering system.
You just import the video you've already made and place it on your main timeline. Then, you can pop your picture onto a new track right on top of it. This lets you place the image exactly where you need it without having to touch the original video clip at all.
A perfect real-world example is adding a company logo. If you've got a finished marketing video, you can just place your logo file (usually a PNG with a transparent background) on a new track and stretch it out so it's visible for the entire duration. It’s a simple, non-destructive fix that takes seconds.
What’s the Best Trick for Making Text Over an Image Easy to Read?
Readability is everything. The last thing you want is for your message to get lost because the text is blending into the background.
A super effective technique is to place a semi-transparent dark overlay between your image and your text layer. This is sometimes called a "scrim," and it just slightly dims the background photo, making any light-coloured text stand out beautifully. For example, in CapCut, you can add a black 'stock video' from the library, place it over your photo, lower its opacity to around 30-40%, and then add your text on top. Another solid option is to add a subtle drop shadow or a thin, solid outline directly to the text itself. Both methods work wonders.
Ready to turn your pictures into something special without all the hassle? Give Seedance a go today and see how quickly you can transform your static images into captivating video stories. Find out what's possible at https://www.seedance.tv.
Ready to try it yourself?
Put the steps from this guide into practice with Seedance and turn prompts or images into polished videos in minutes.
Free credits on signup. Plans from $20/month.
Related Articles
More posts in the same locale you may want to read next.
Seedance App Preview Video Generator 2026: Create App Store and Product Launch Clips
Use Seedance to turn app screenshots, feature copy, and launch goals into App Store previews, Google Play promo videos, and product launch clips.
Read article
Video Text Creator: The Future of AI Filmmaking in 2026
Discover how a video text creator transforms your ideas into stunning 1080p video. Learn the process, use cases, and tools like Seedance to start creating.
Read article
Small Business Advertising Ideas: 10 Budget-Friendly
Discover 10 actionable small business advertising ideas for 2026. Get practical, budget-friendly tips to create effective video ads & content for growth.
Read article